Intro to Fab: Week 1

Excited to go into a new class for the second half of the semester! Ben started off Intro to Fabrication with a really wonderful story about a flashlight he made for his grandmother when he was a child. Our first assignment was to build a flashlight of our own. The definitions have been generously outlined as something 1) portable, that 2) creates light.

Inspiration

I like the idea of things that are dual use, to save on resources, space and money. Maybe not the best example, but I’ve always been drawn to the glowing umbrellas in Blade Runner. A light and an umbrella in one! (Not sure how often that is needed, though…)

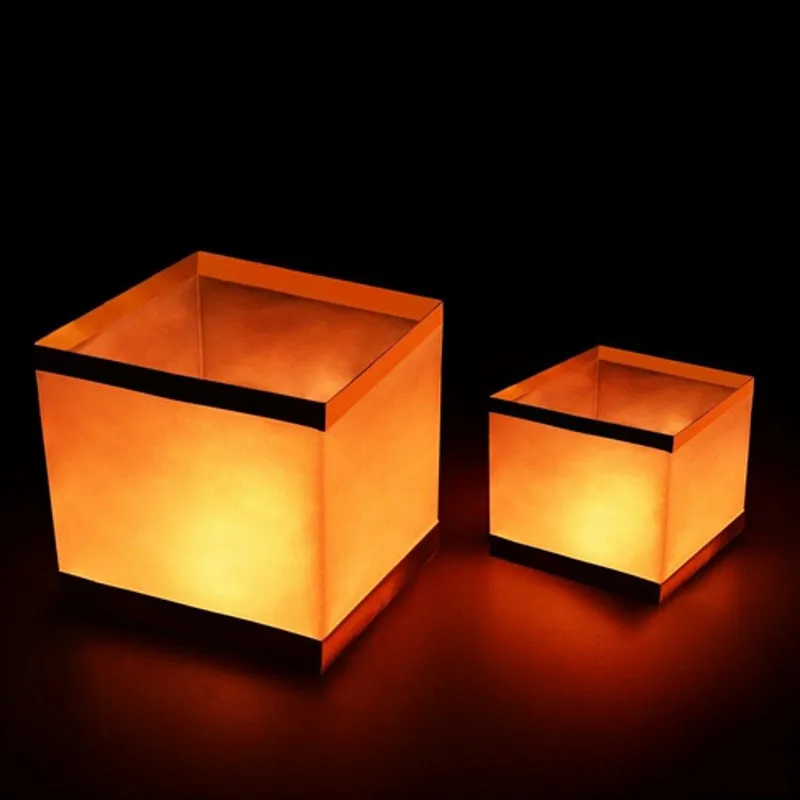
As for this assignment, I thought it would be nice to create a flashlight that wouldn’t only sit in a drawer for most of it’s life. A more practical approach would be something like a lantern. It can be portable light when you need it, but can also sit stationary as a lamp.

A simple paper lantern

Drawings

Maybe there could be a specially shaped lamp that could have the functionality of a flashlight when desired. A lamp type use case when needed, and directed light when desired.

img_20161031_093955

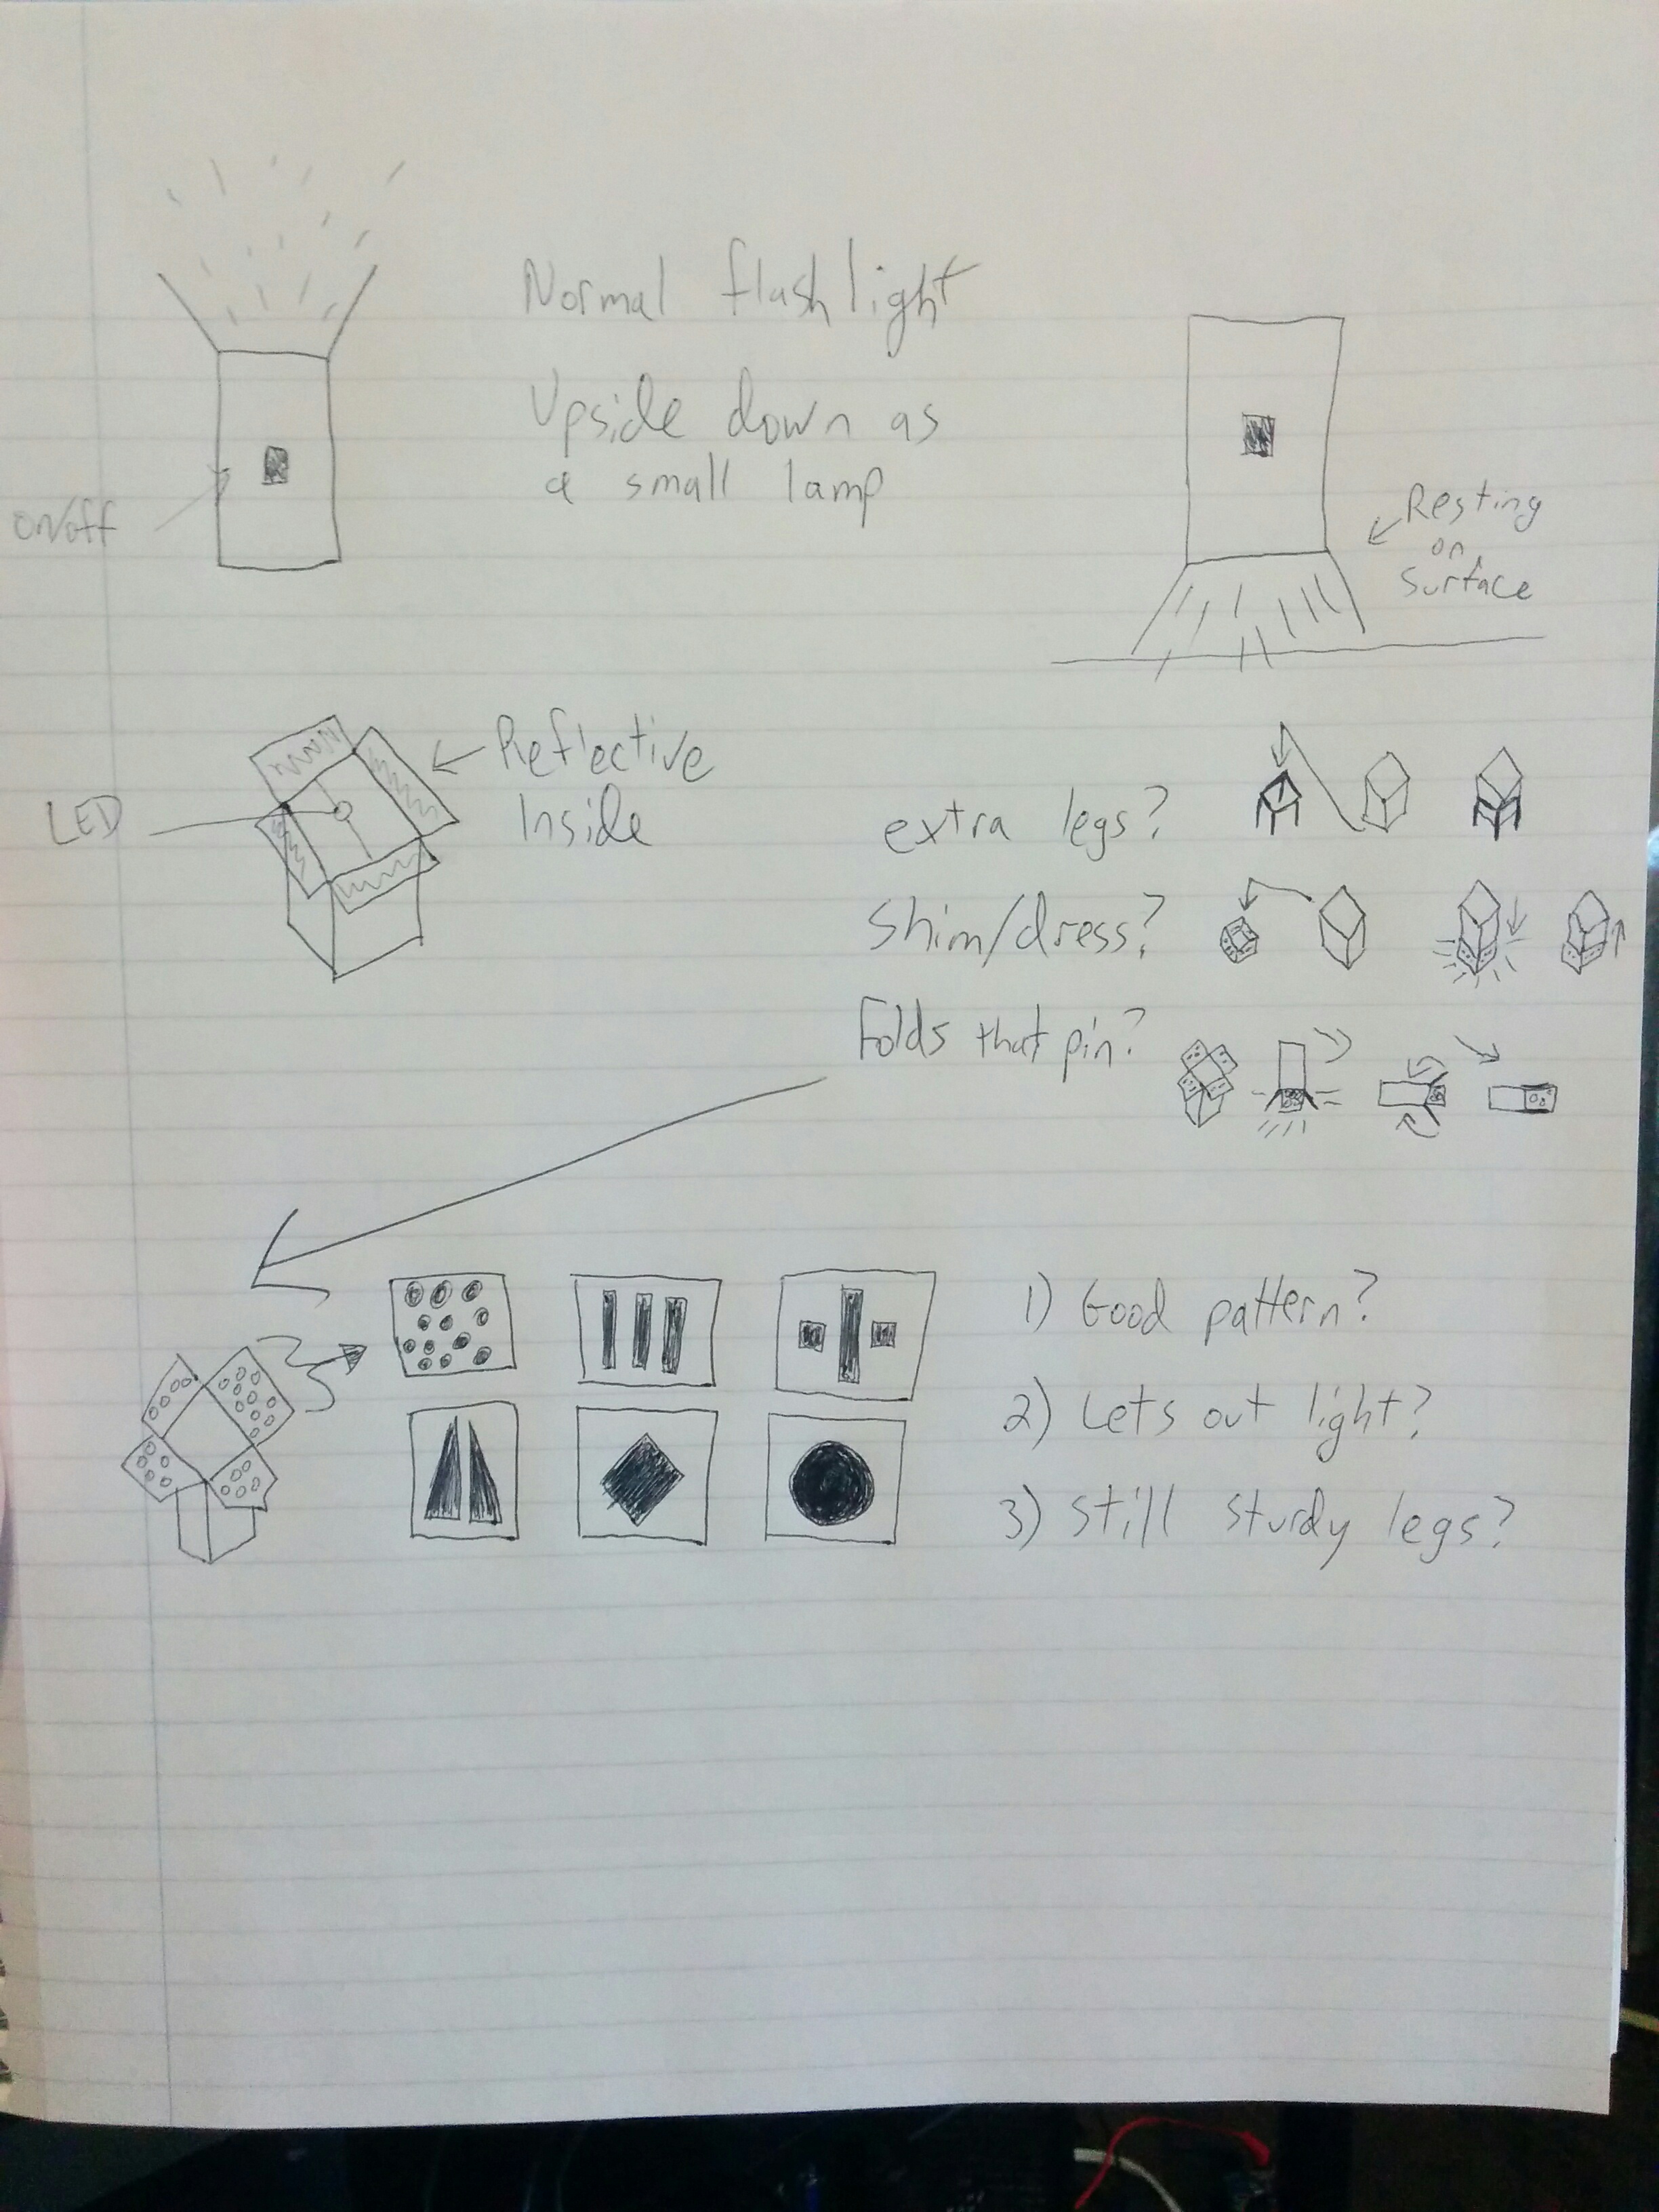
What I came up with was essentially a “standing” flashlight. Hold it like a normal flashlight in one use case, but when you place it light-down there are affordances to let certain amounts of light through.

Raw Material

I enjoy having clever ideas, but I am skeptical of “clever” ideas. What if there is a good reason I haven’t seen this kind of design somewhere? I thought the best initial incarnation of this concept would be cardboard. Test out if the general form is even a good idea to begin with.

img_20161029_143156

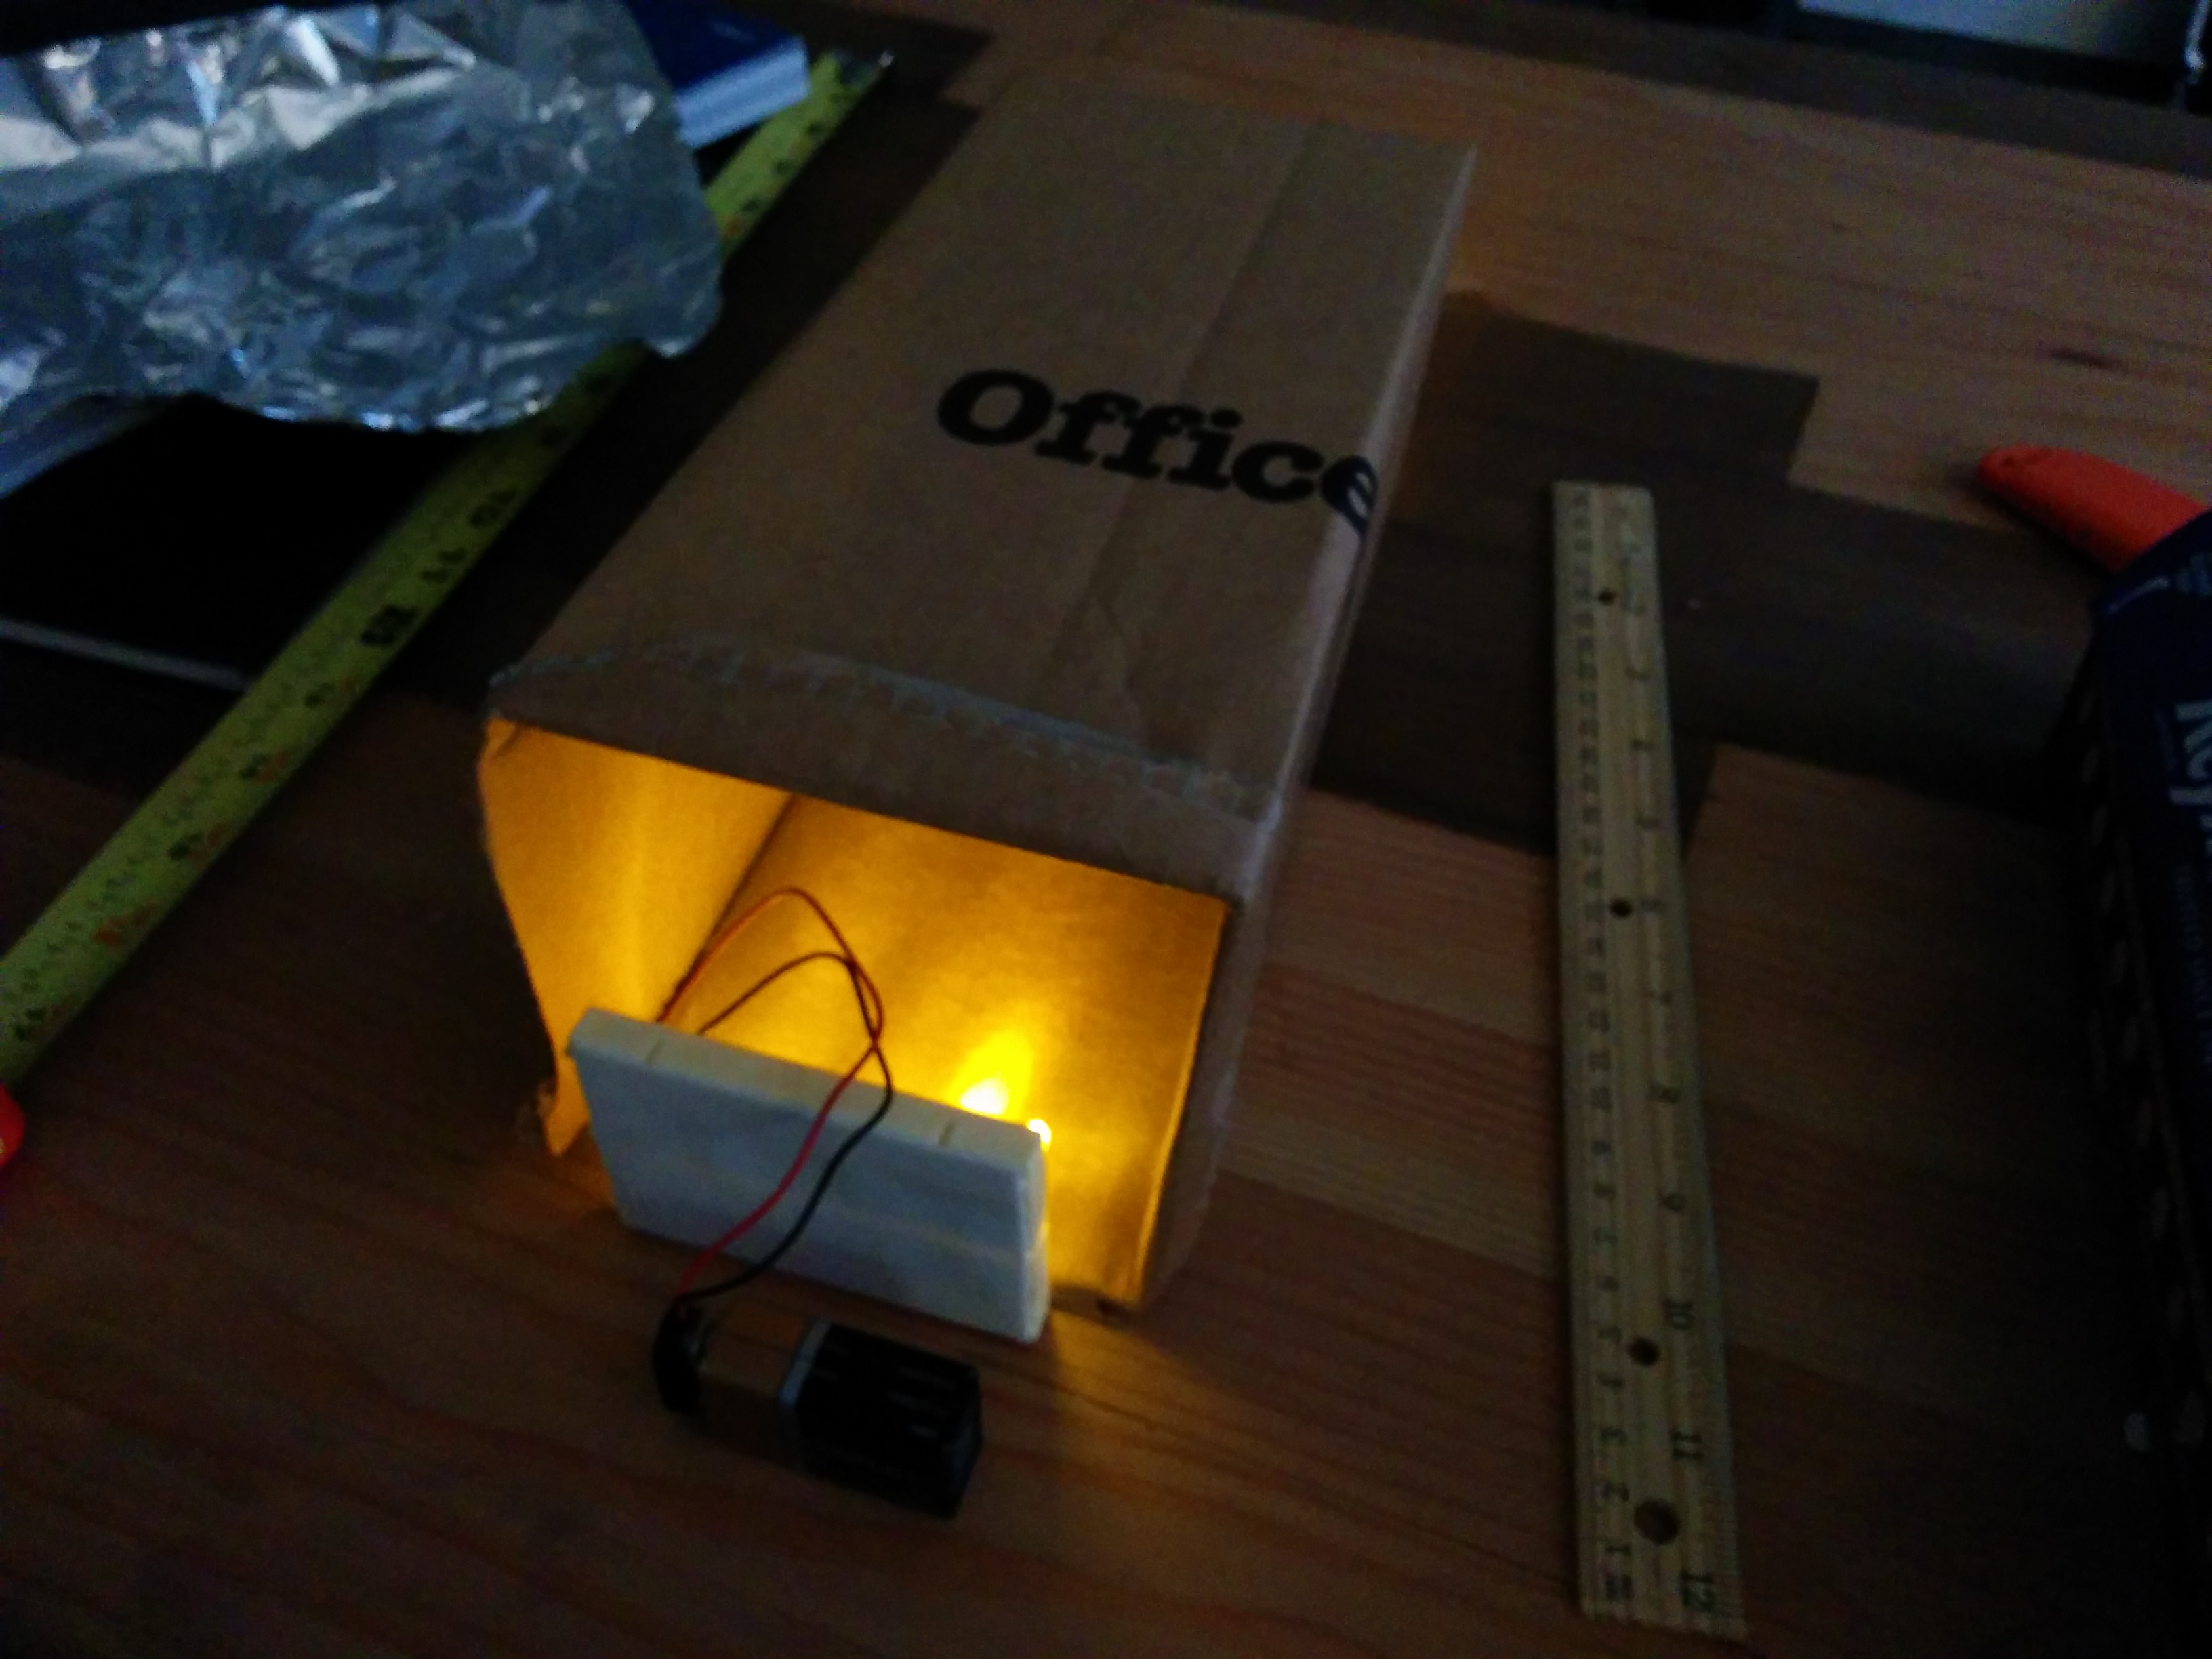
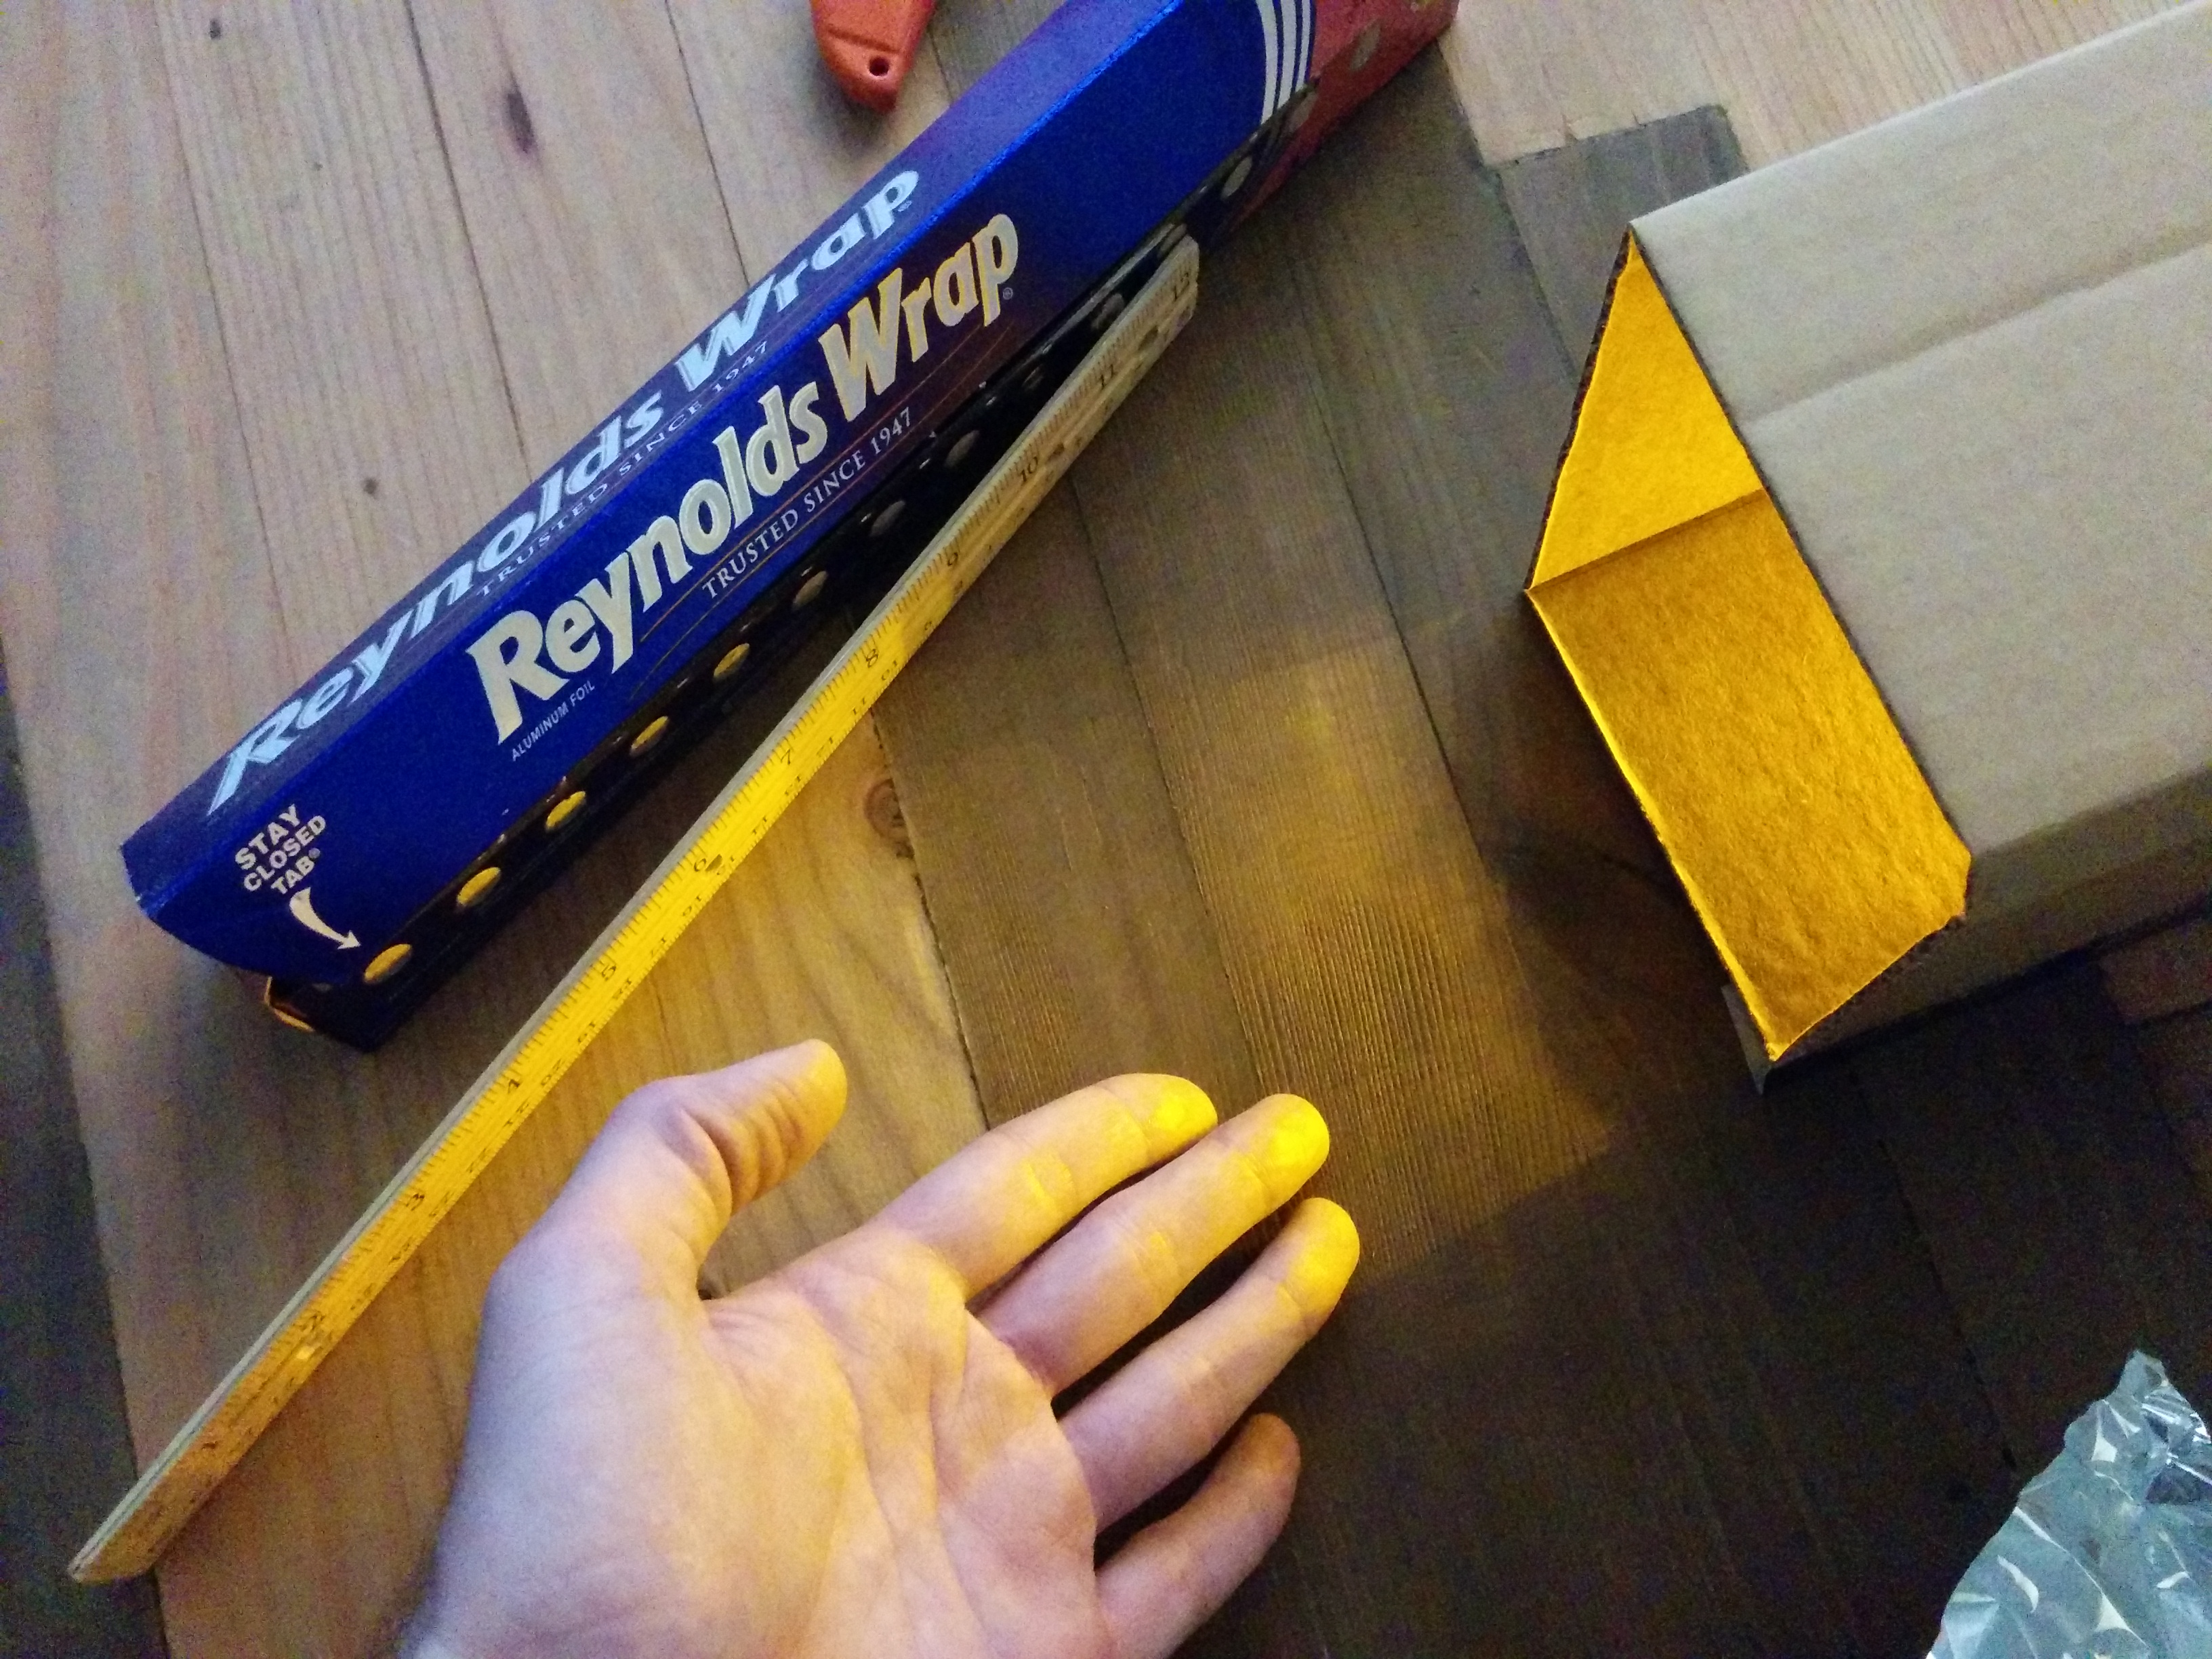
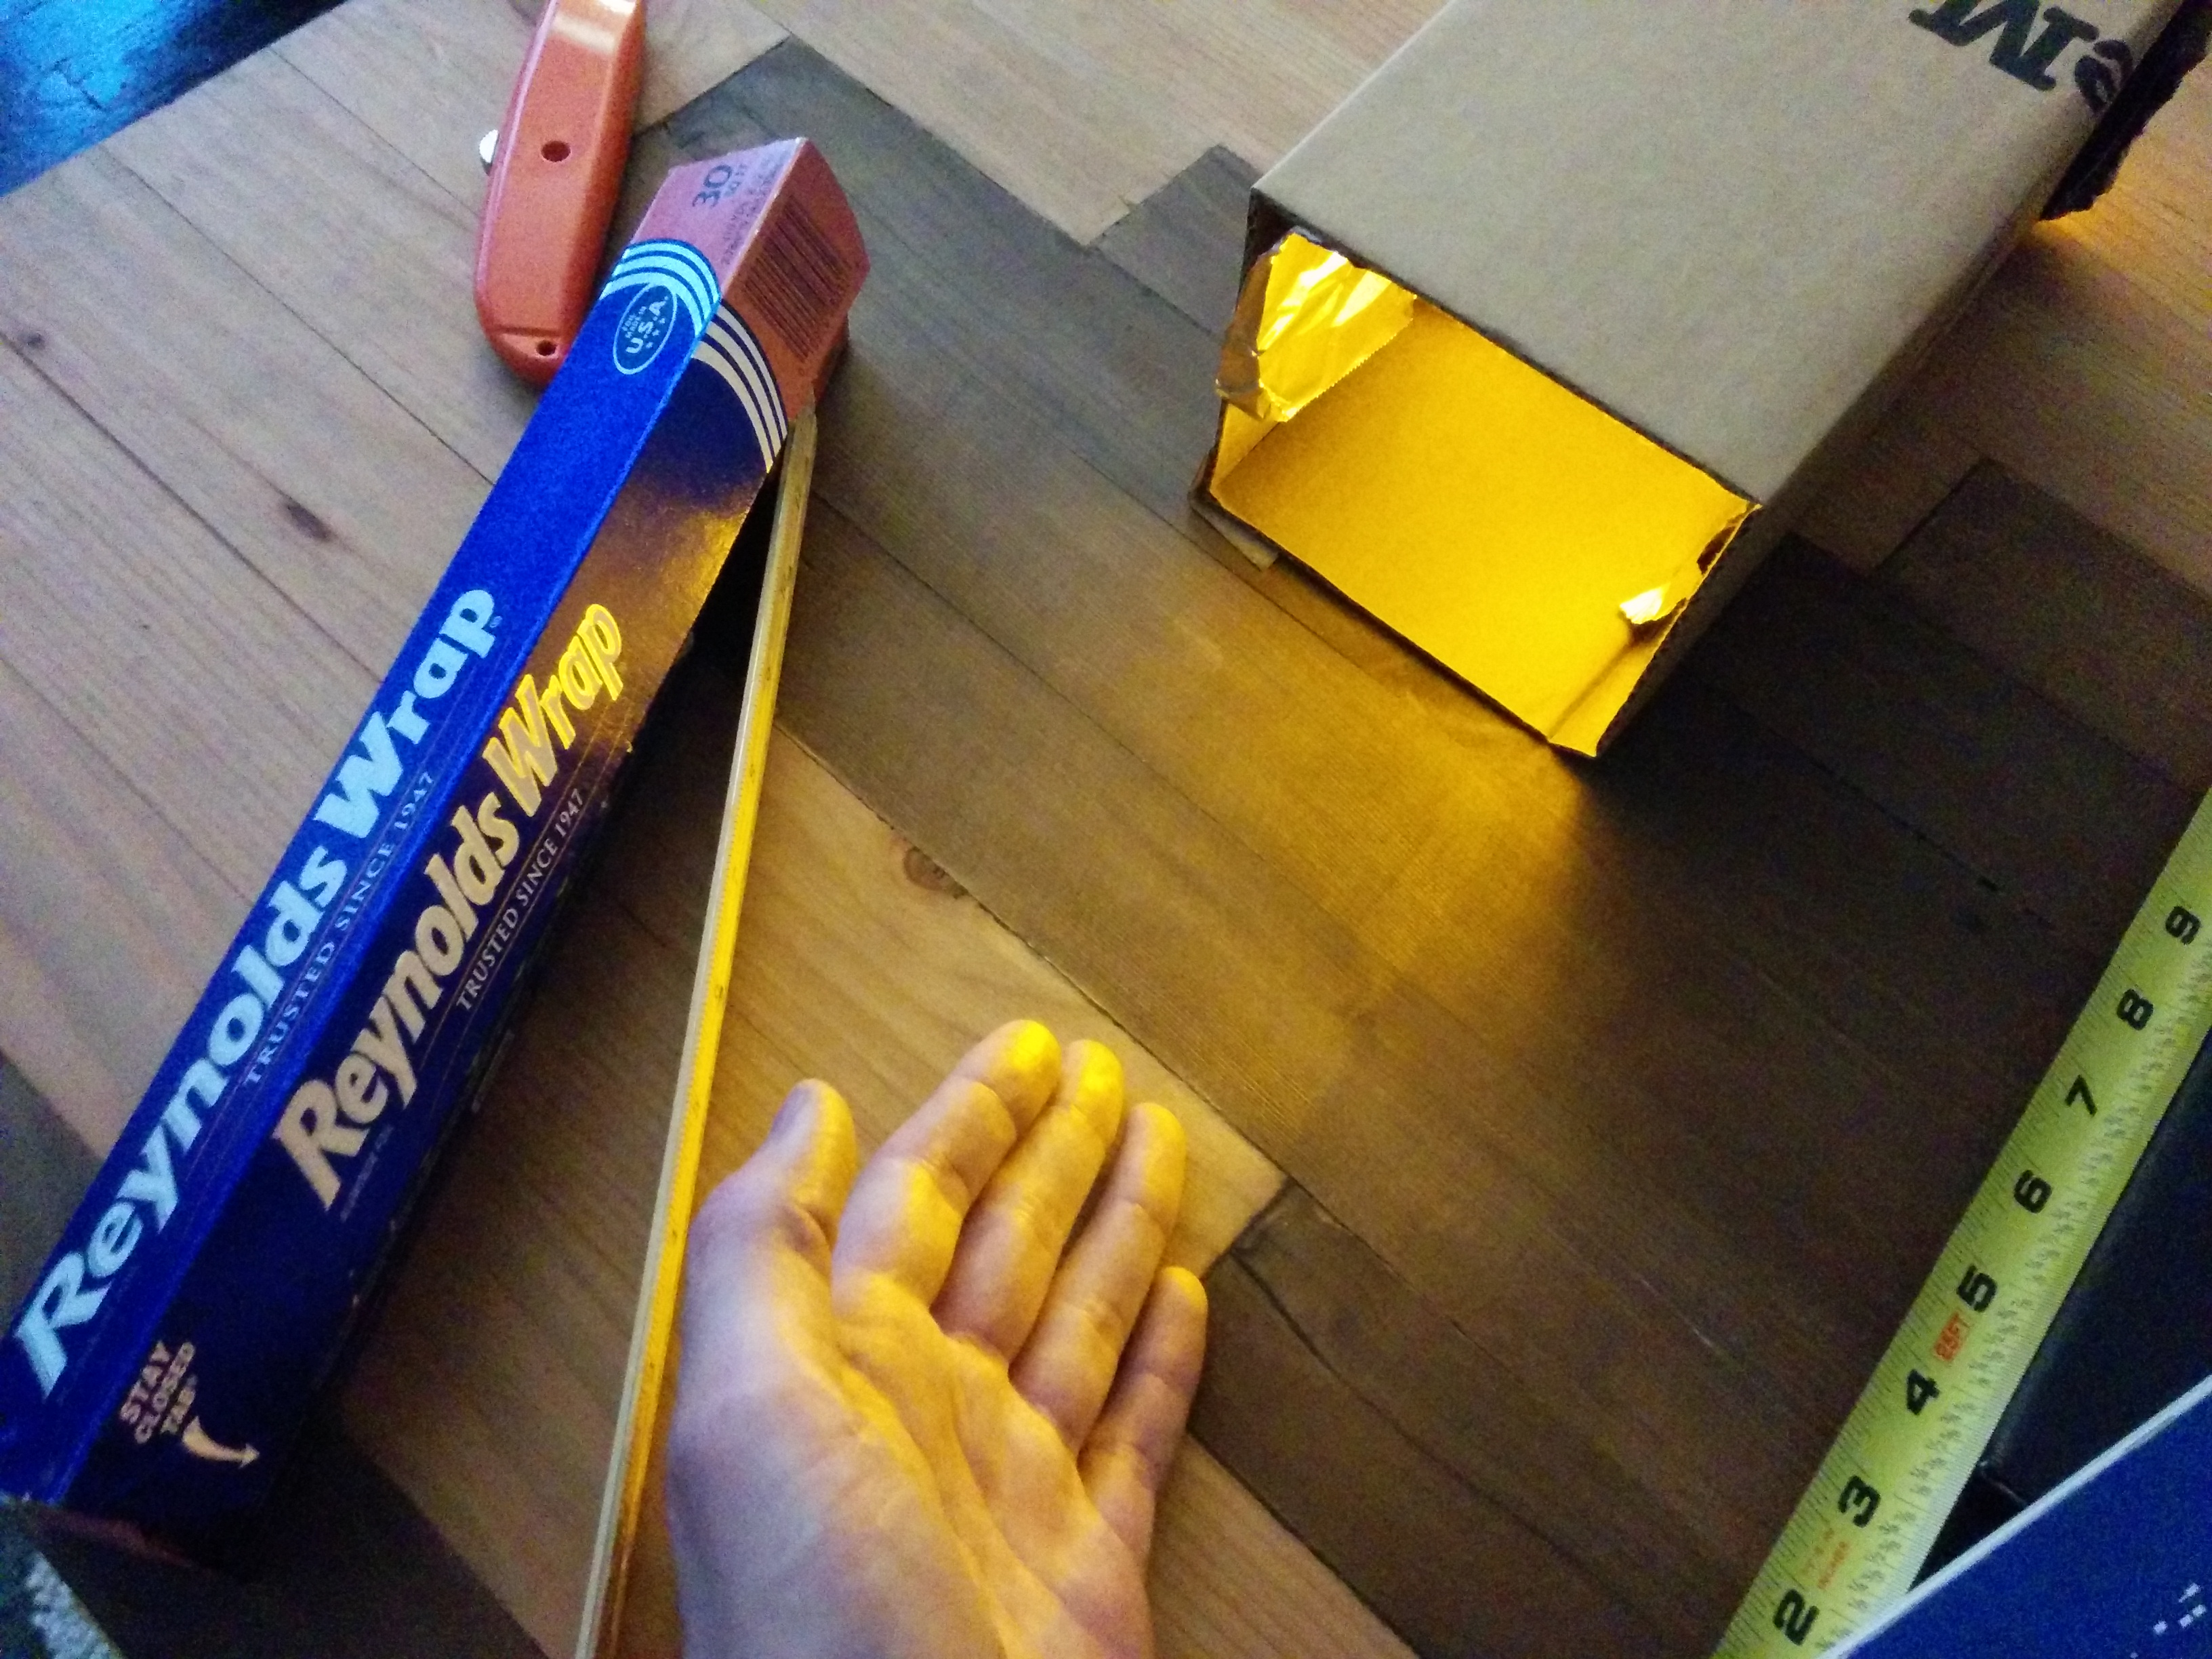
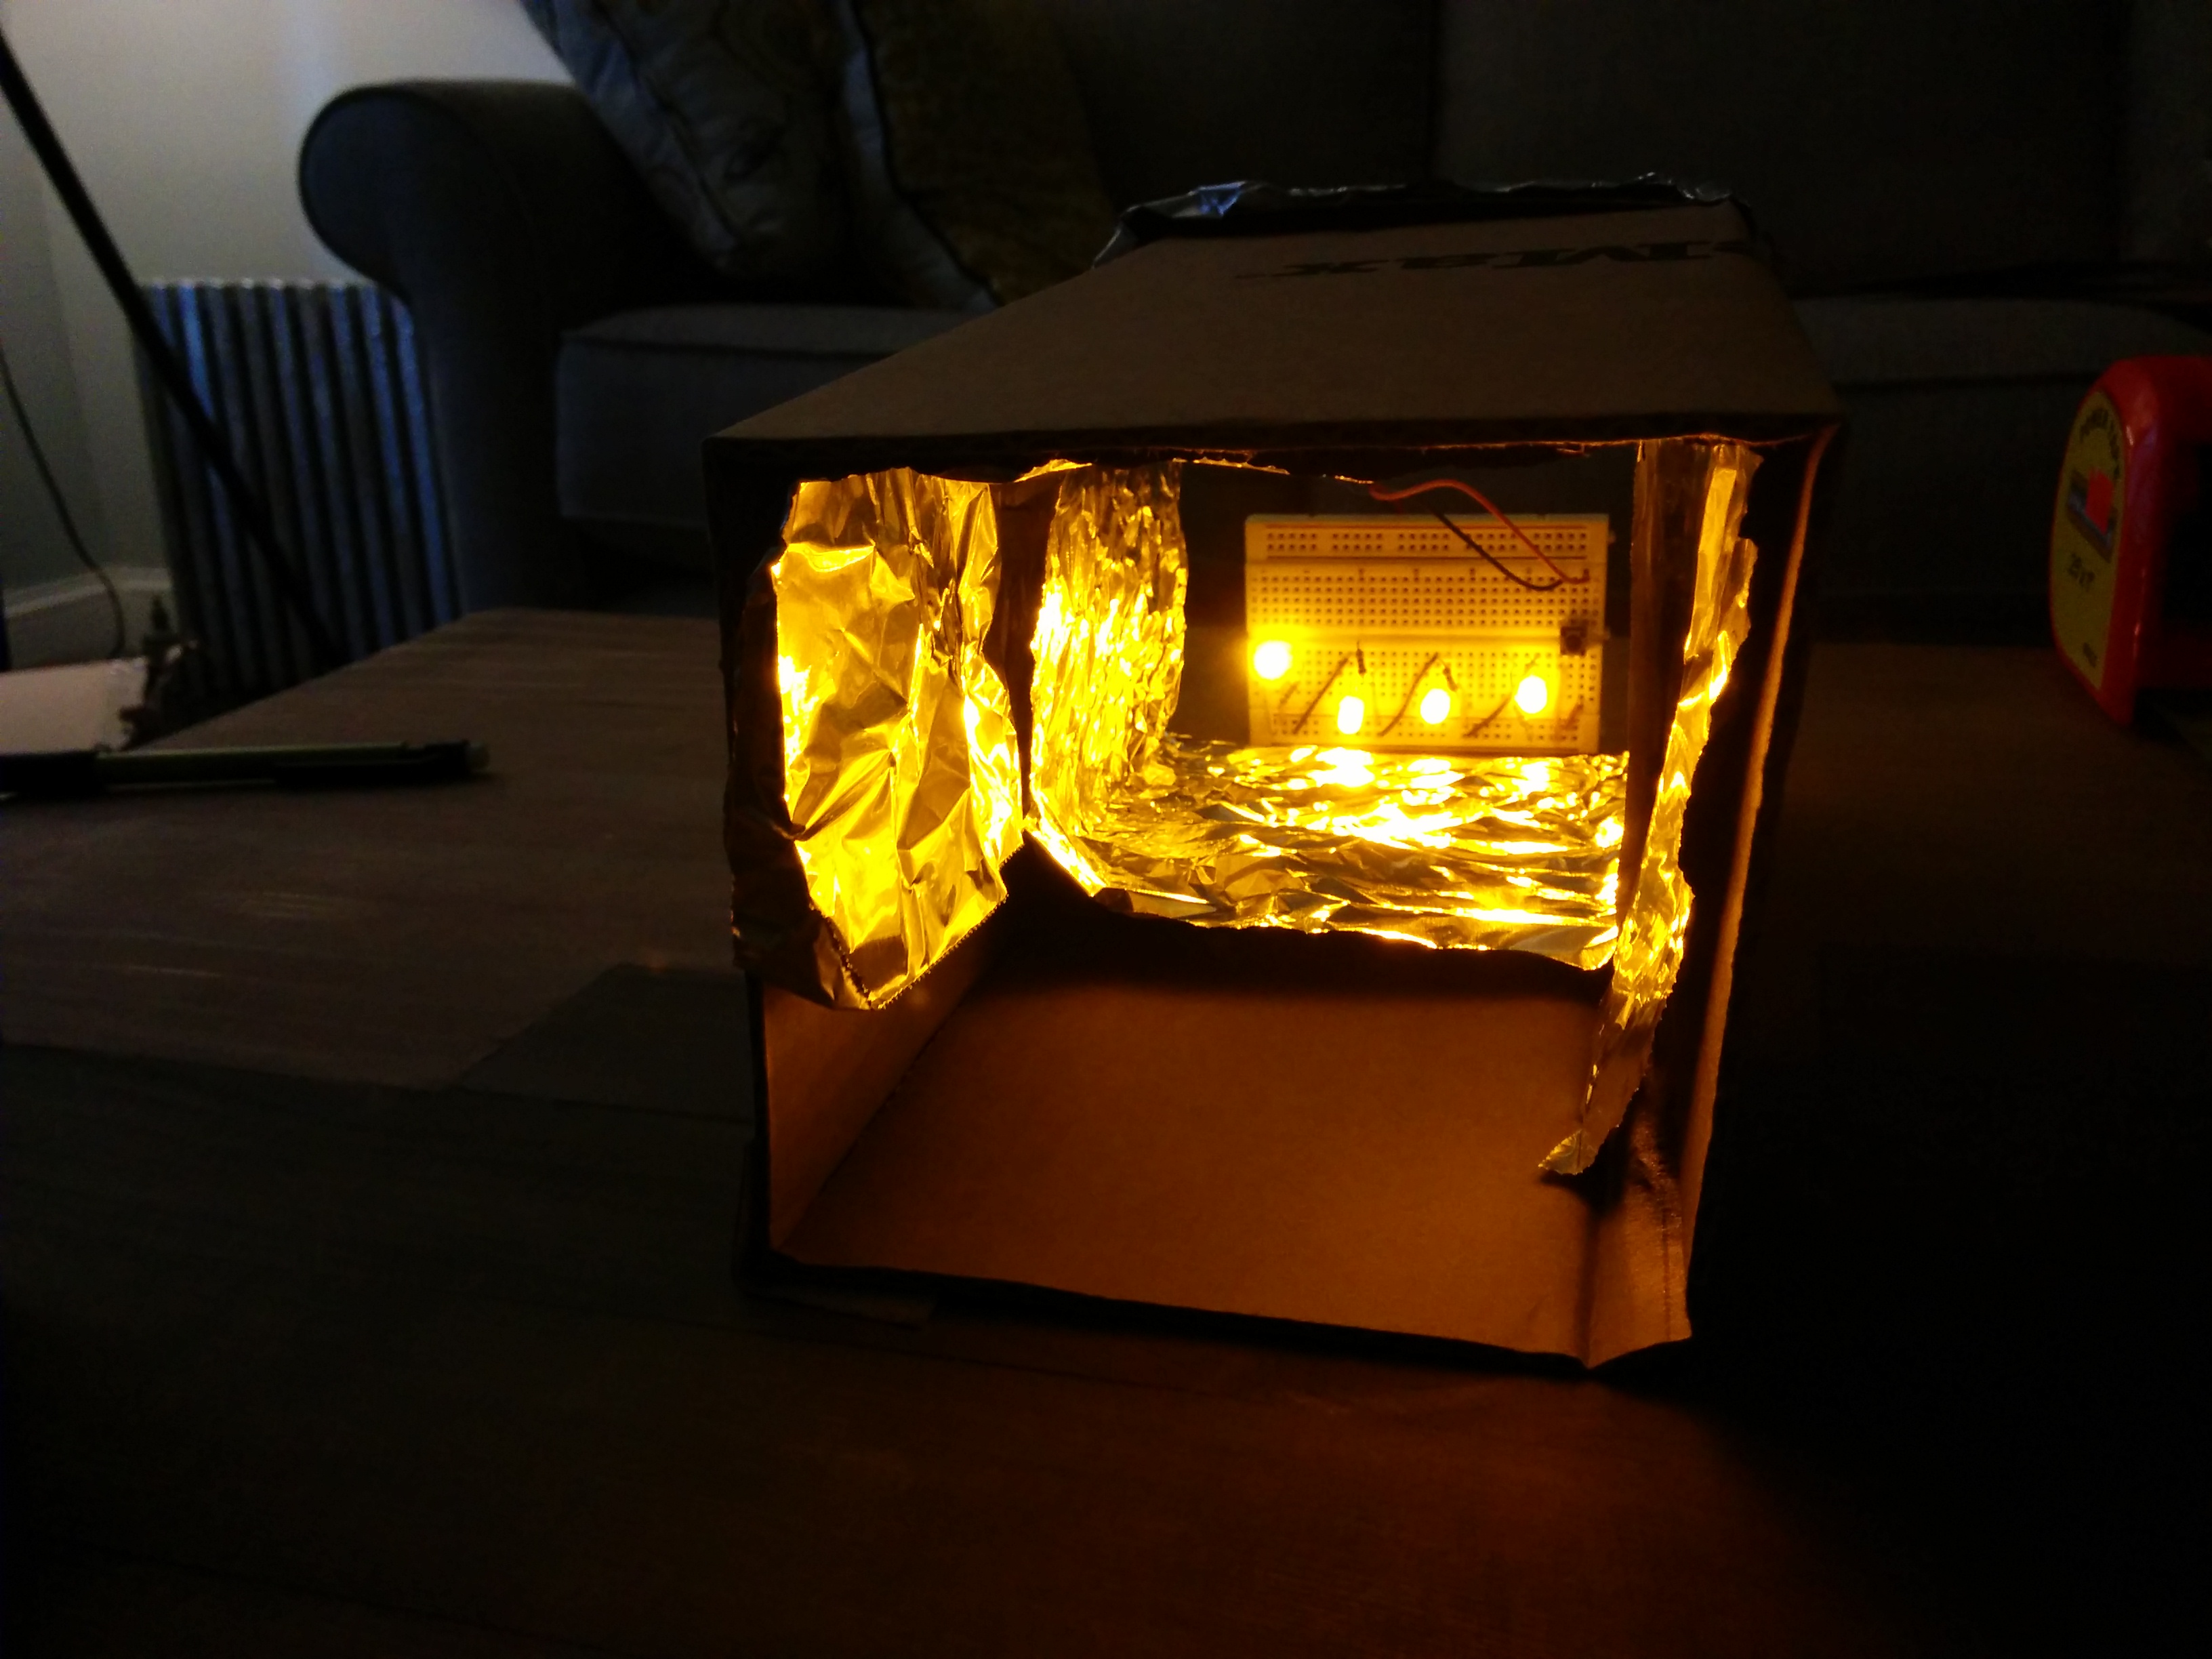
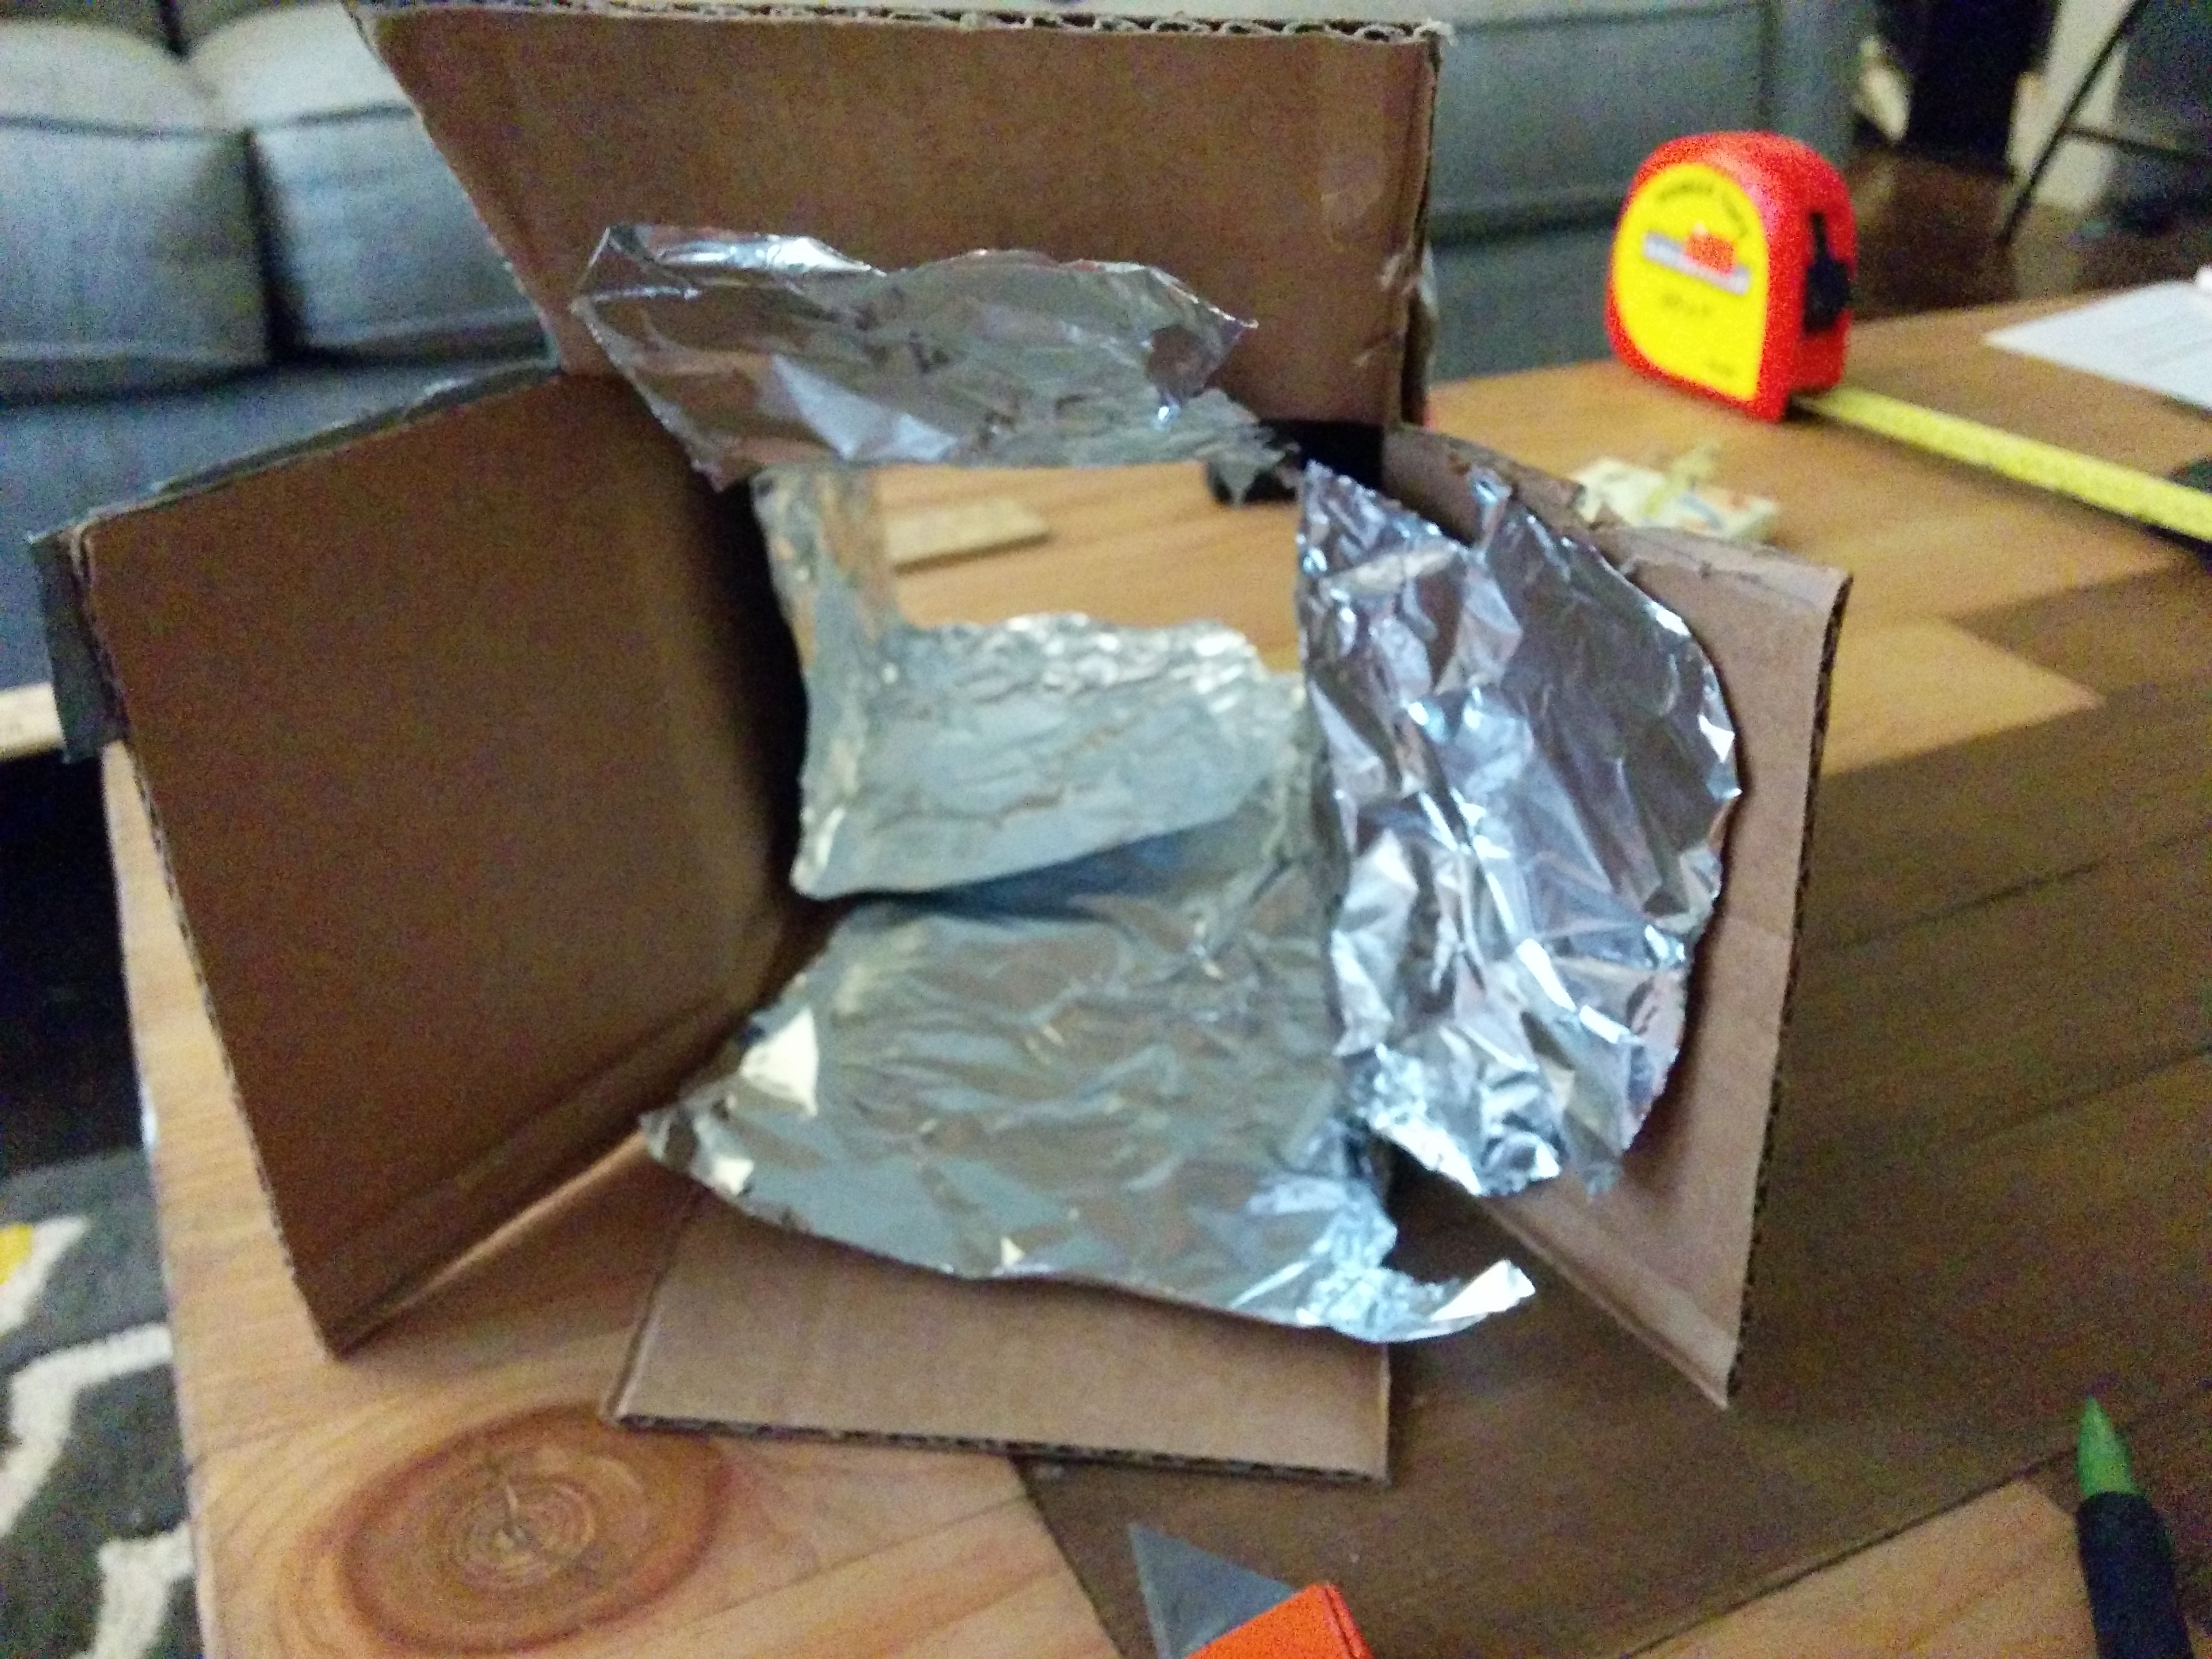
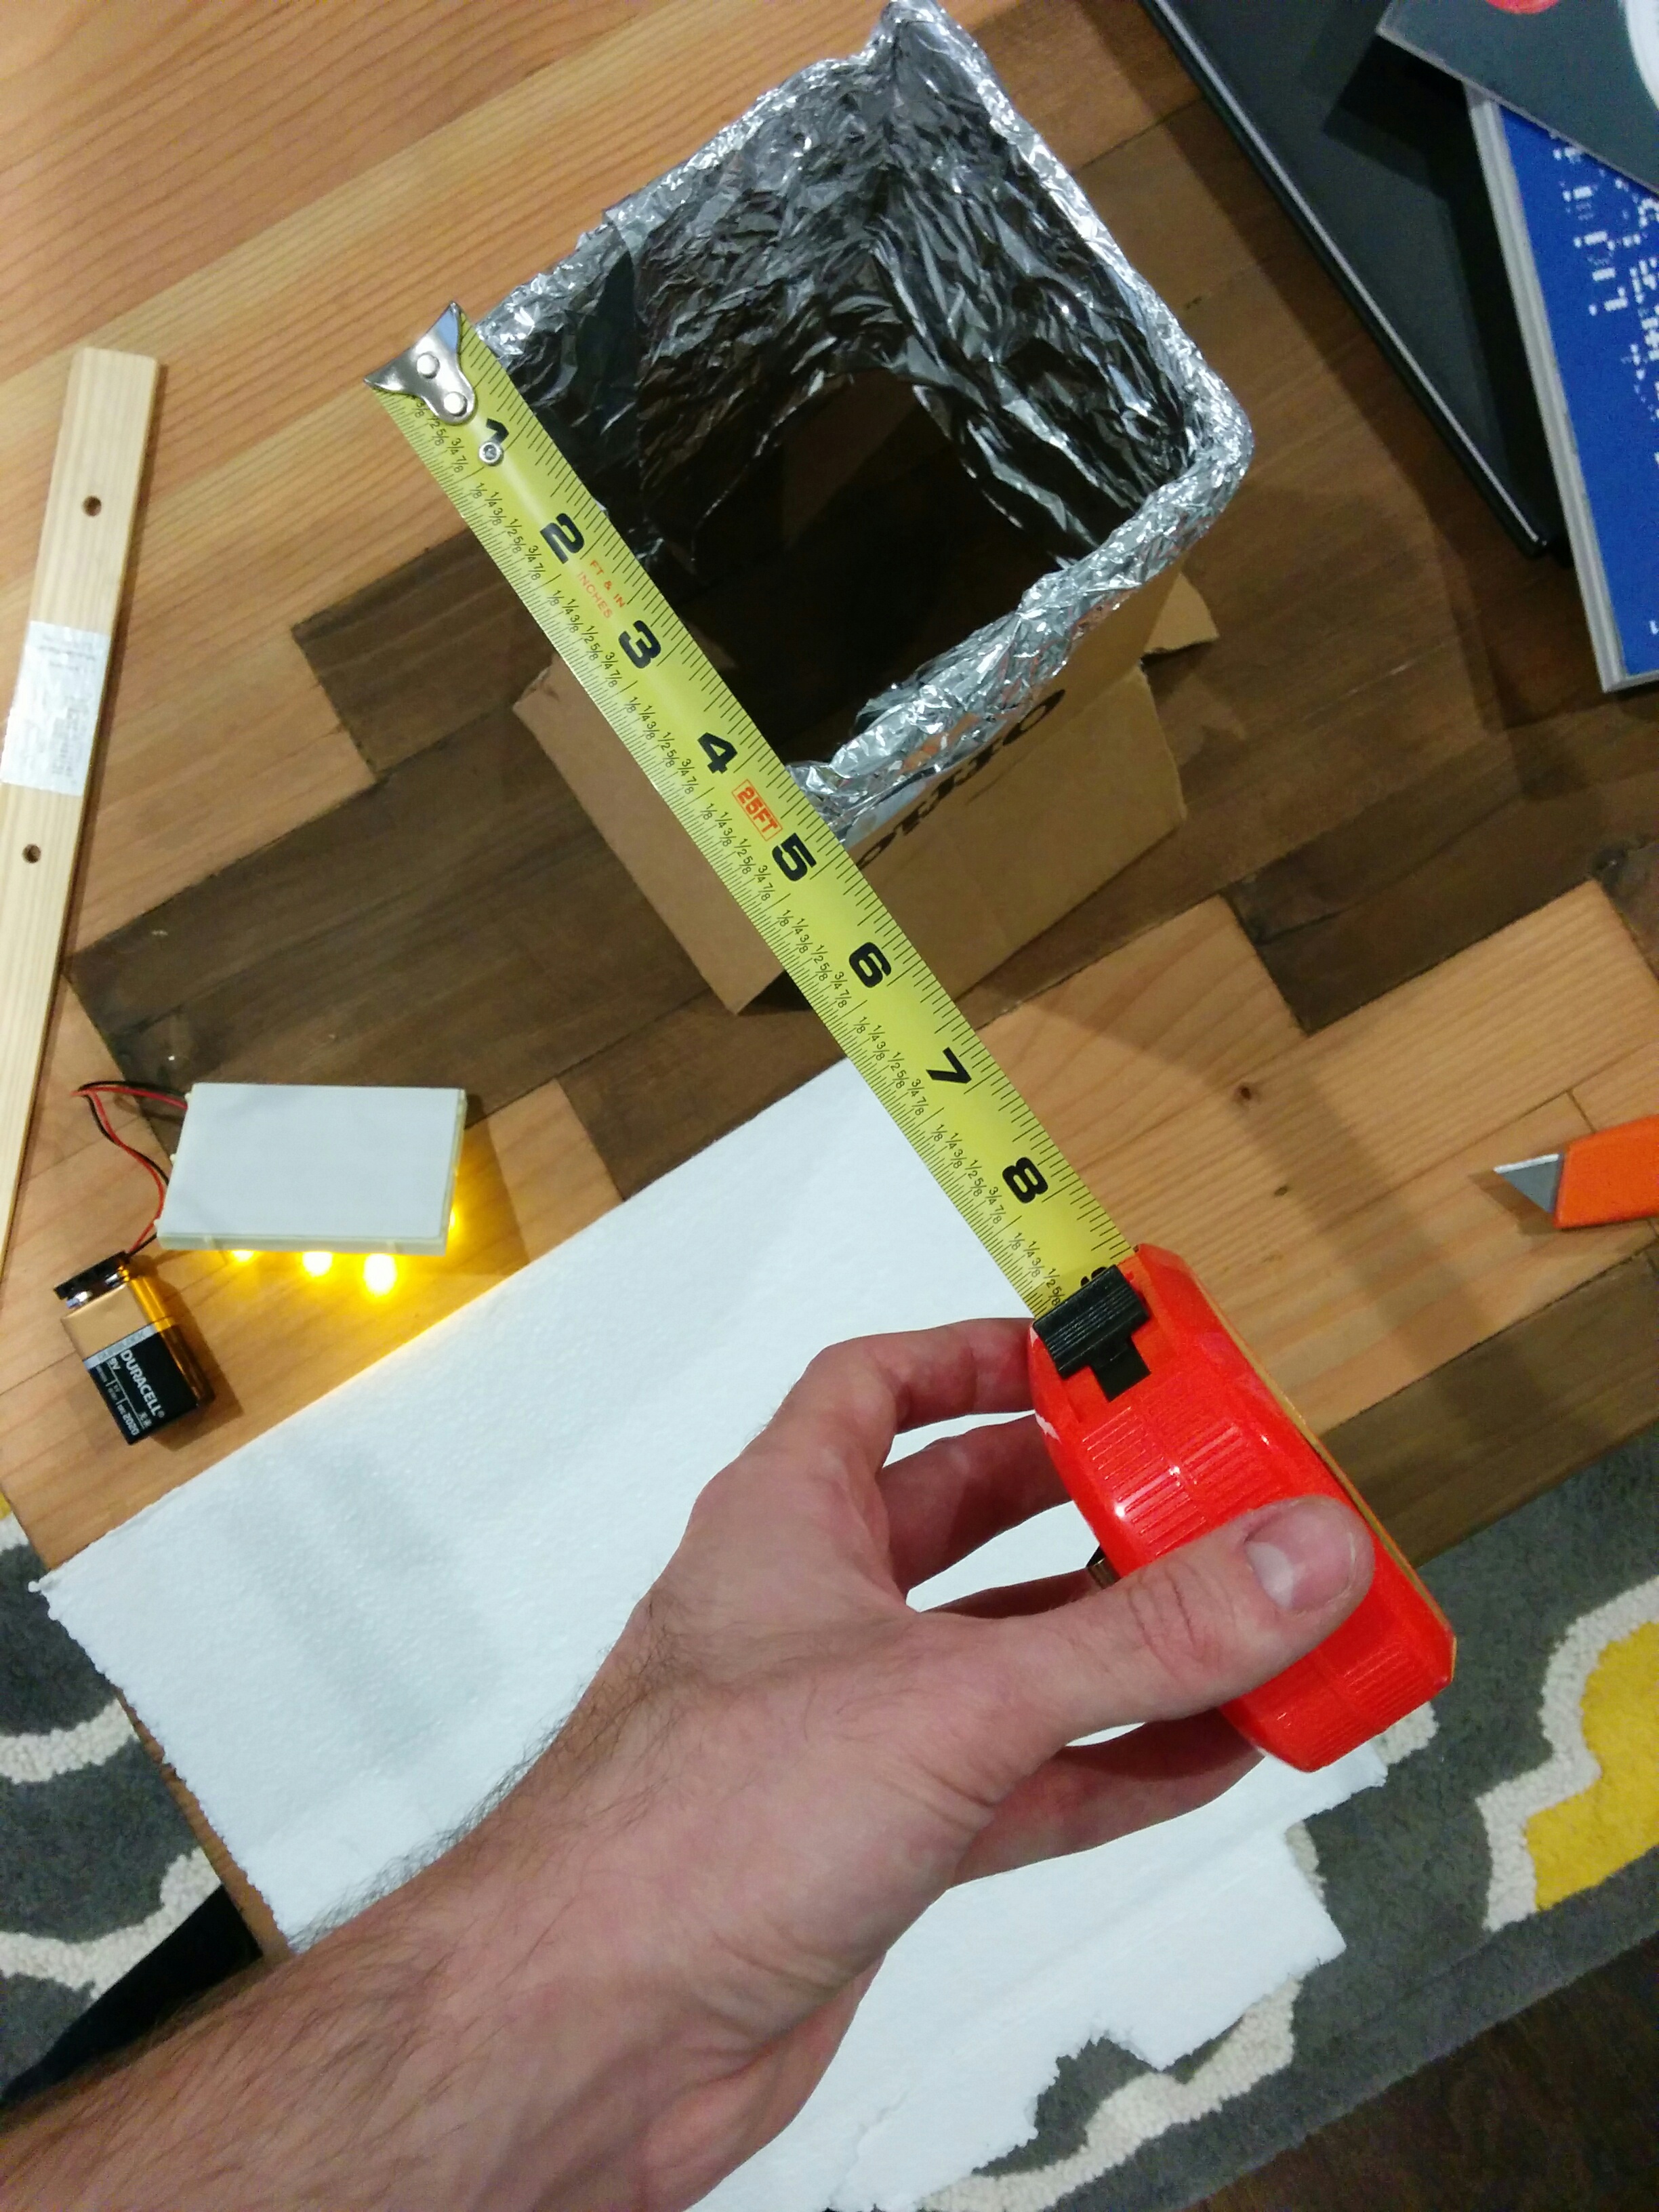
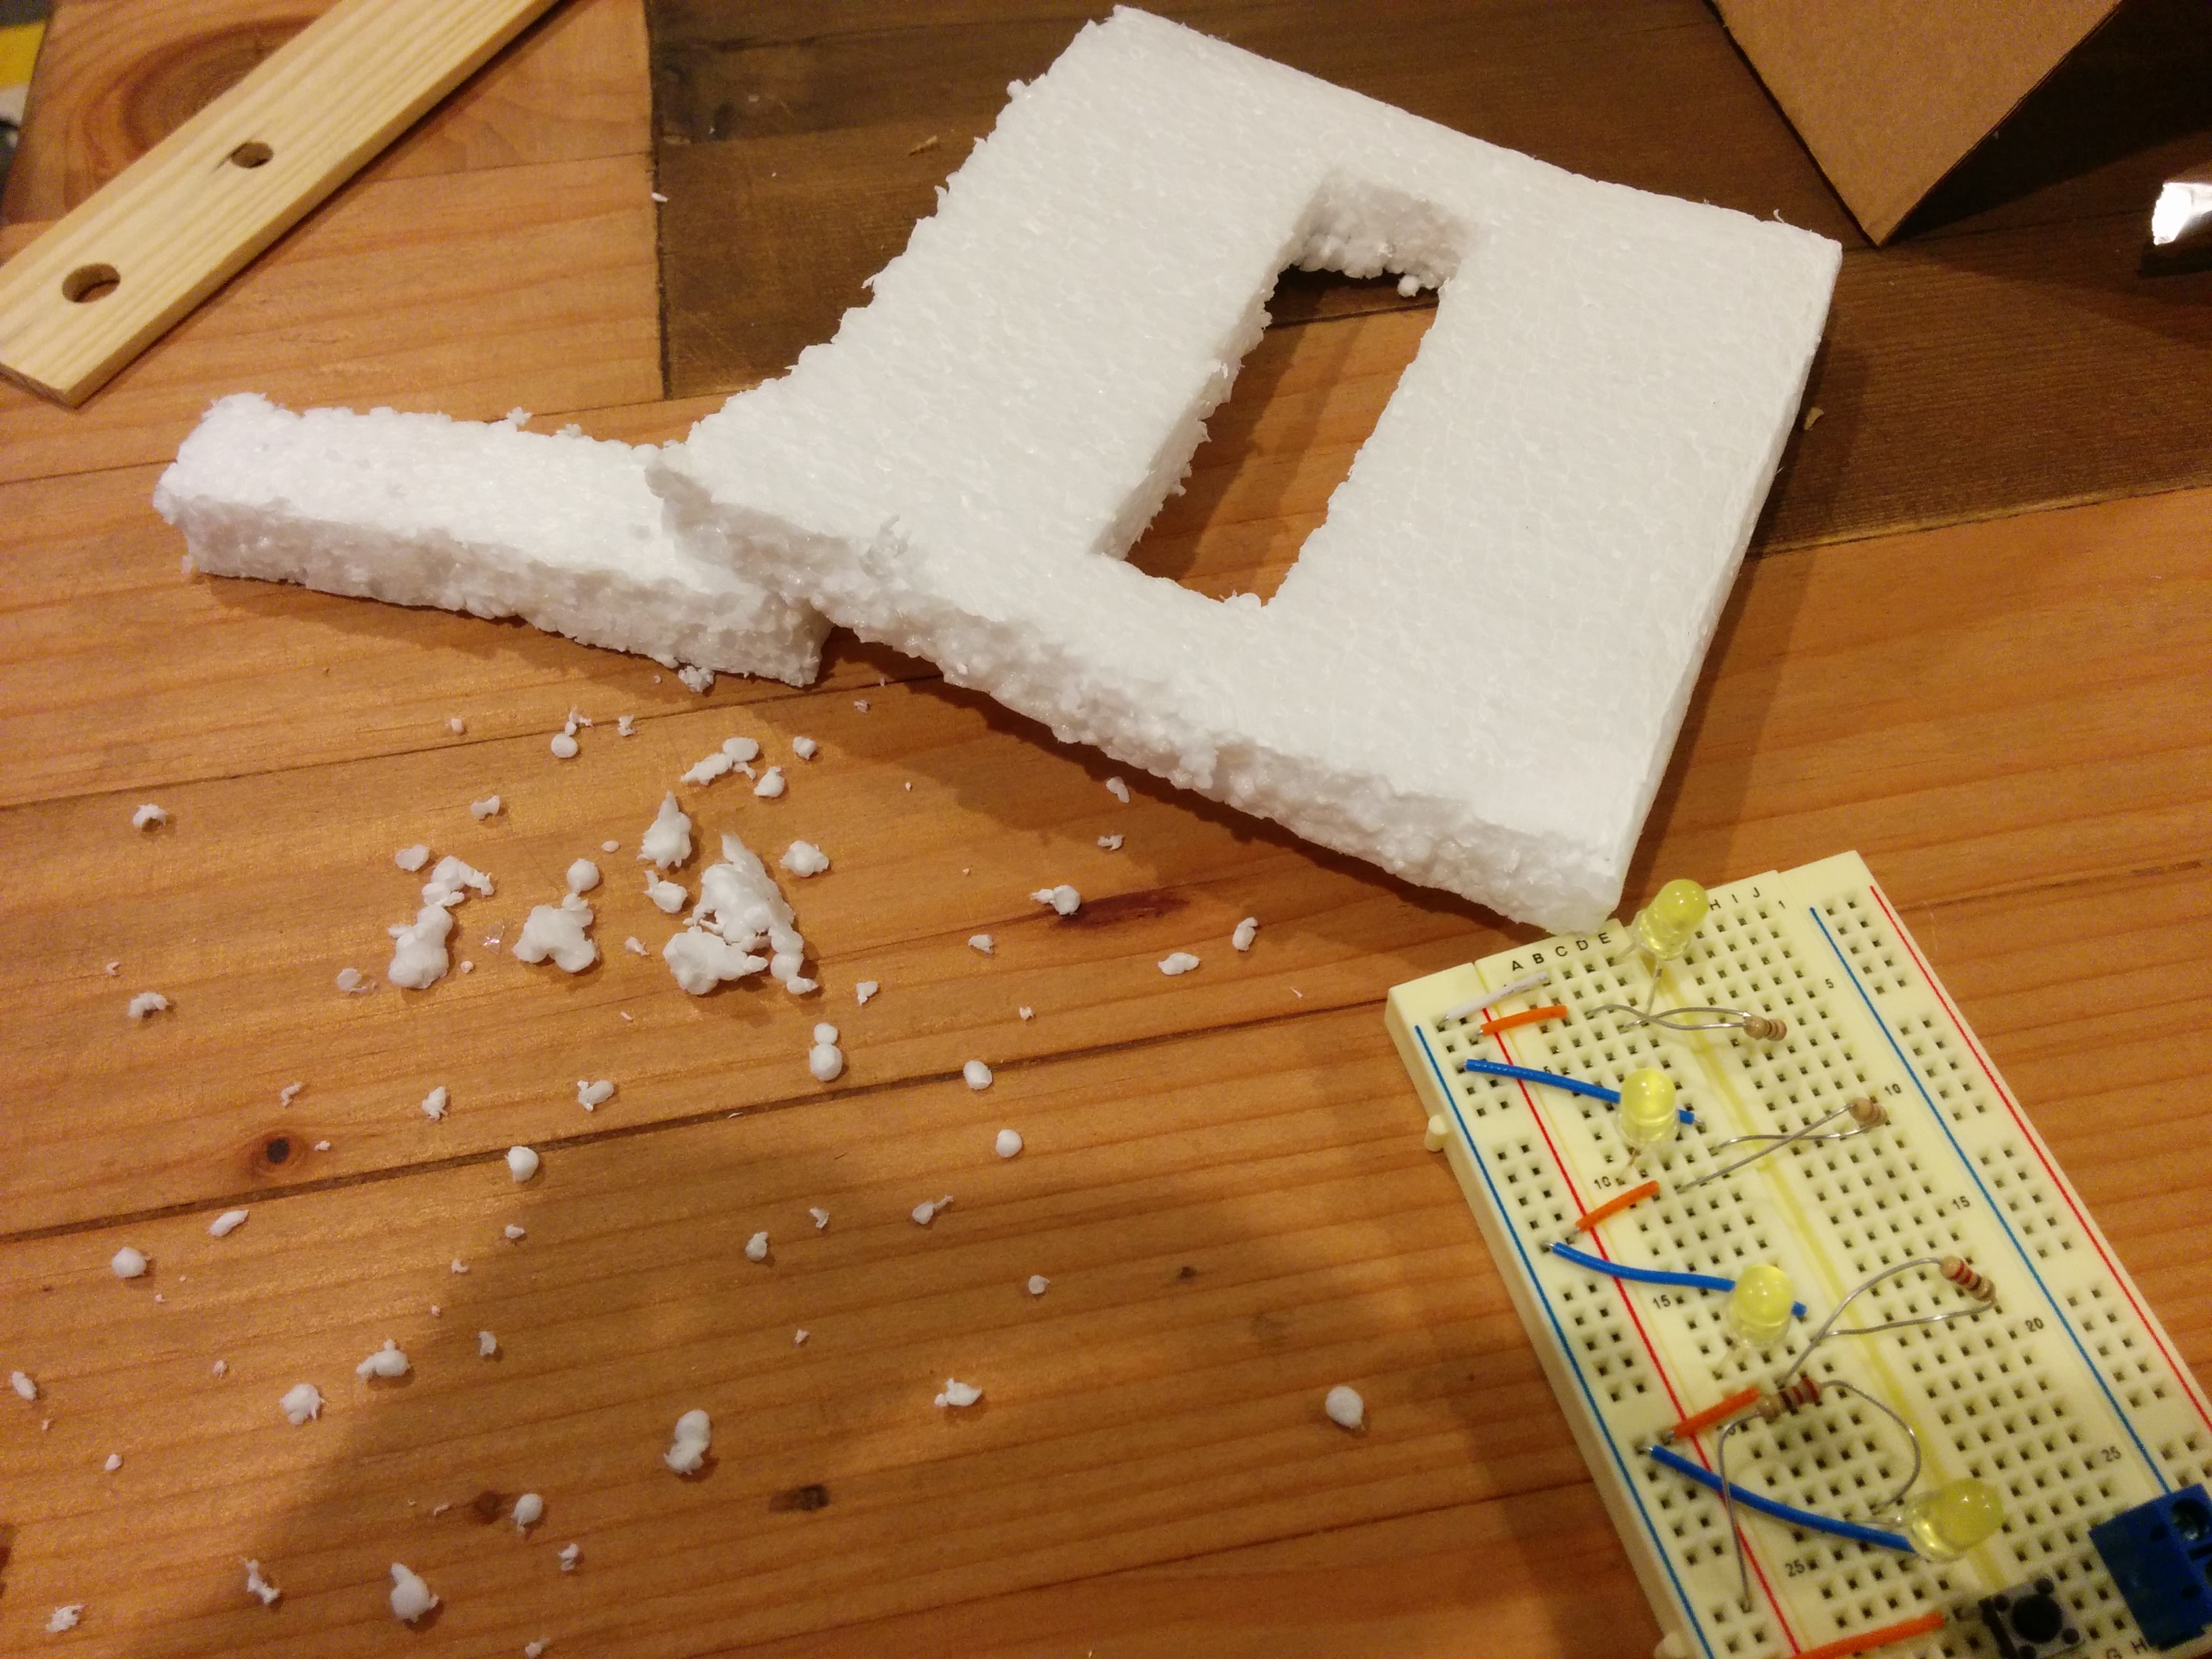
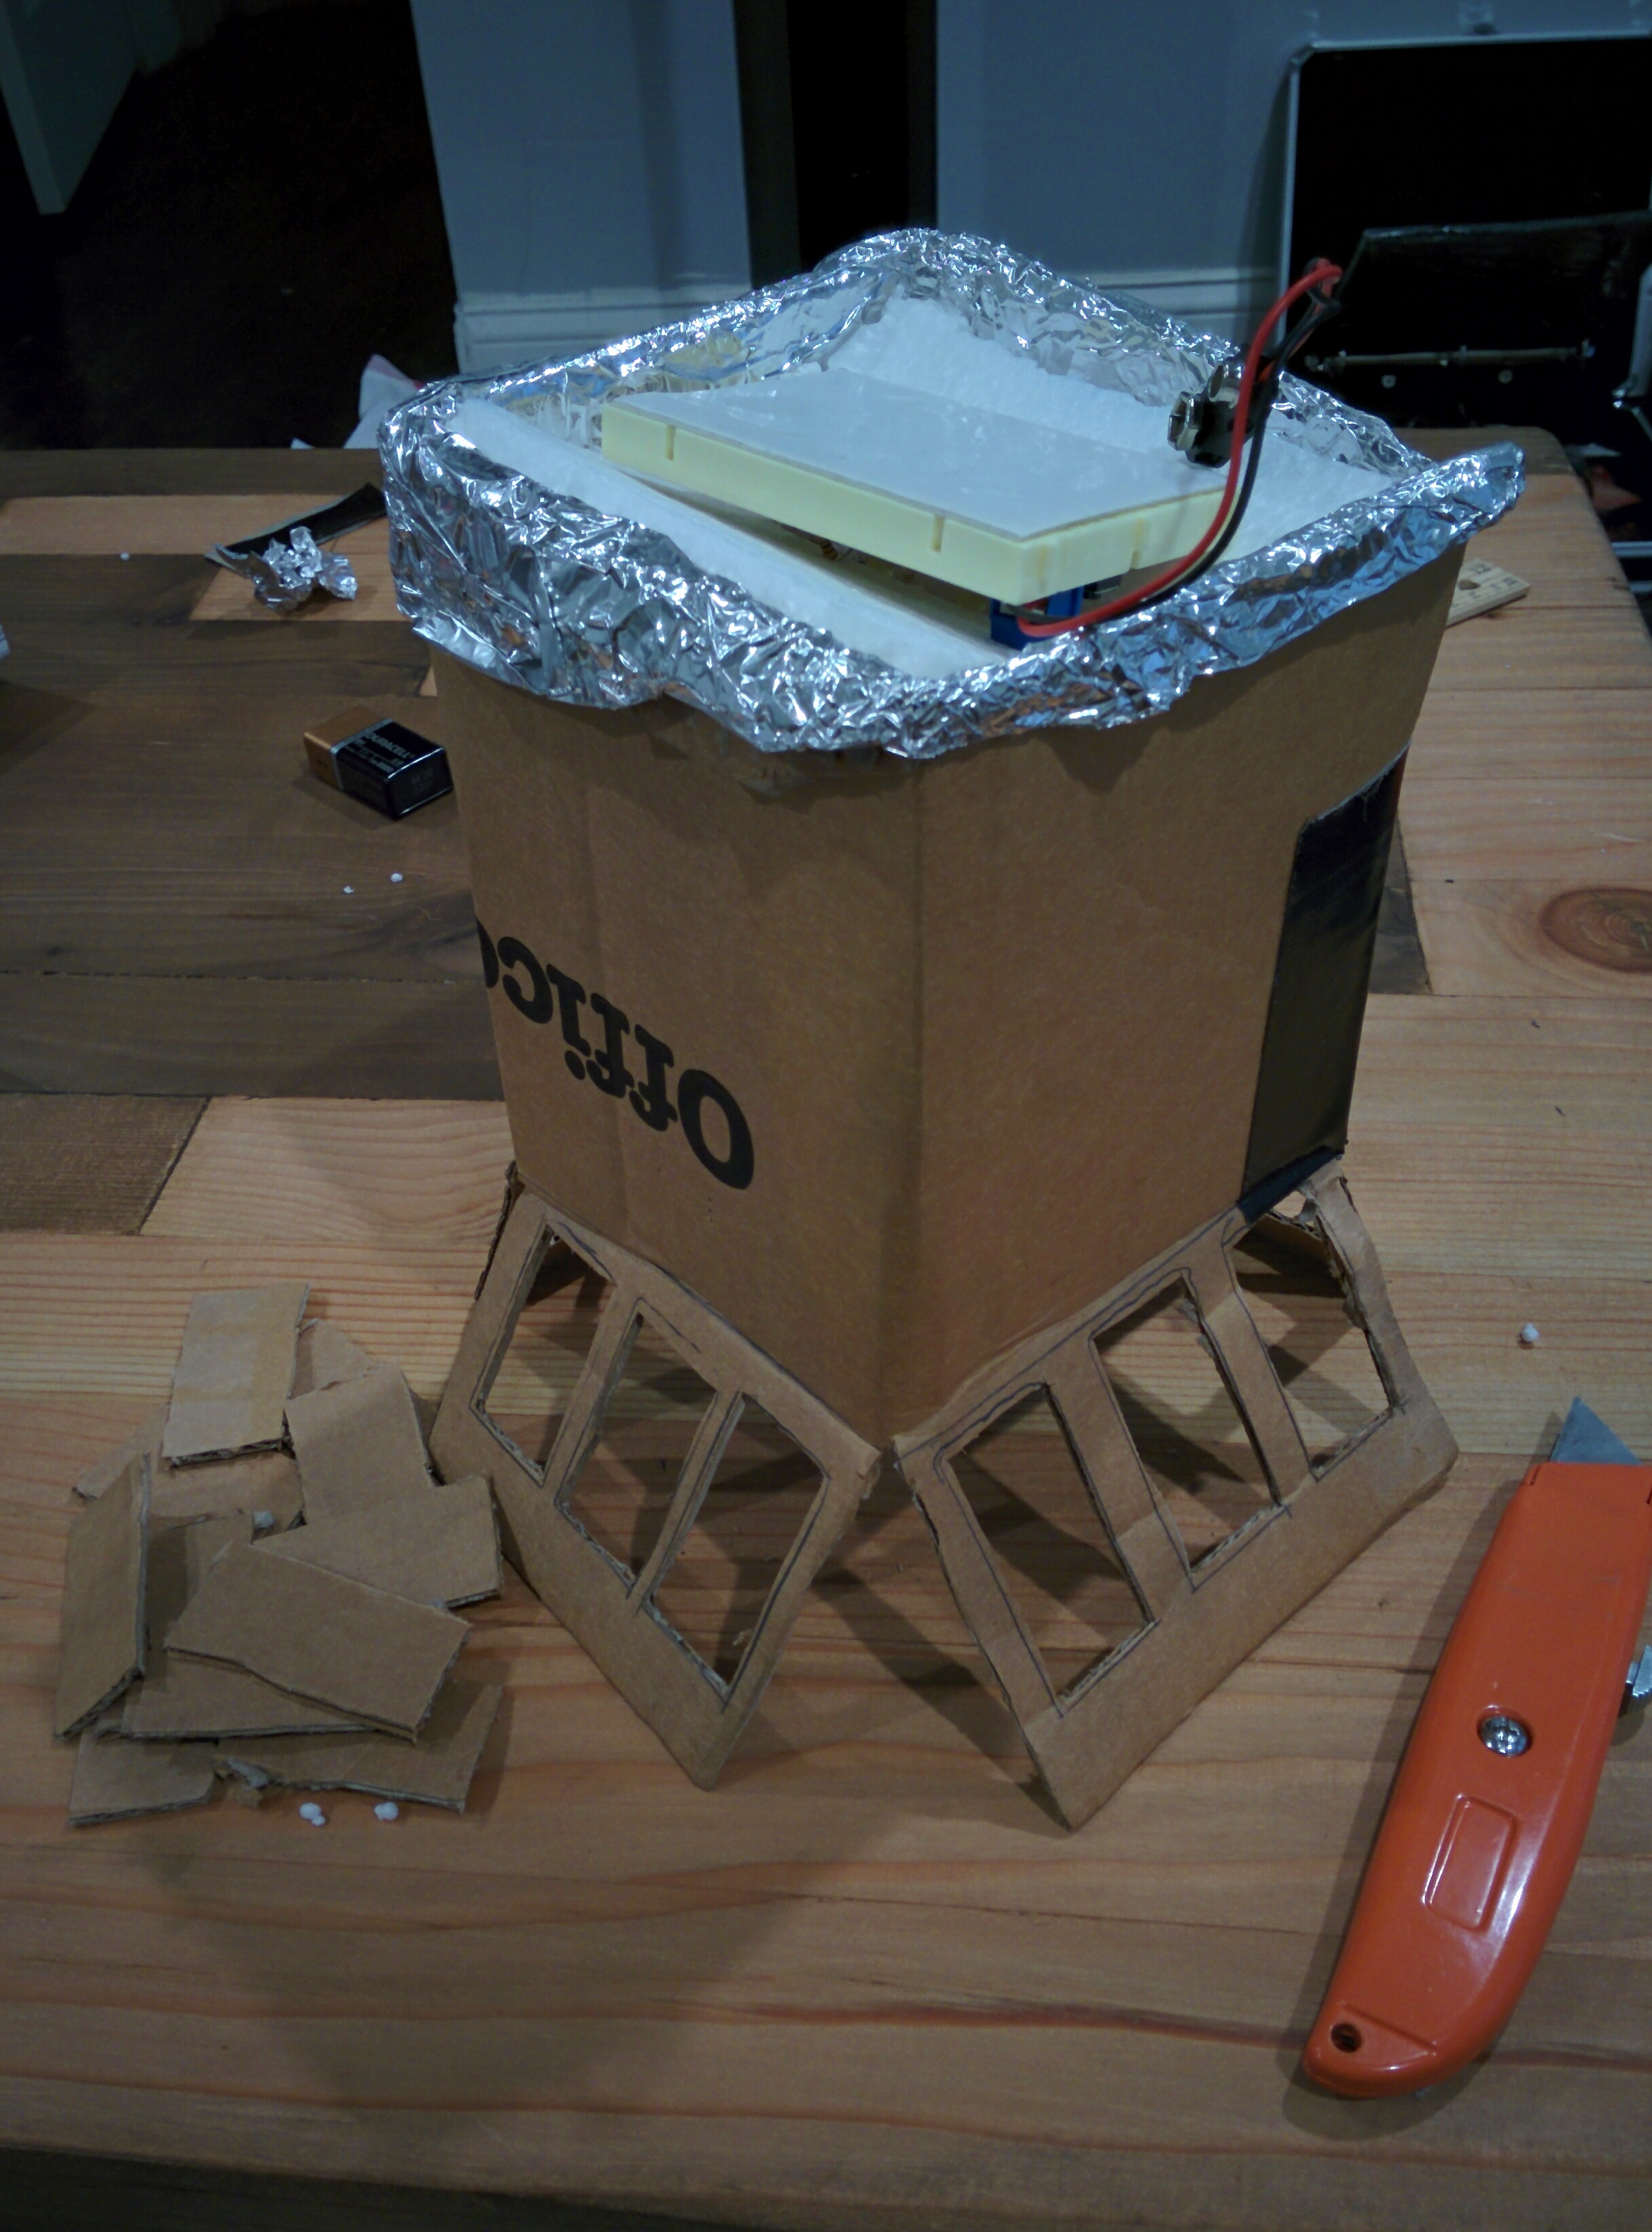
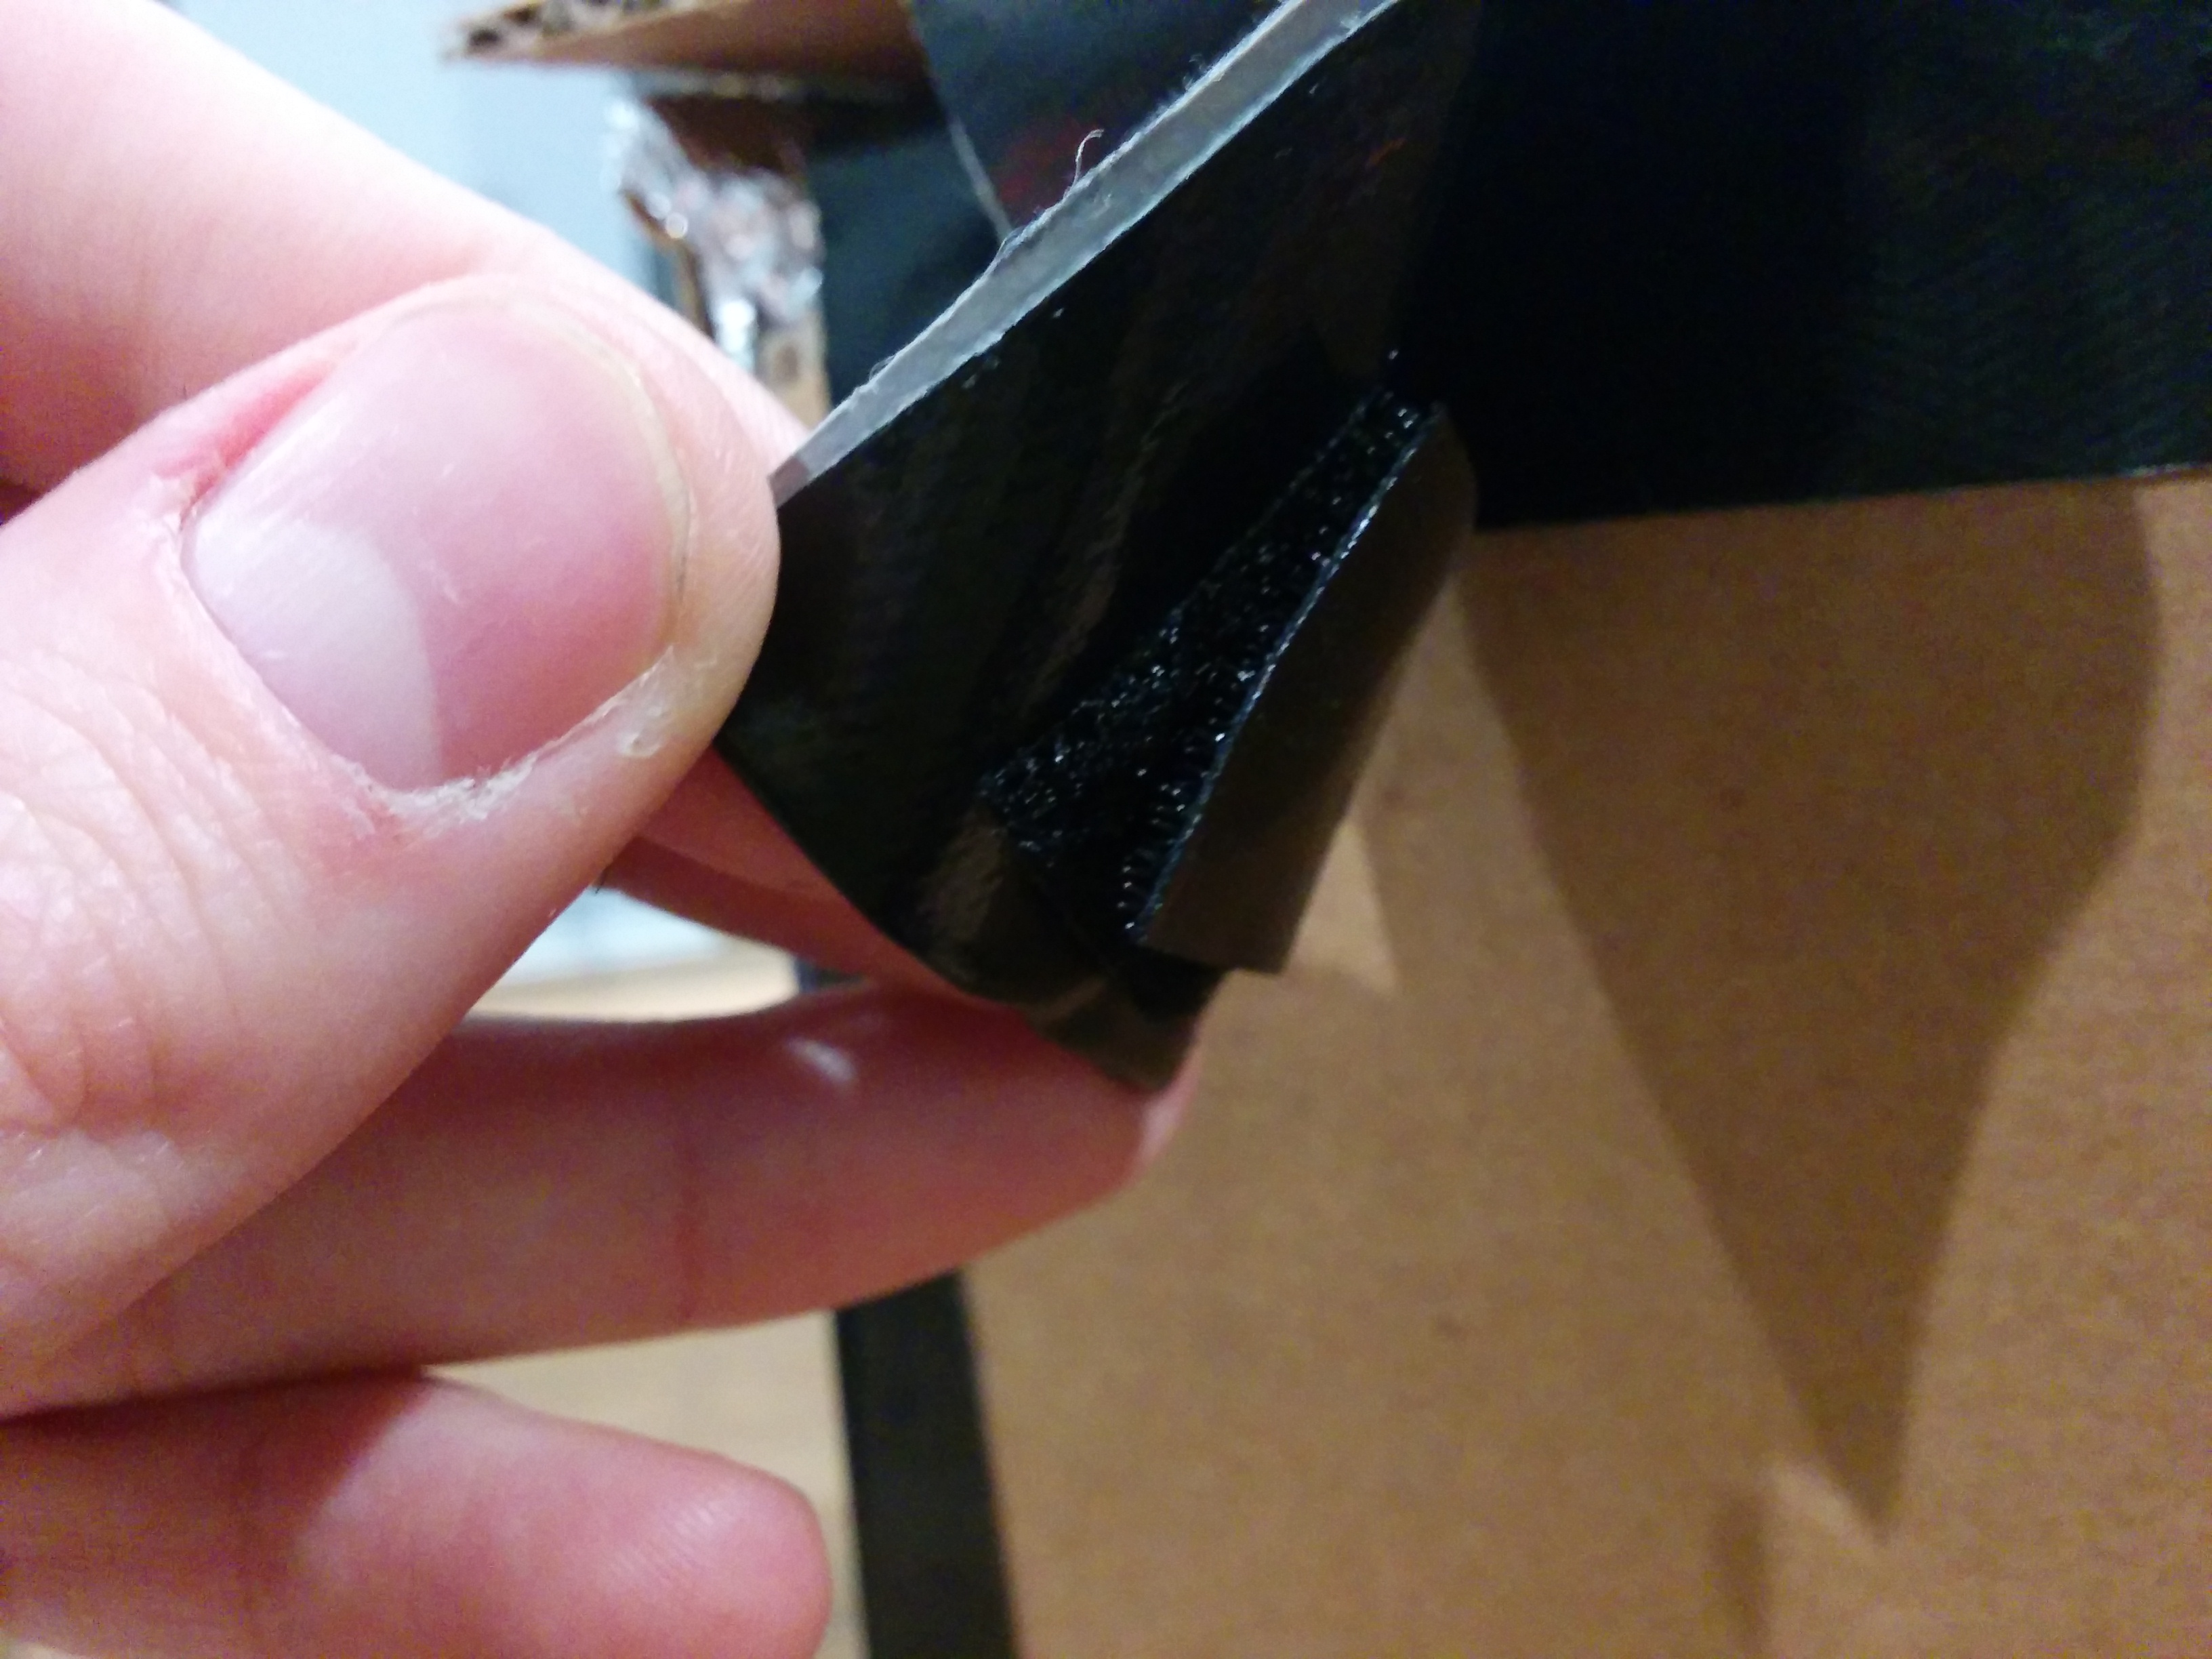
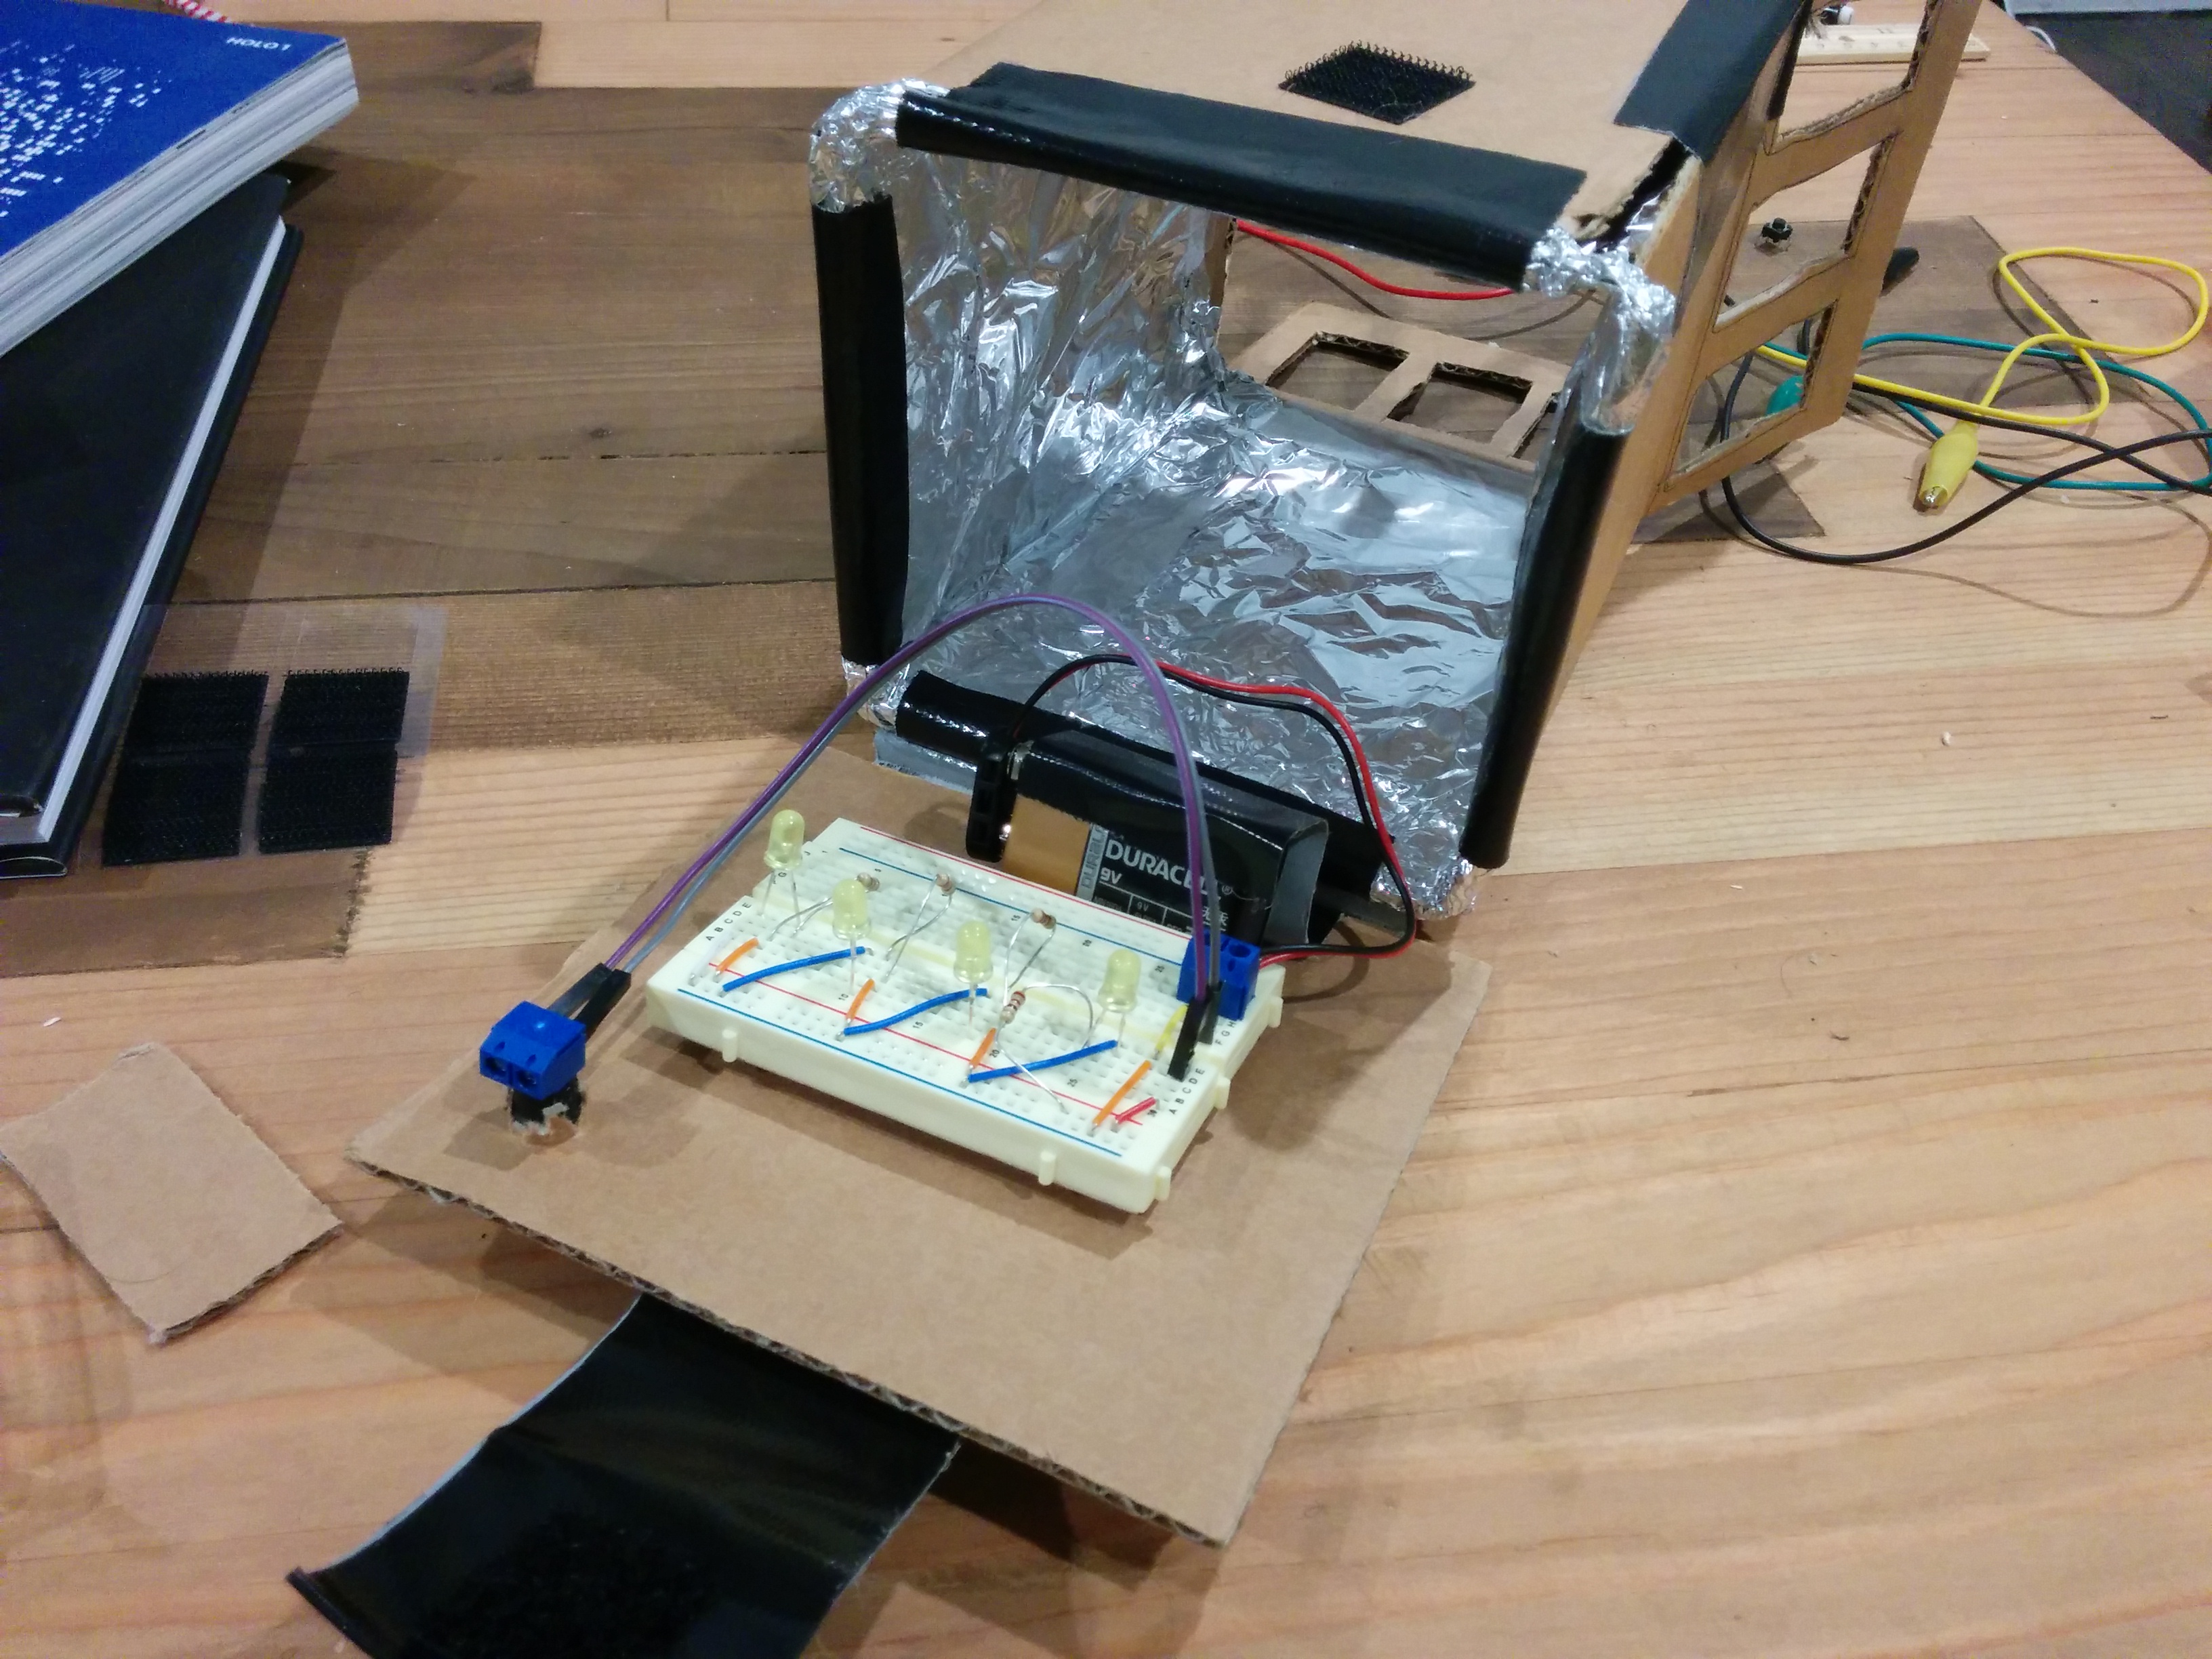
The cardboard is brought together by duct tape. The inside of the piece has tin foil on the sides to increase reflectivity, which is held into place by duct tape and normal clear tape. There is also  a little patch of velcro for functionality I will outline later. At one point I used to styrofoam to test out some functionality, but it did not stay in the final design.

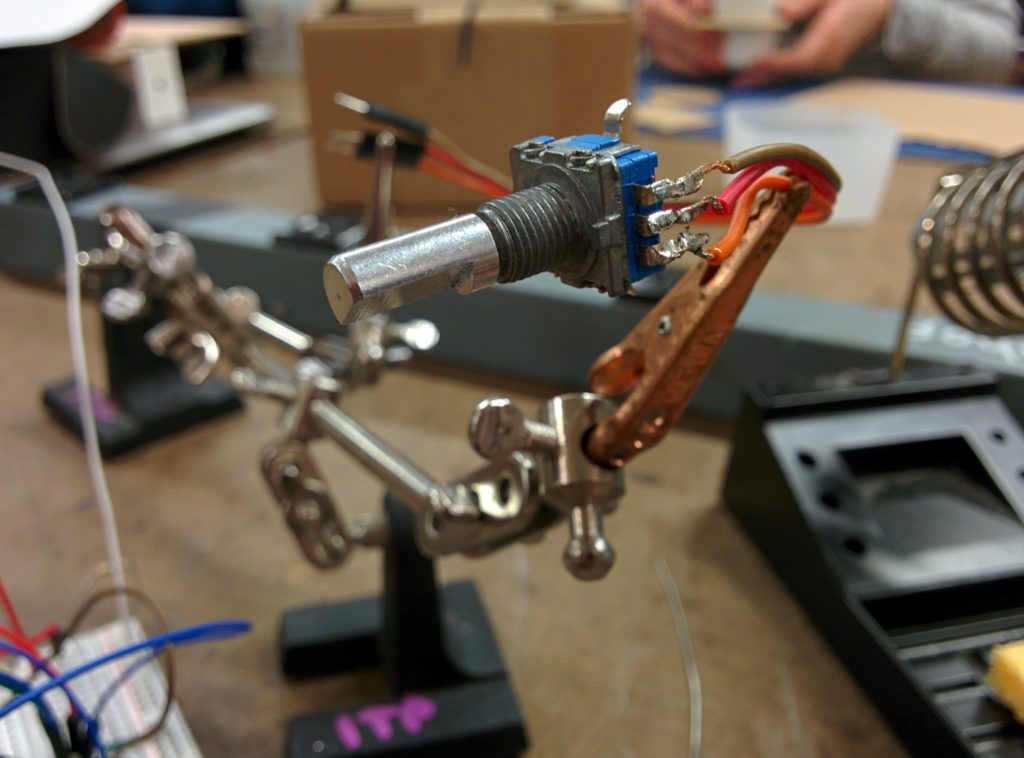
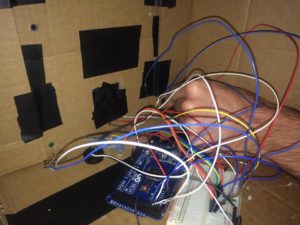
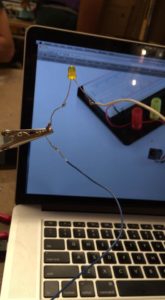
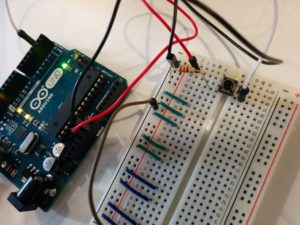
The light source is a breadboard with 4 yellow LEDs, appropriate resistors, a 9 volt battery source with appropriate connection terminal, and a “soft touch” switch. These are connected via stiff, on-board jumper wires, a looser jumper cable for the switch, a screw terminal to connect the switch to the wires. I used some alligator clips during testing of the circuit, but they did not stay in the final design.

Mid-Process

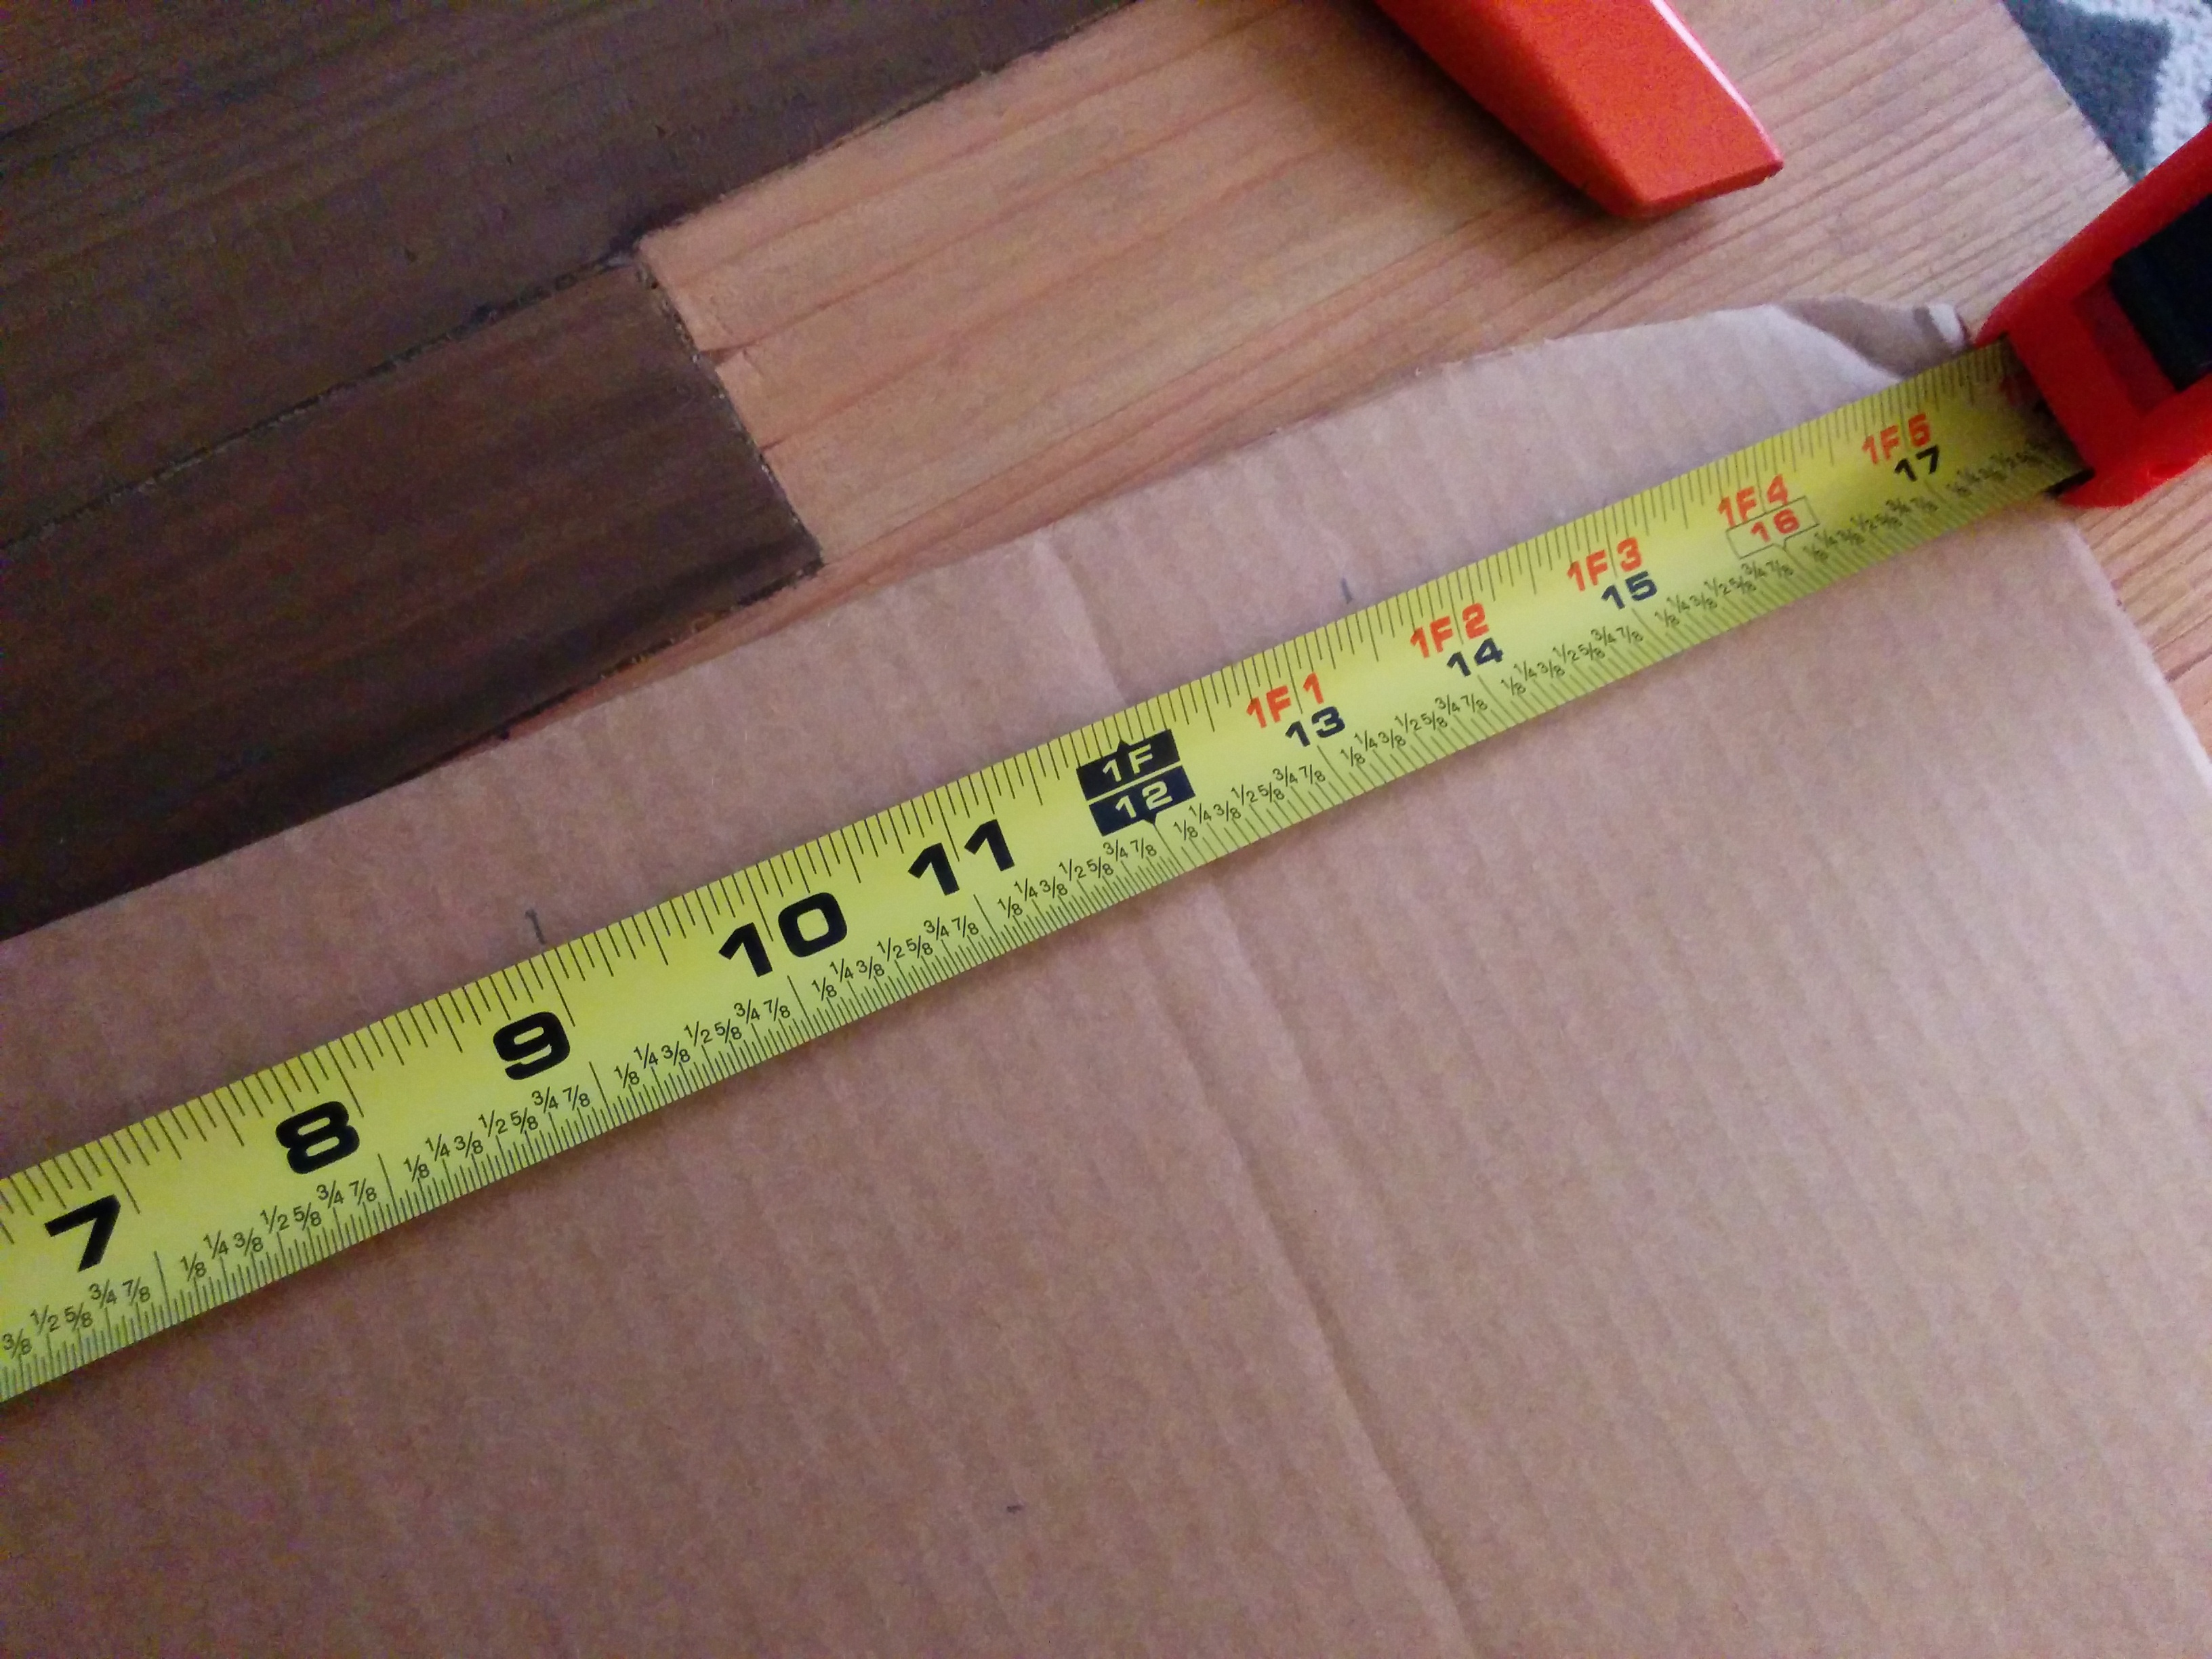
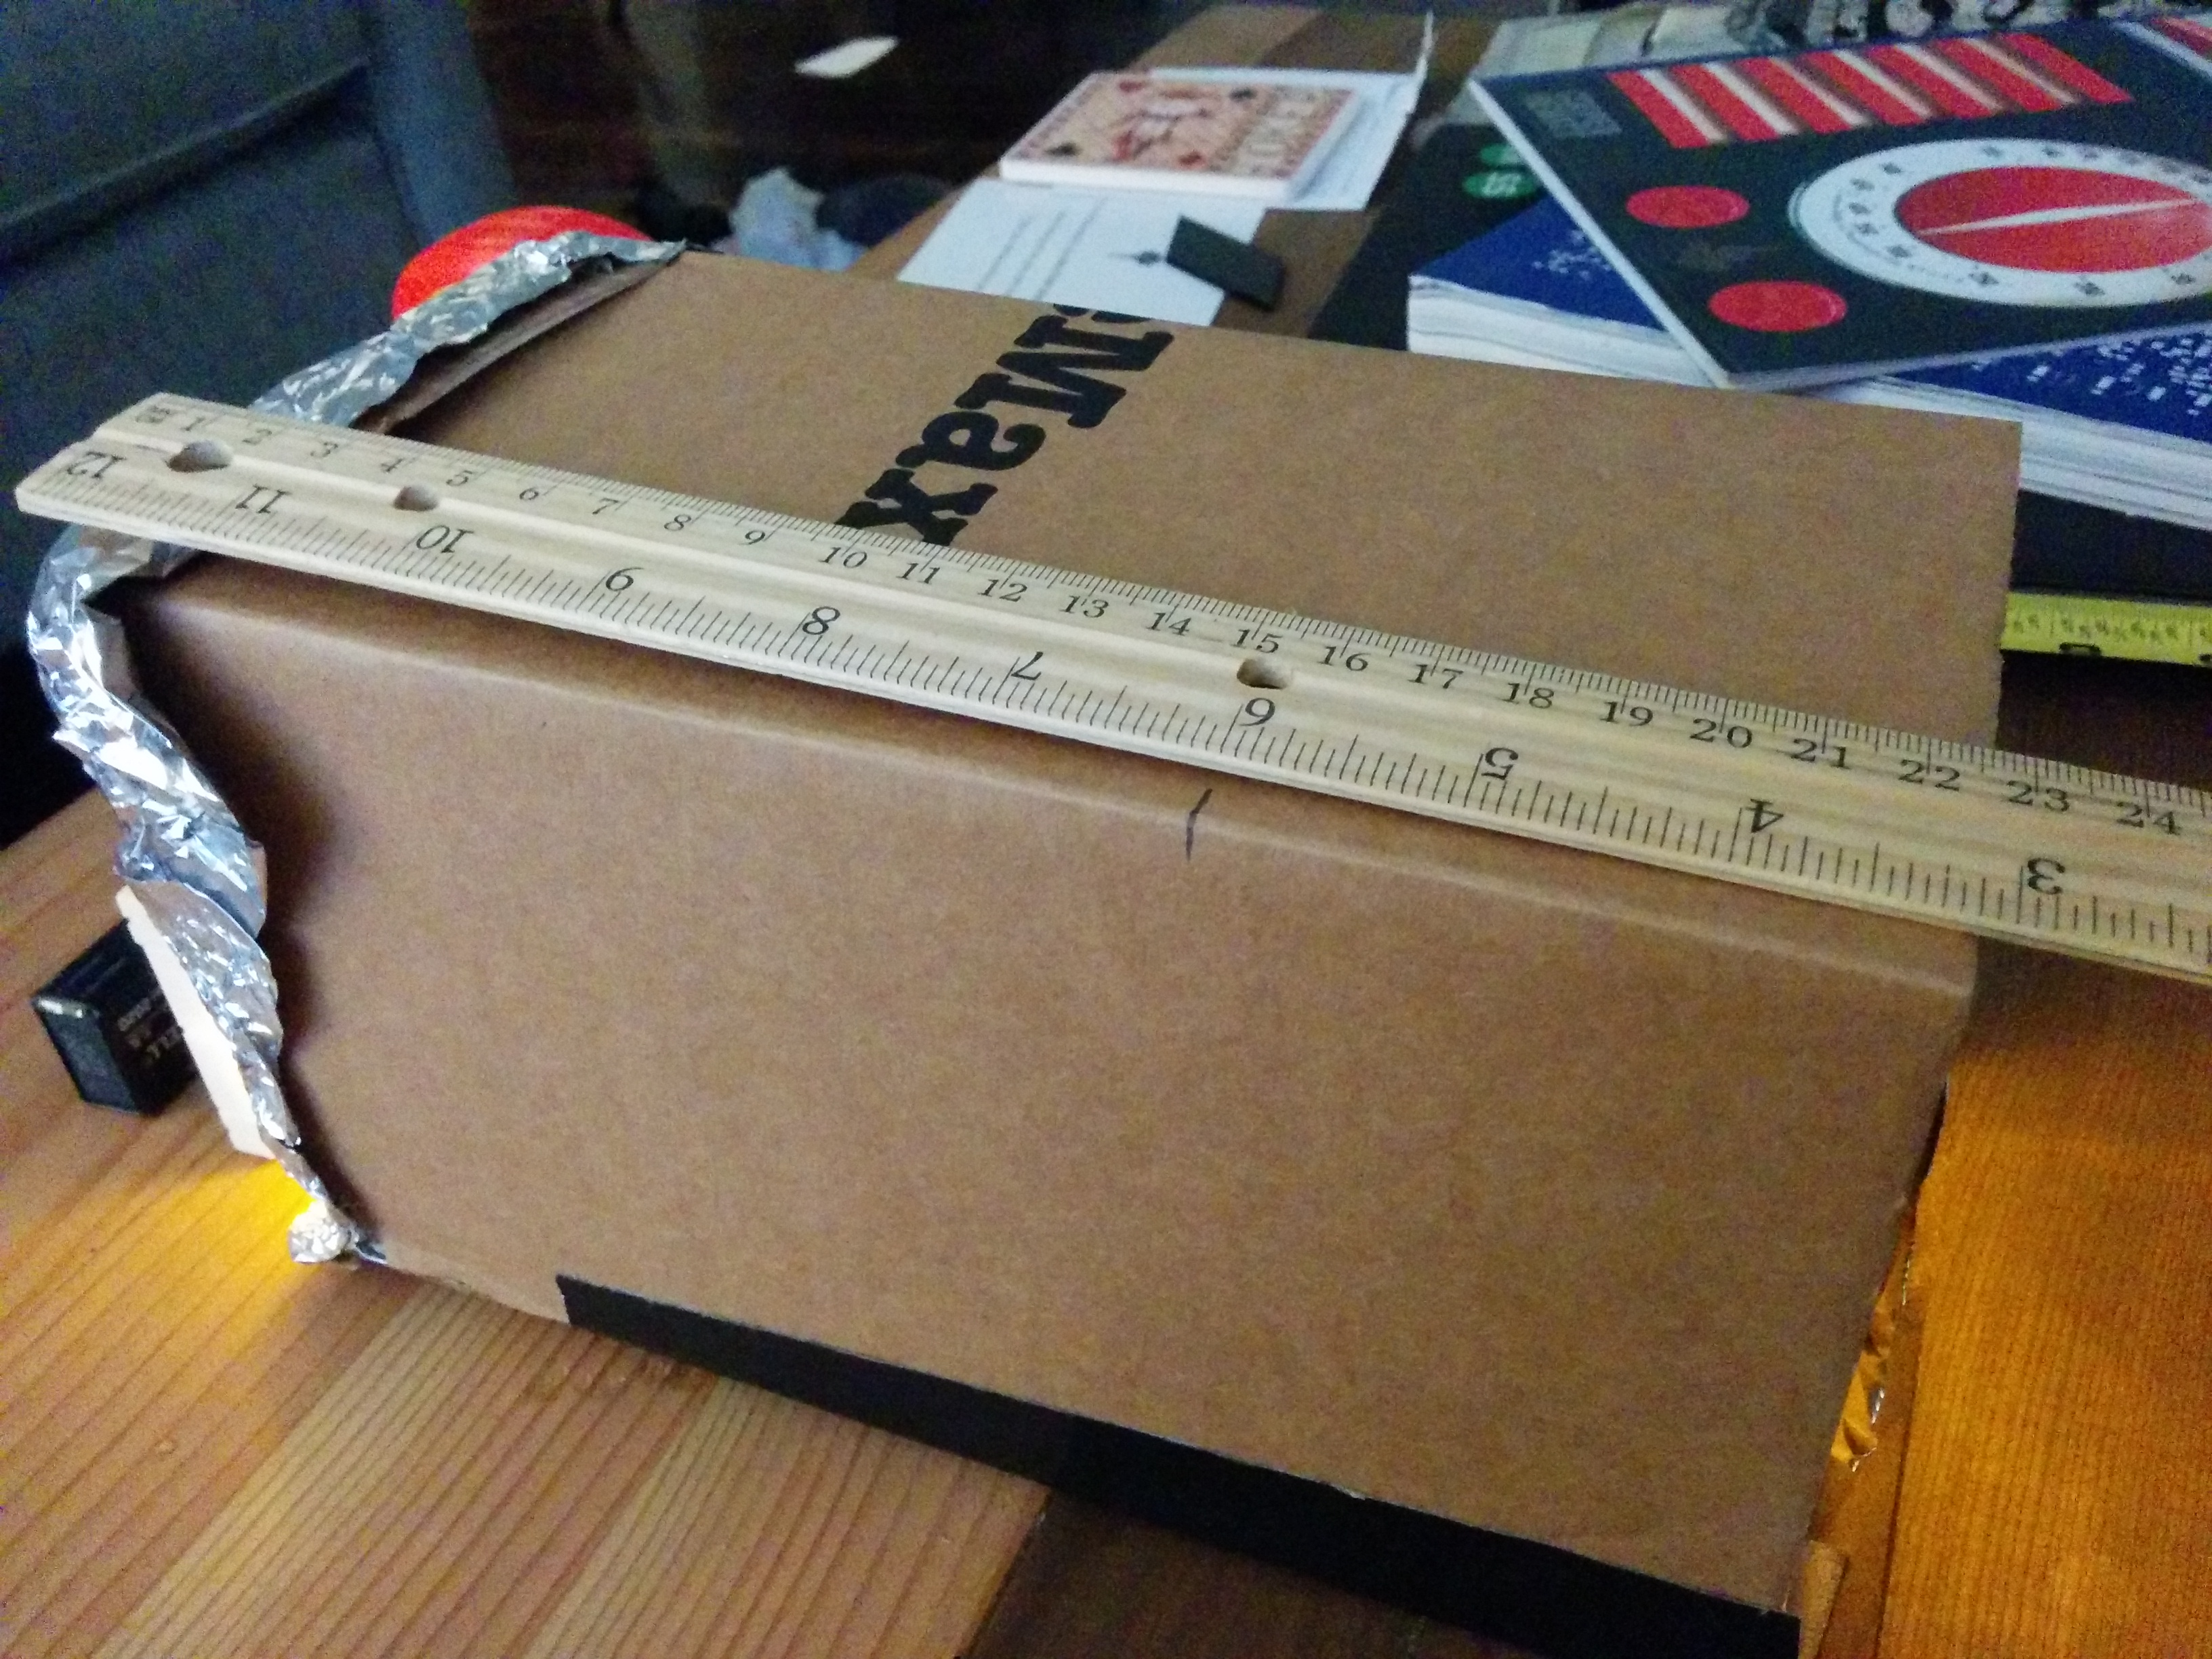
The questions started almost immediately, as I was unsure what would be a good size for the frame. I wanted something small enough so that I could hold it in my hand but large enough to justify as a stationary light source. I wound up going with 4.5 inches.

img_20161029_143736 img_20161029_143935

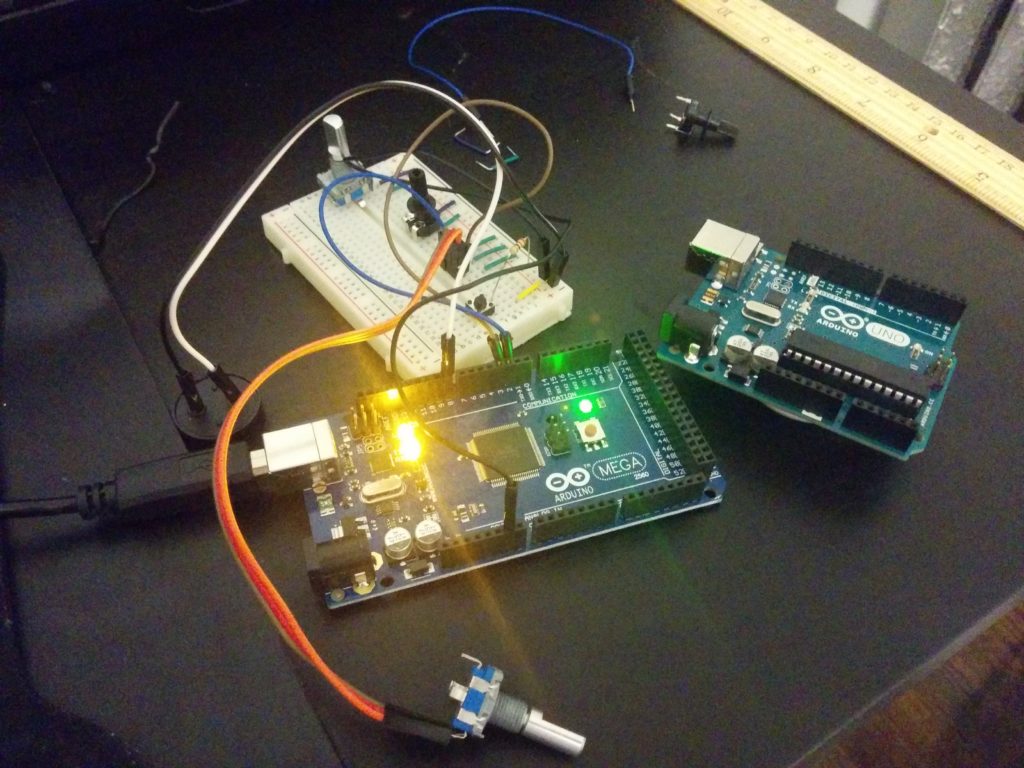
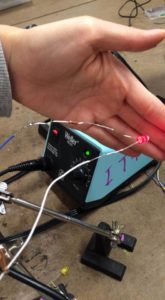
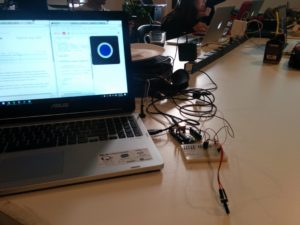
I wired up my breadboard with 4 LEDs and a 9 volt battery and shone the light through my cardboard tunnel. Not too bad.

img_20161029_152545 img_20161029_152602 img_20161029_152643

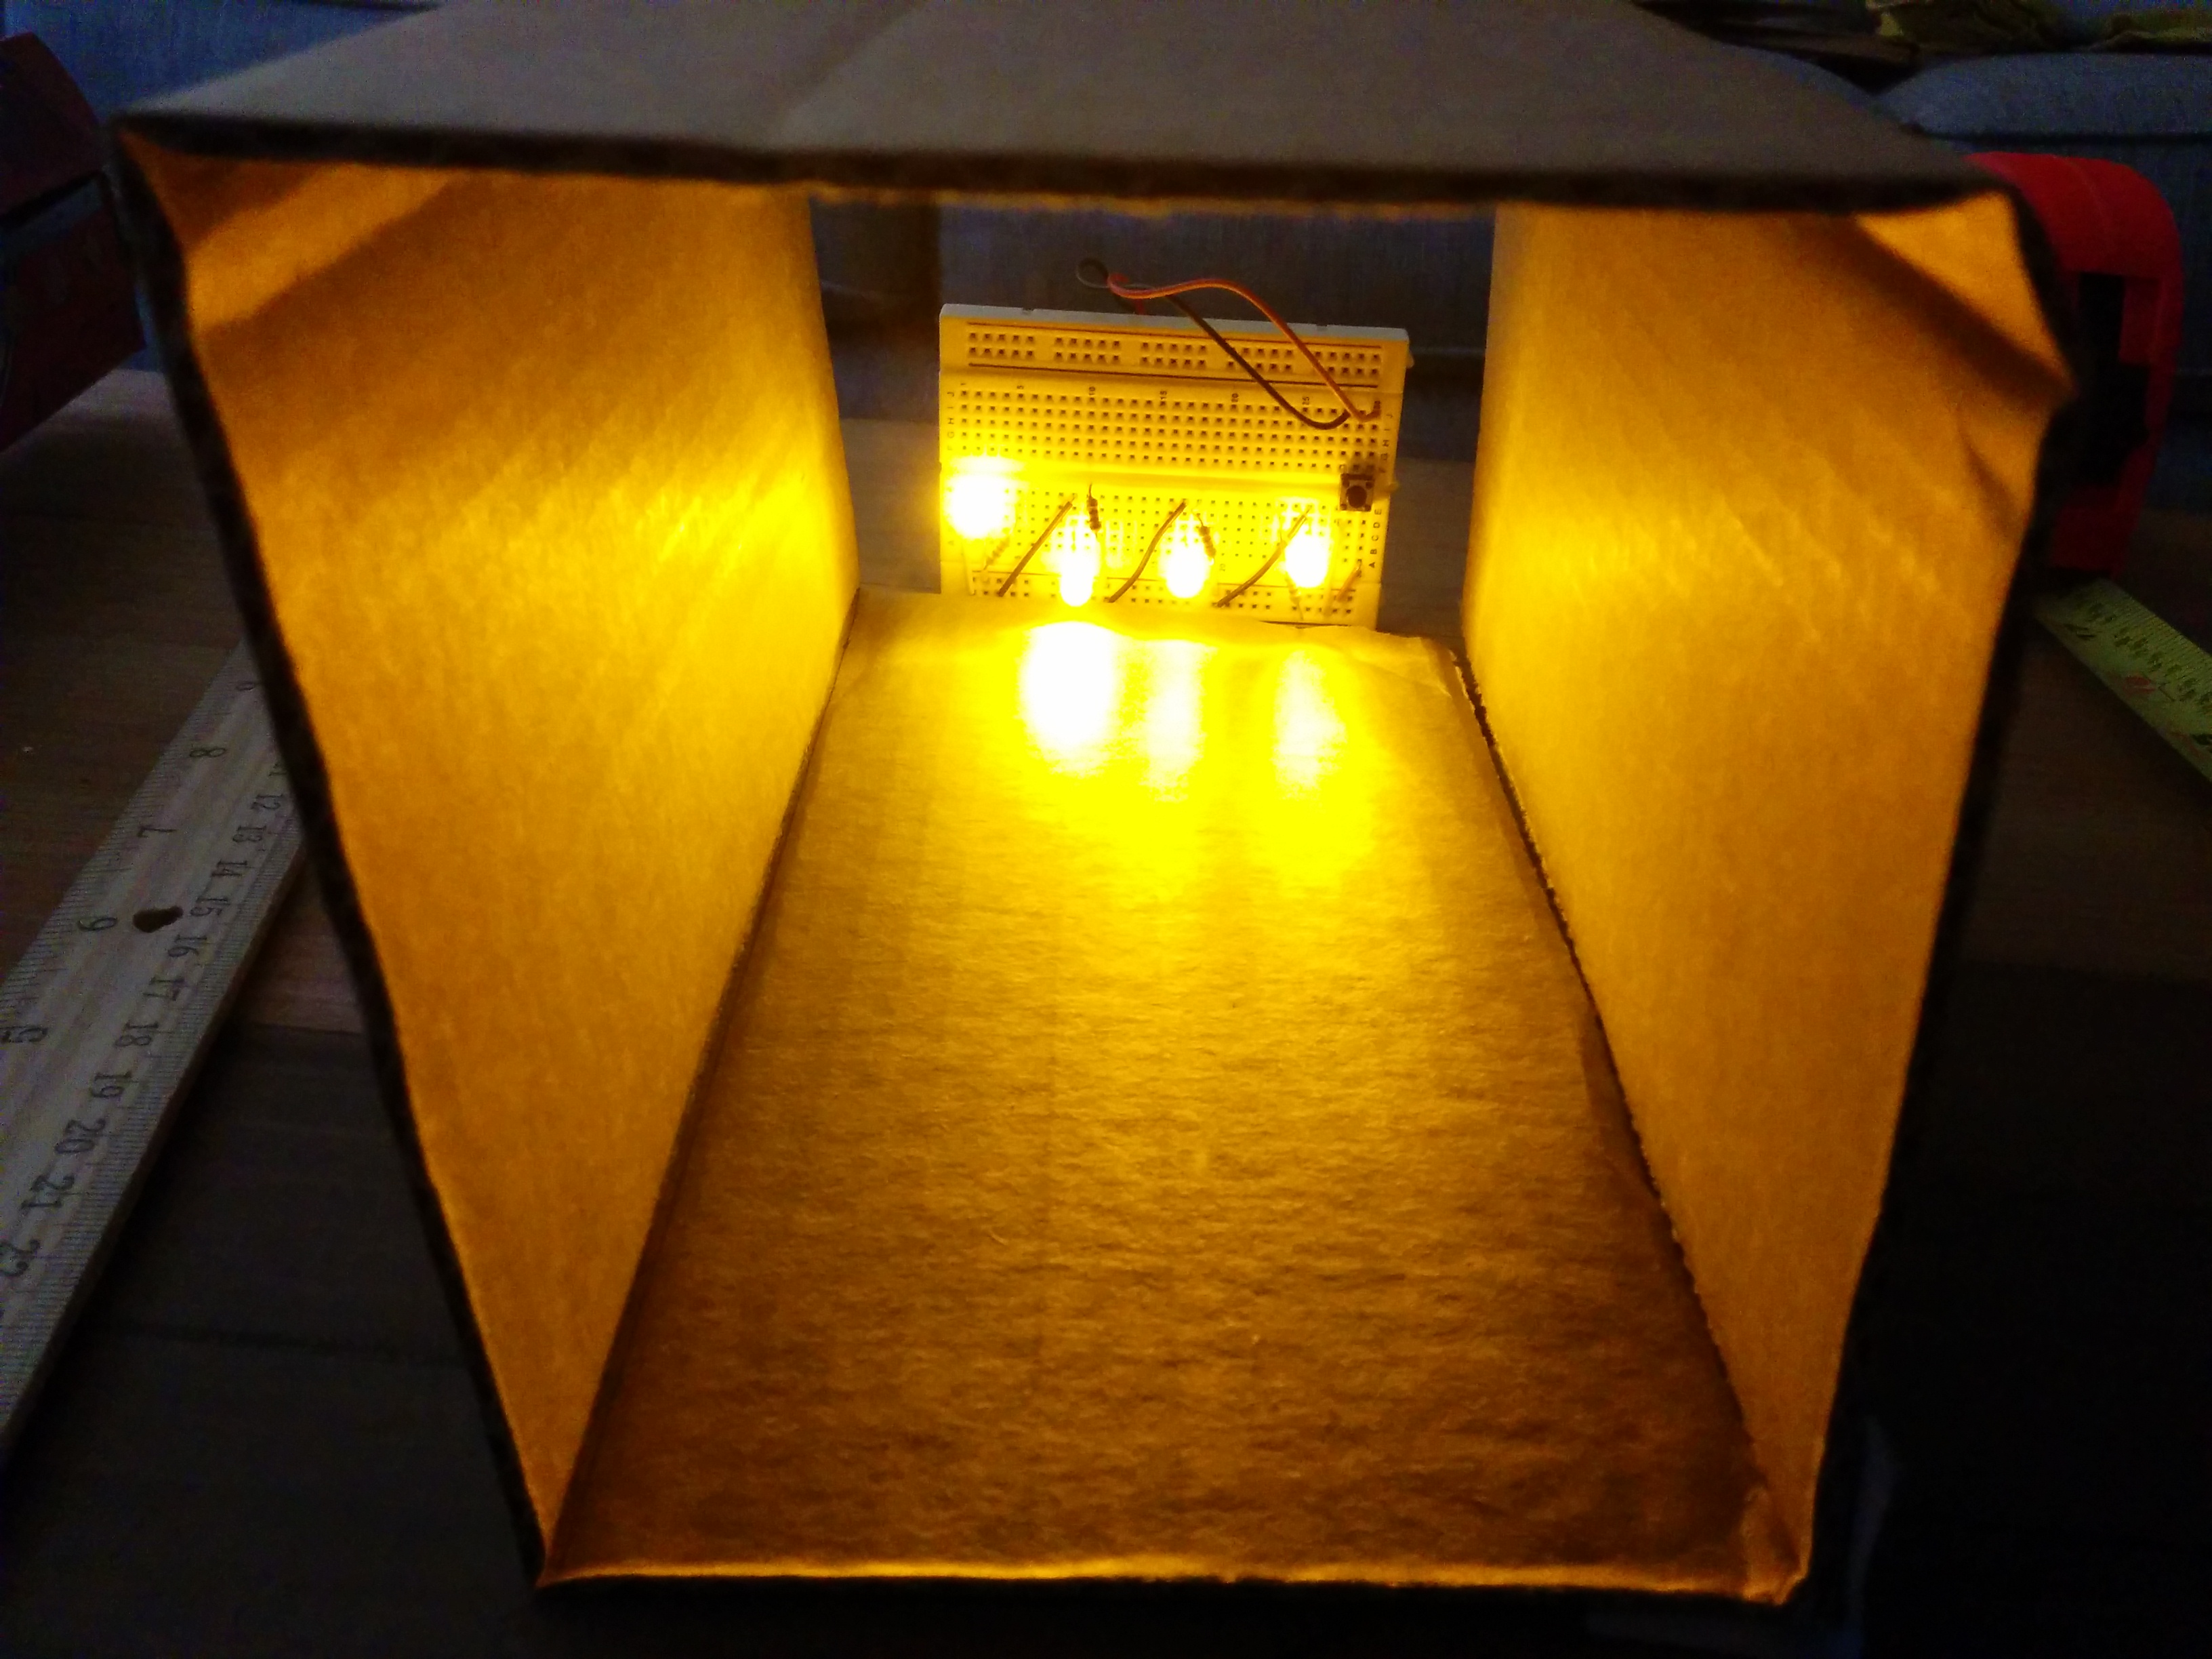
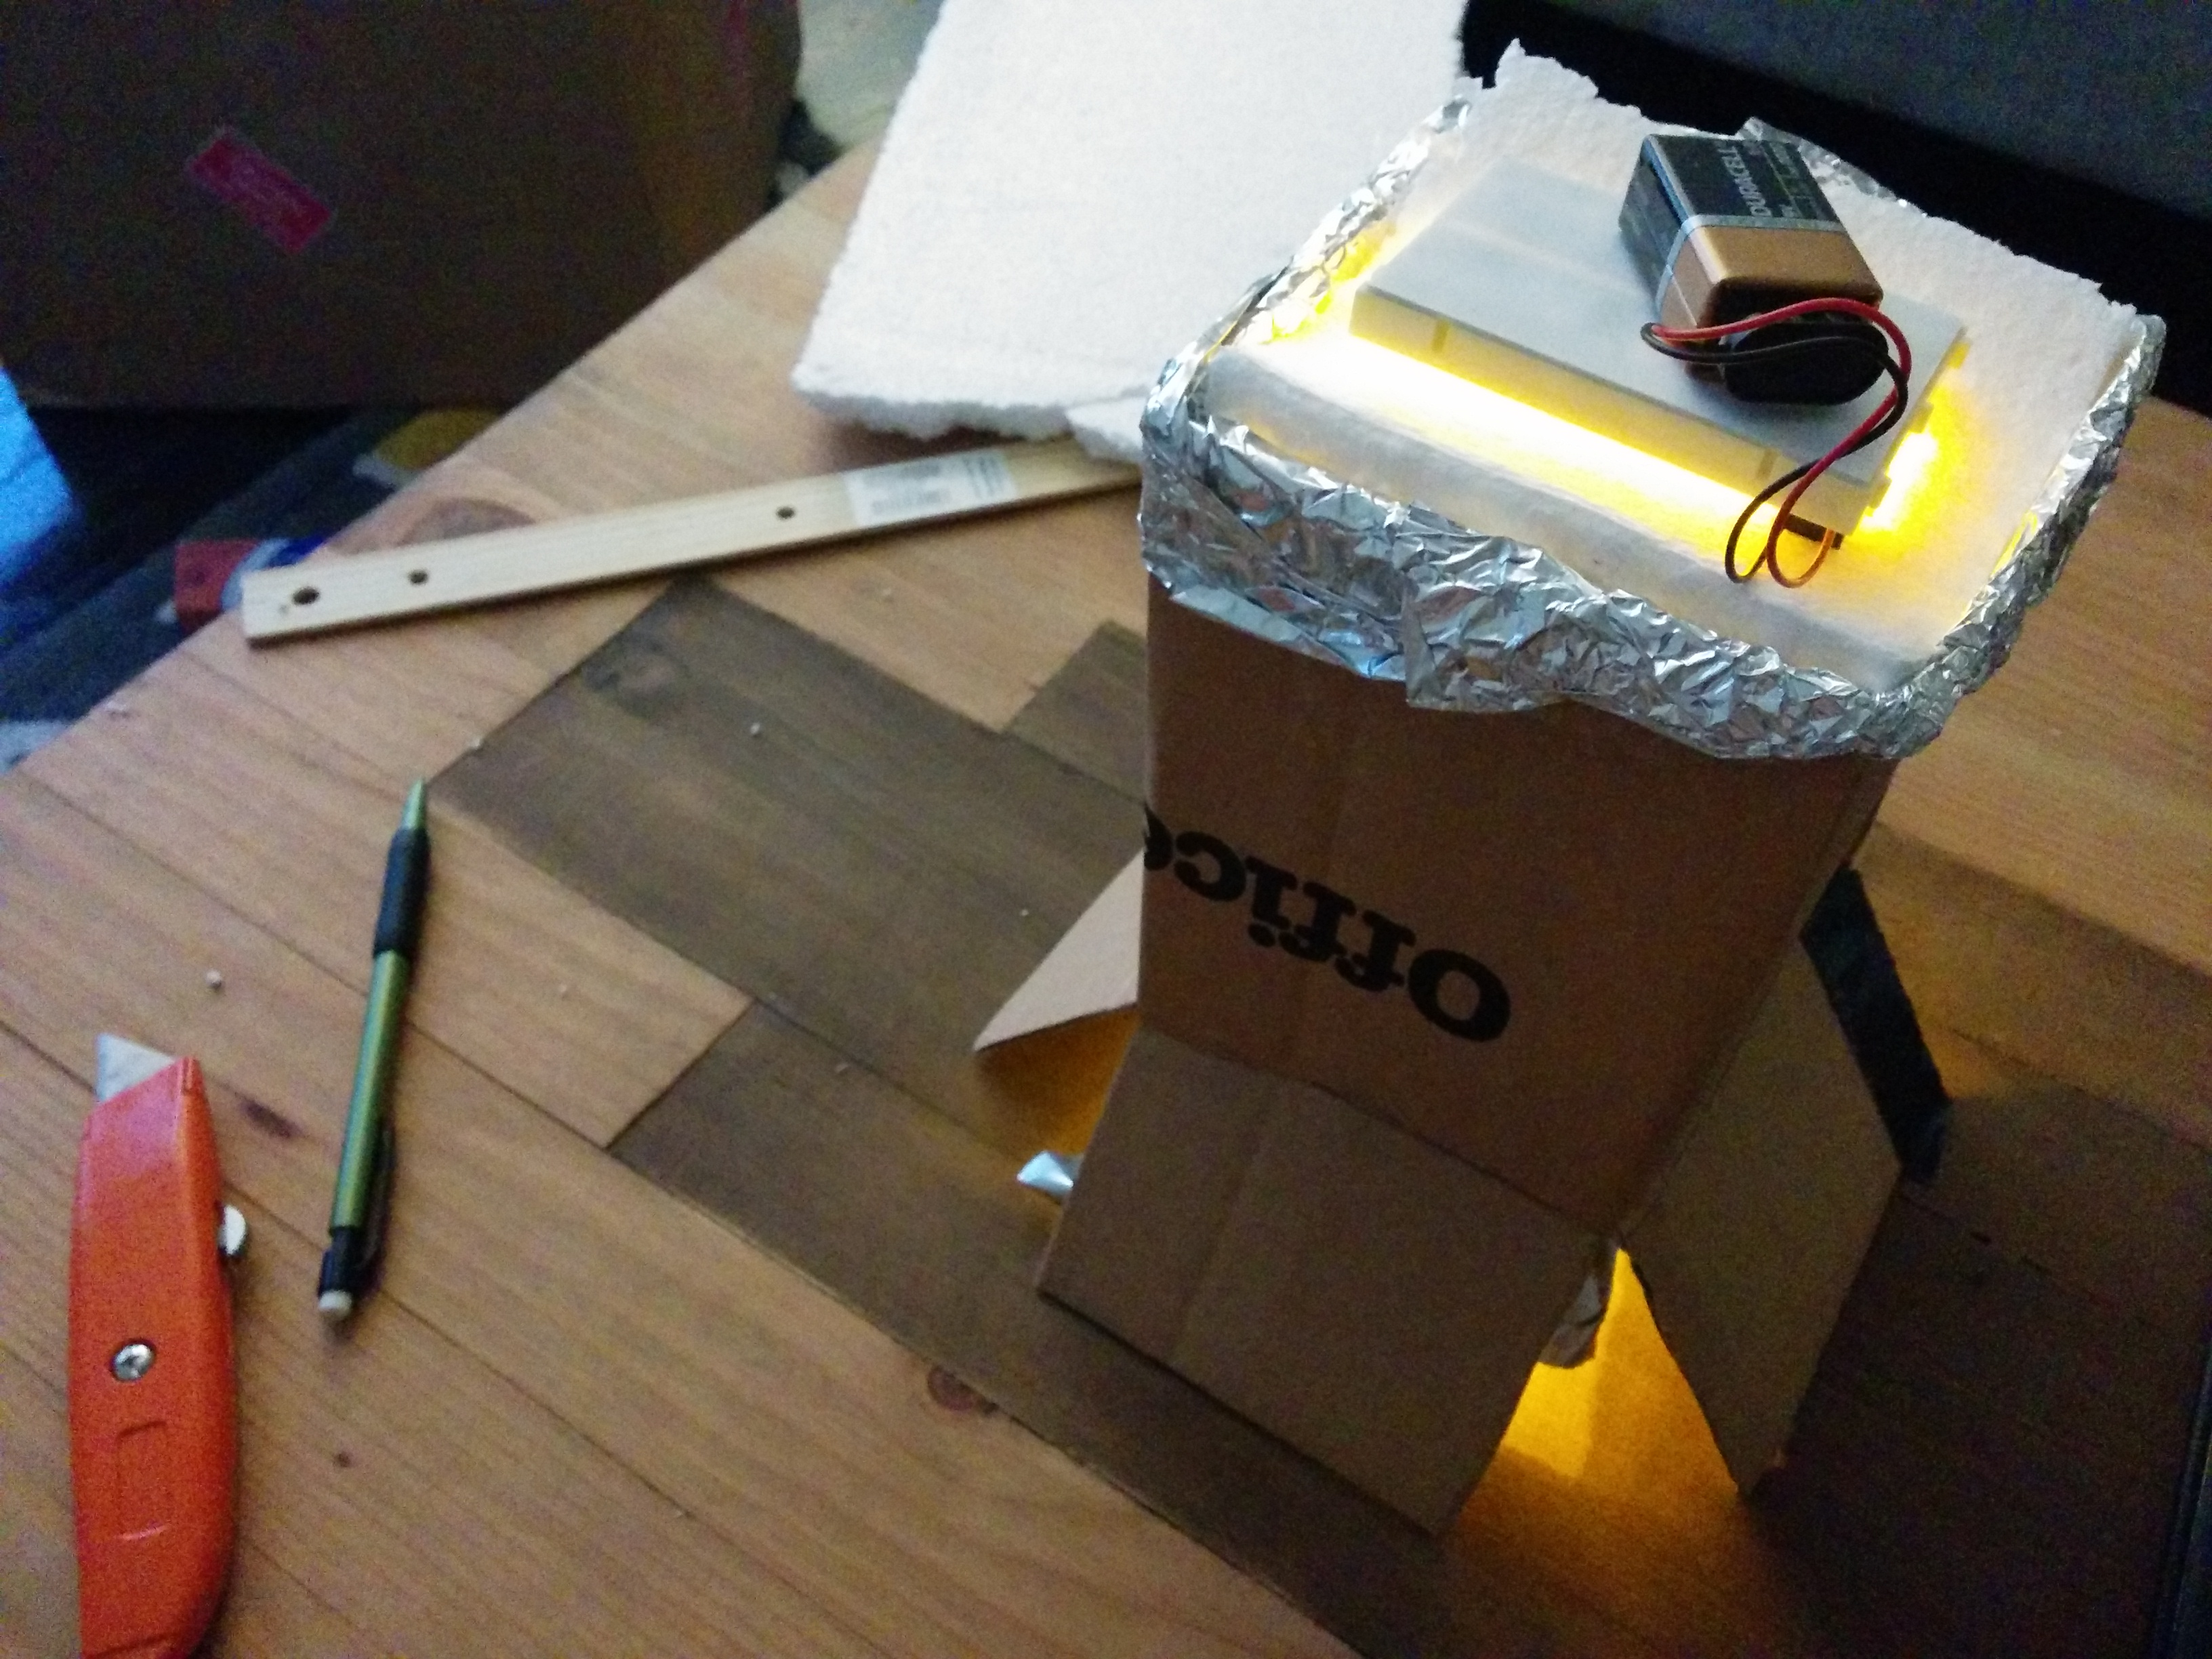
Then the tin foil was added to increase light reflection. Not really sure this made that much more of a difference. To my eye, it was more than these photos might convey, but certainly a minimal difference. However, the light was coming out and was forced into a direction, so I decided there was enough functionality for now.

img_20161029_152946 img_20161029_152956

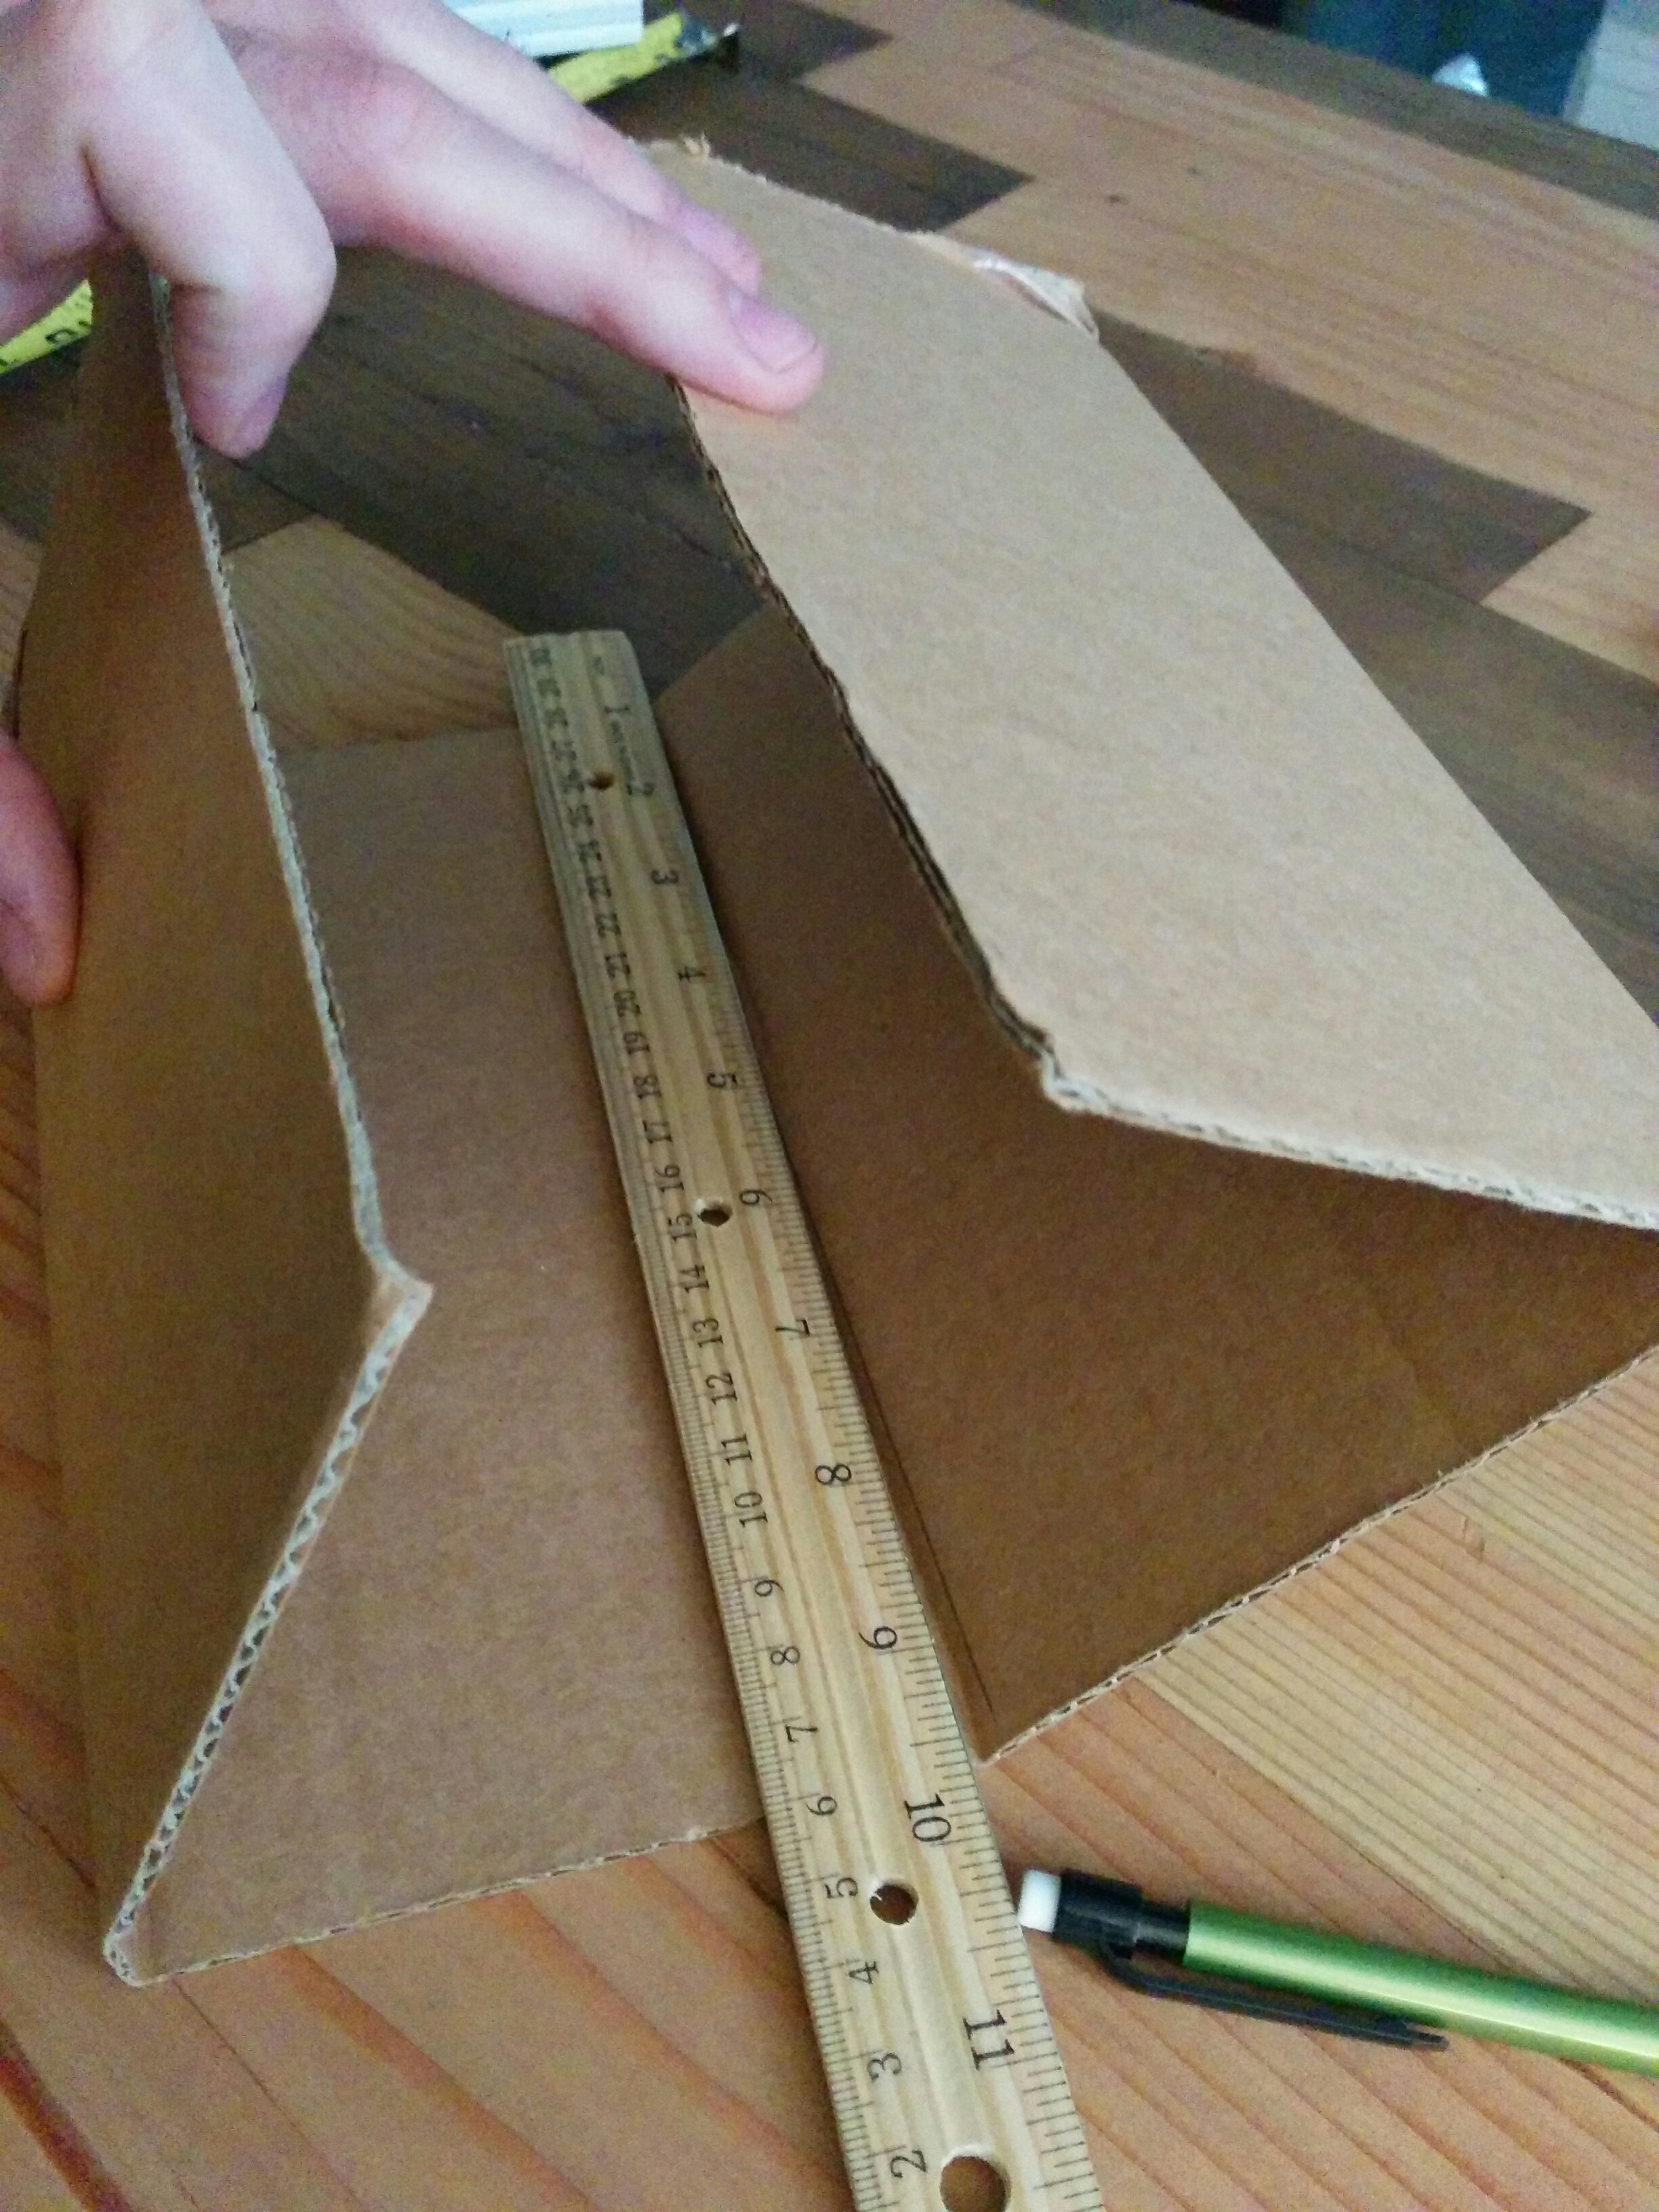
Cuts were added to the bottom 3rd of the cardboard to create the lamp legs, and measurements were made in order to cut a piece of styrofoam. This was a quick way to punch out a hole and rest my light on top of the structure to see how the lamp functionality worked.

img_20161029_154050 img_20161029_154507img_20161029_155649img_20161029_160012img_20161029_160213

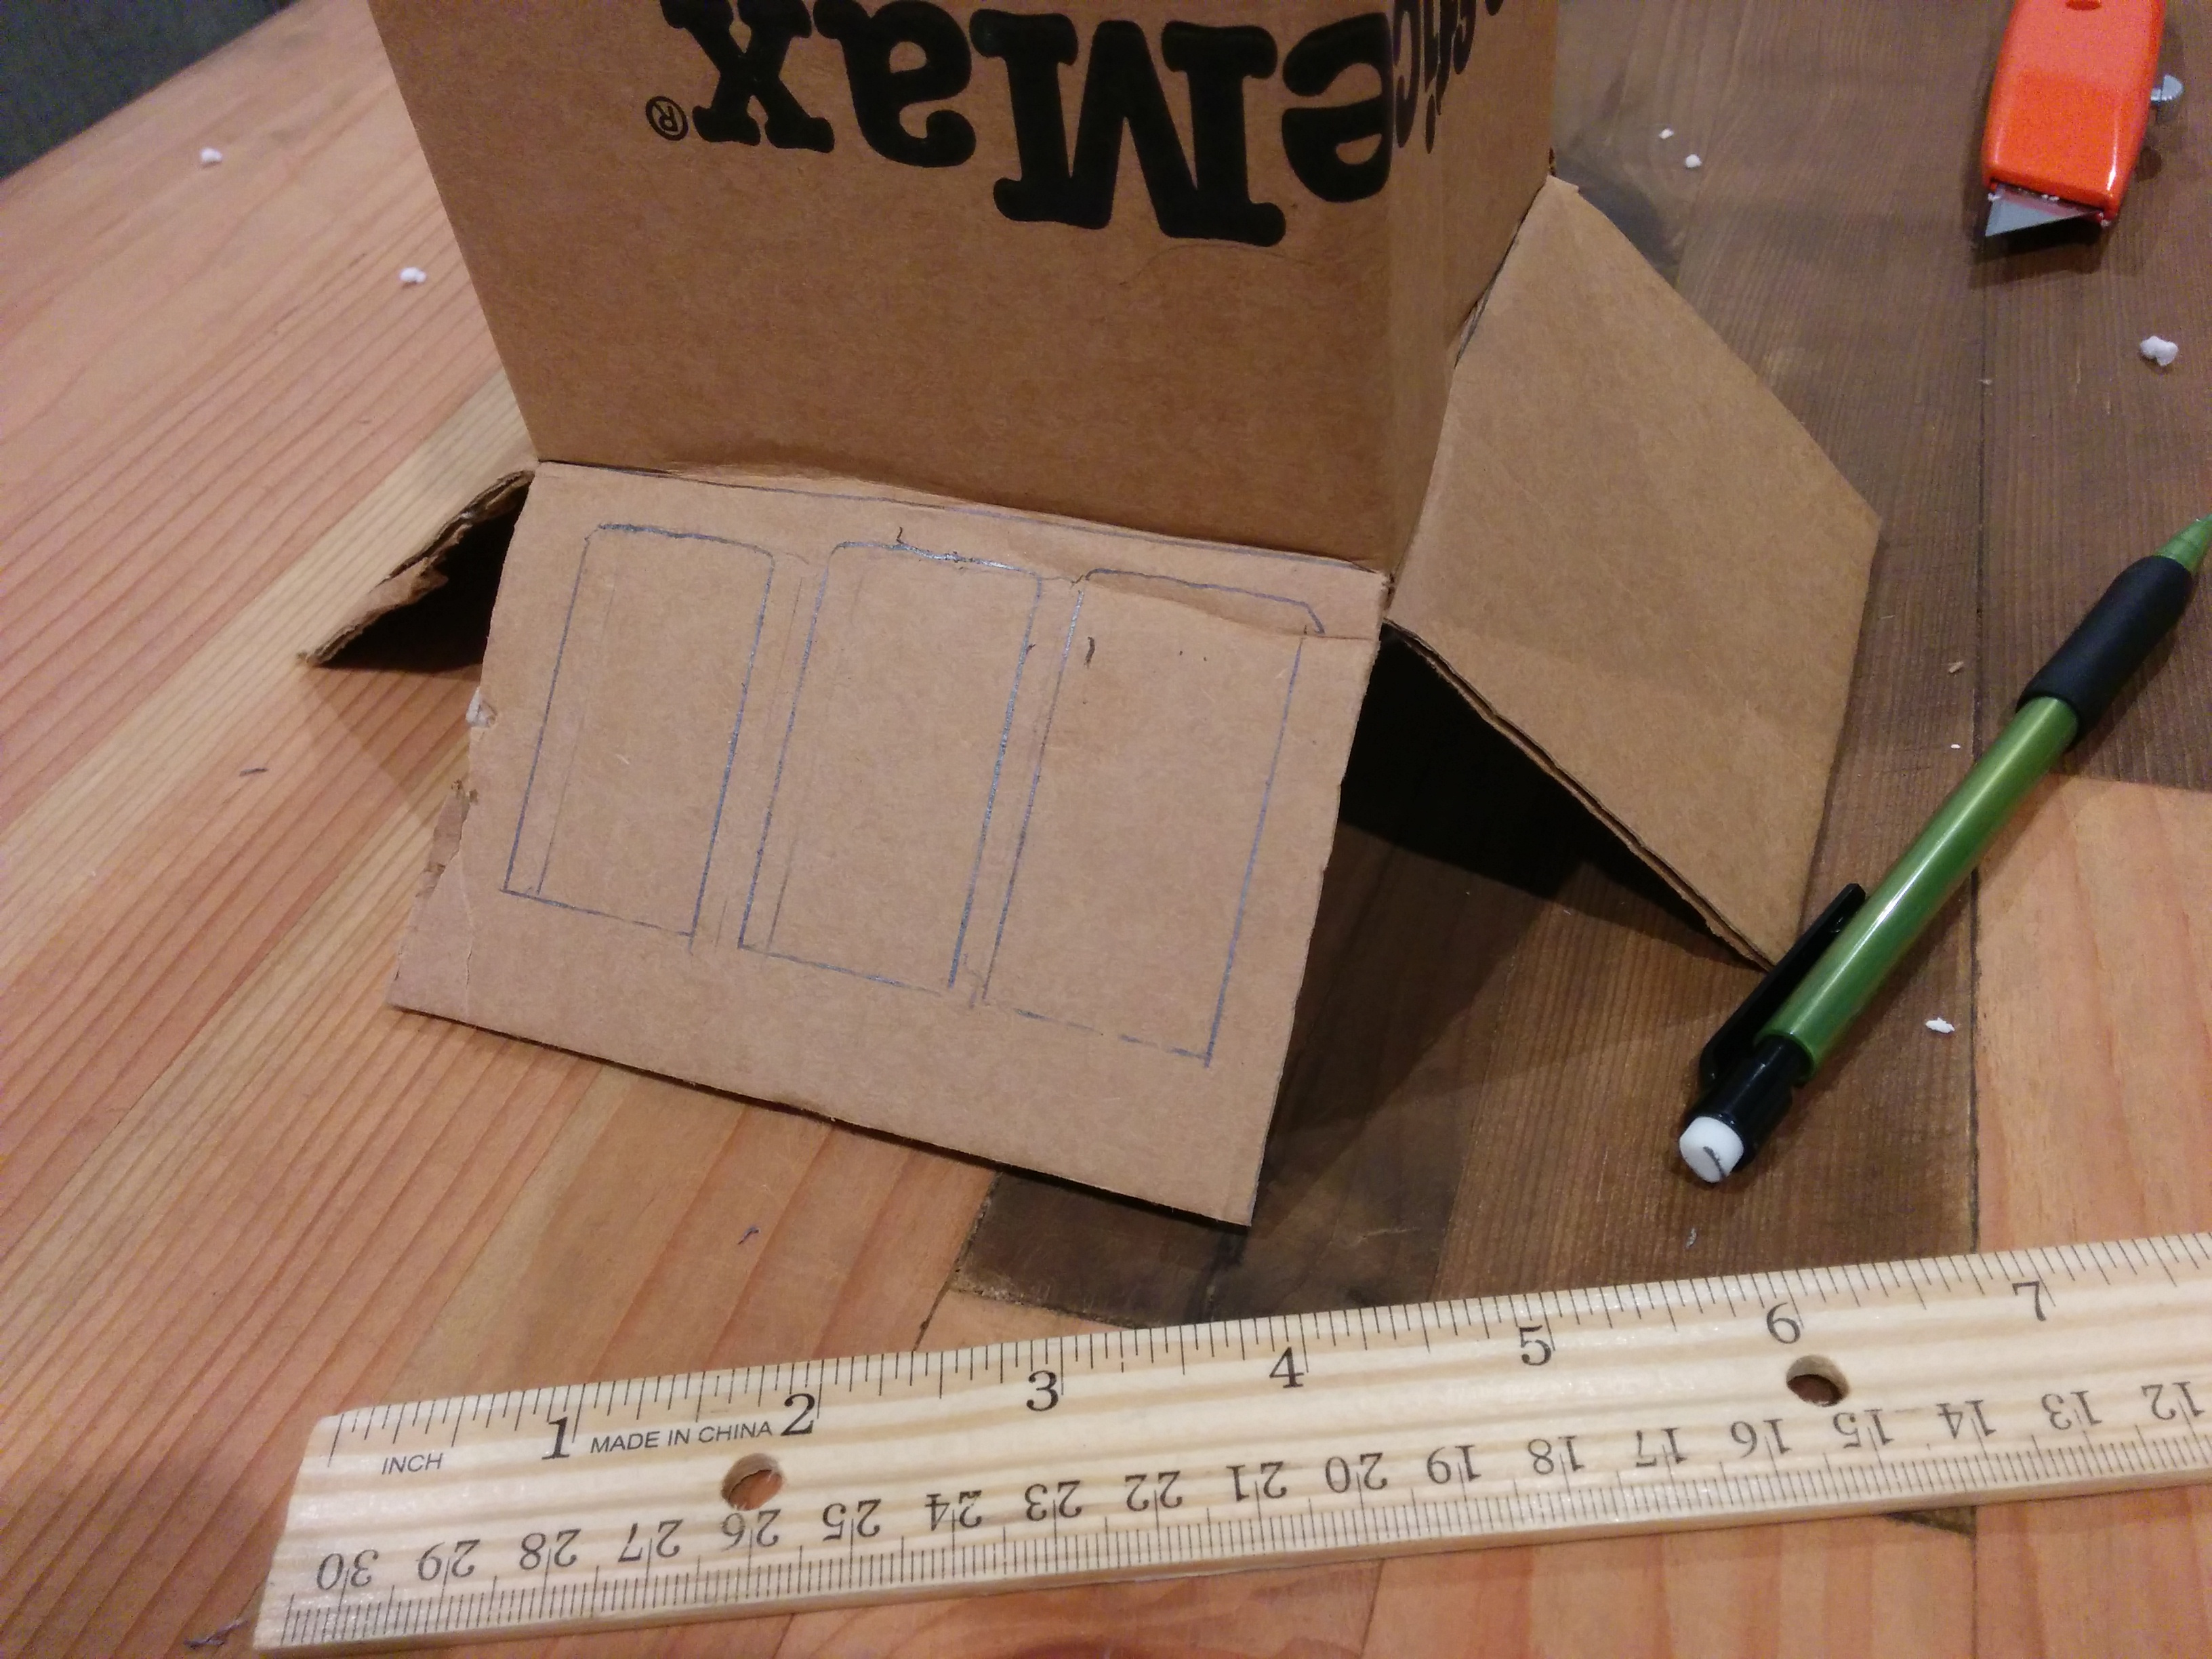
Getting there. But the legs need to allow more light out. I measured and drew my window holes, and cut with my box cutter. Not without some issues…

img_20161029_162055 img_20161029_163157

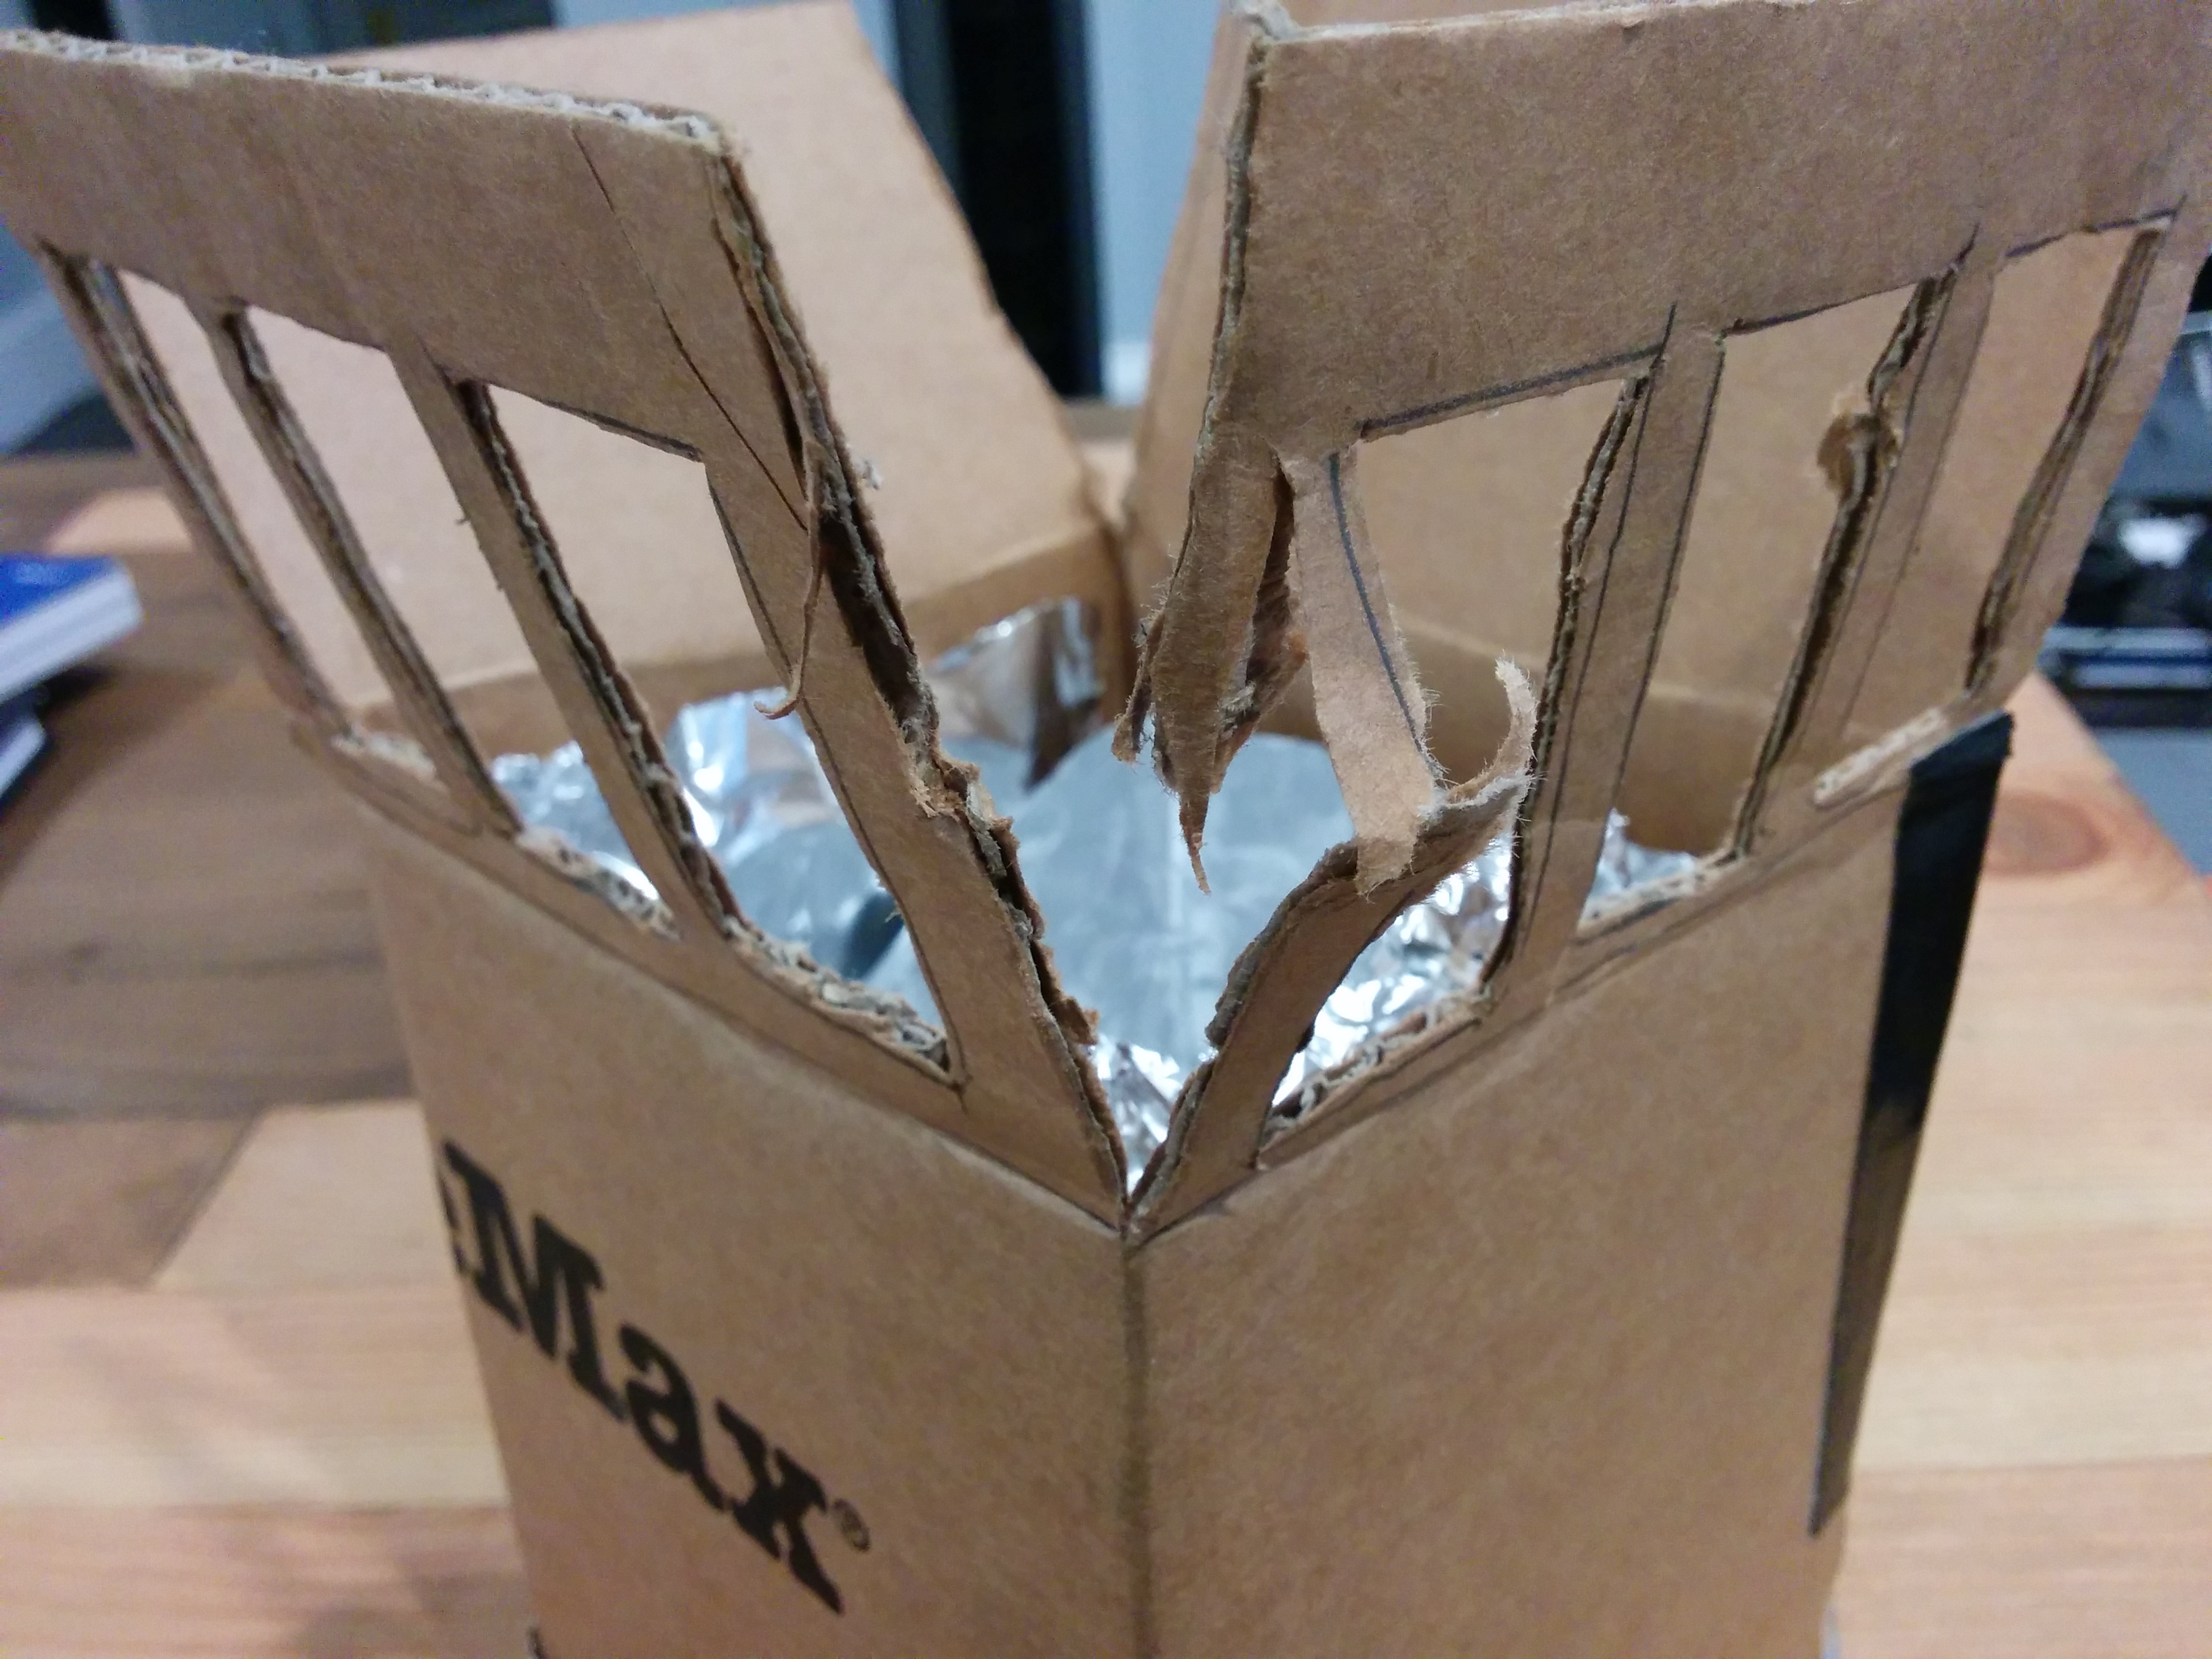
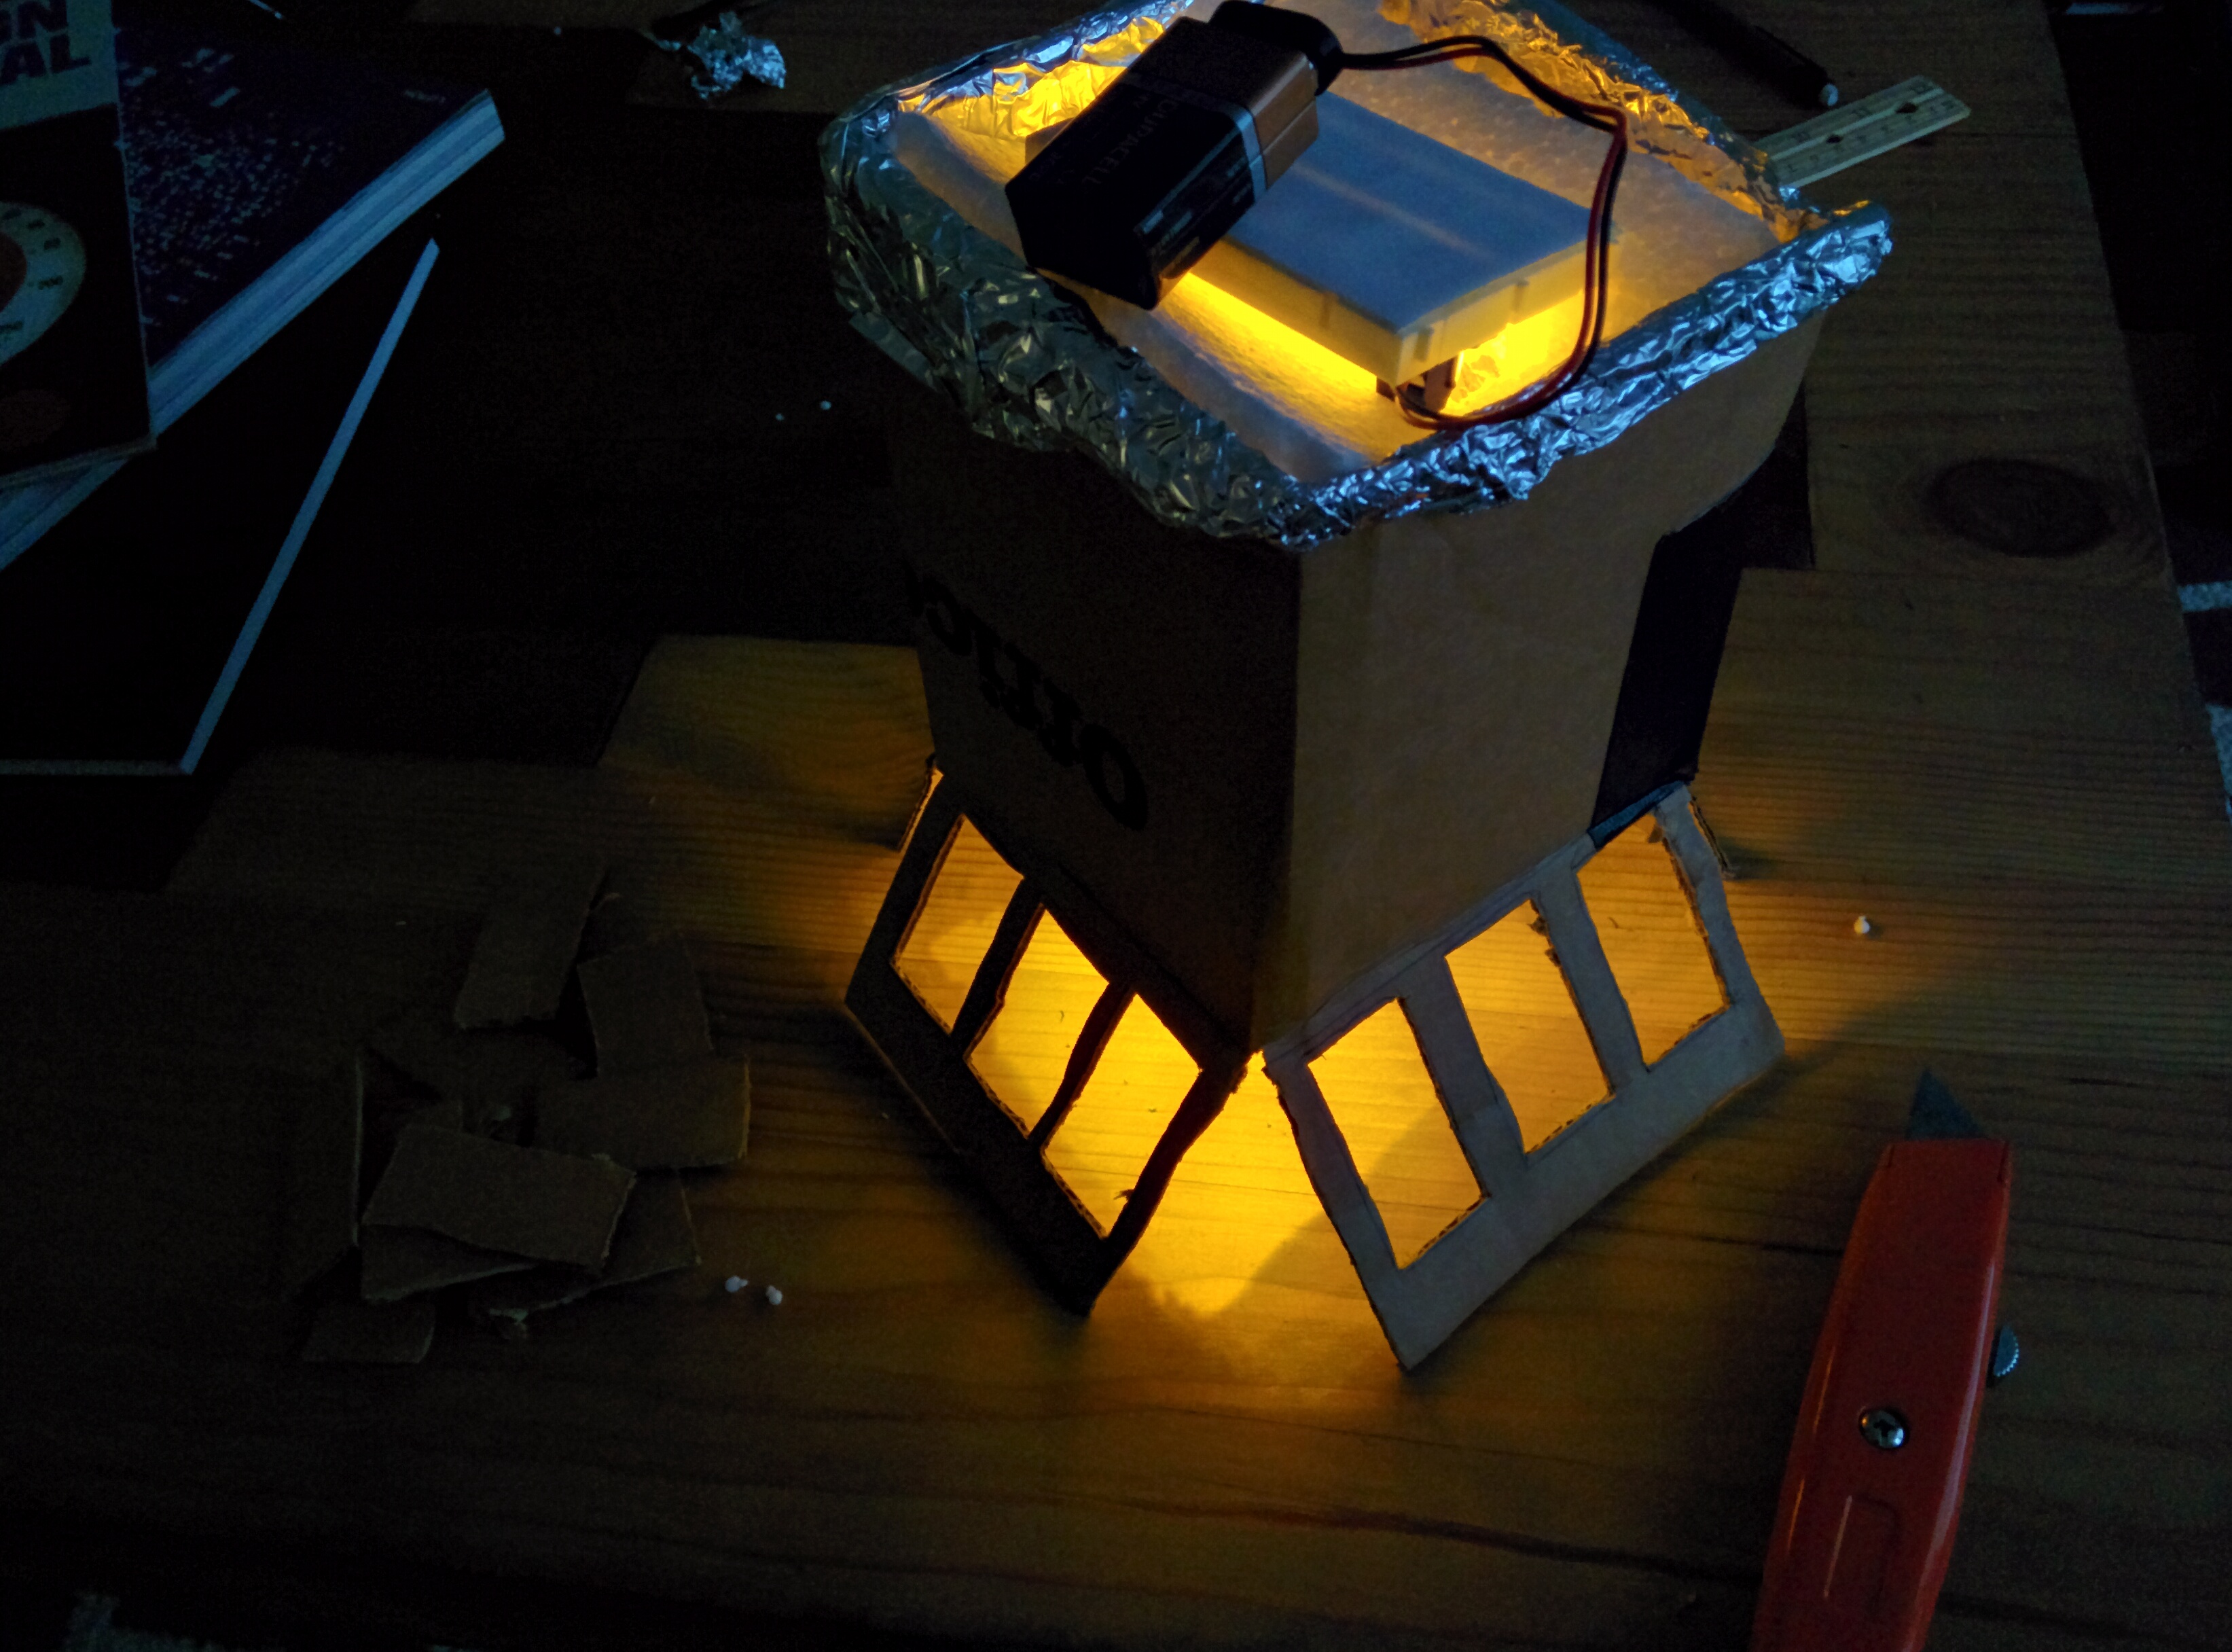
But eventually they were all clear. This was the moment of truth: would the legs hold the weight of the entire light source?

img_20161029_164157

It stayed up! Also, this gave me a moment to turn off the lights and test the LEDs. Glad I went with the yellow, which provide a much warmer glow.

img_20161029_163725

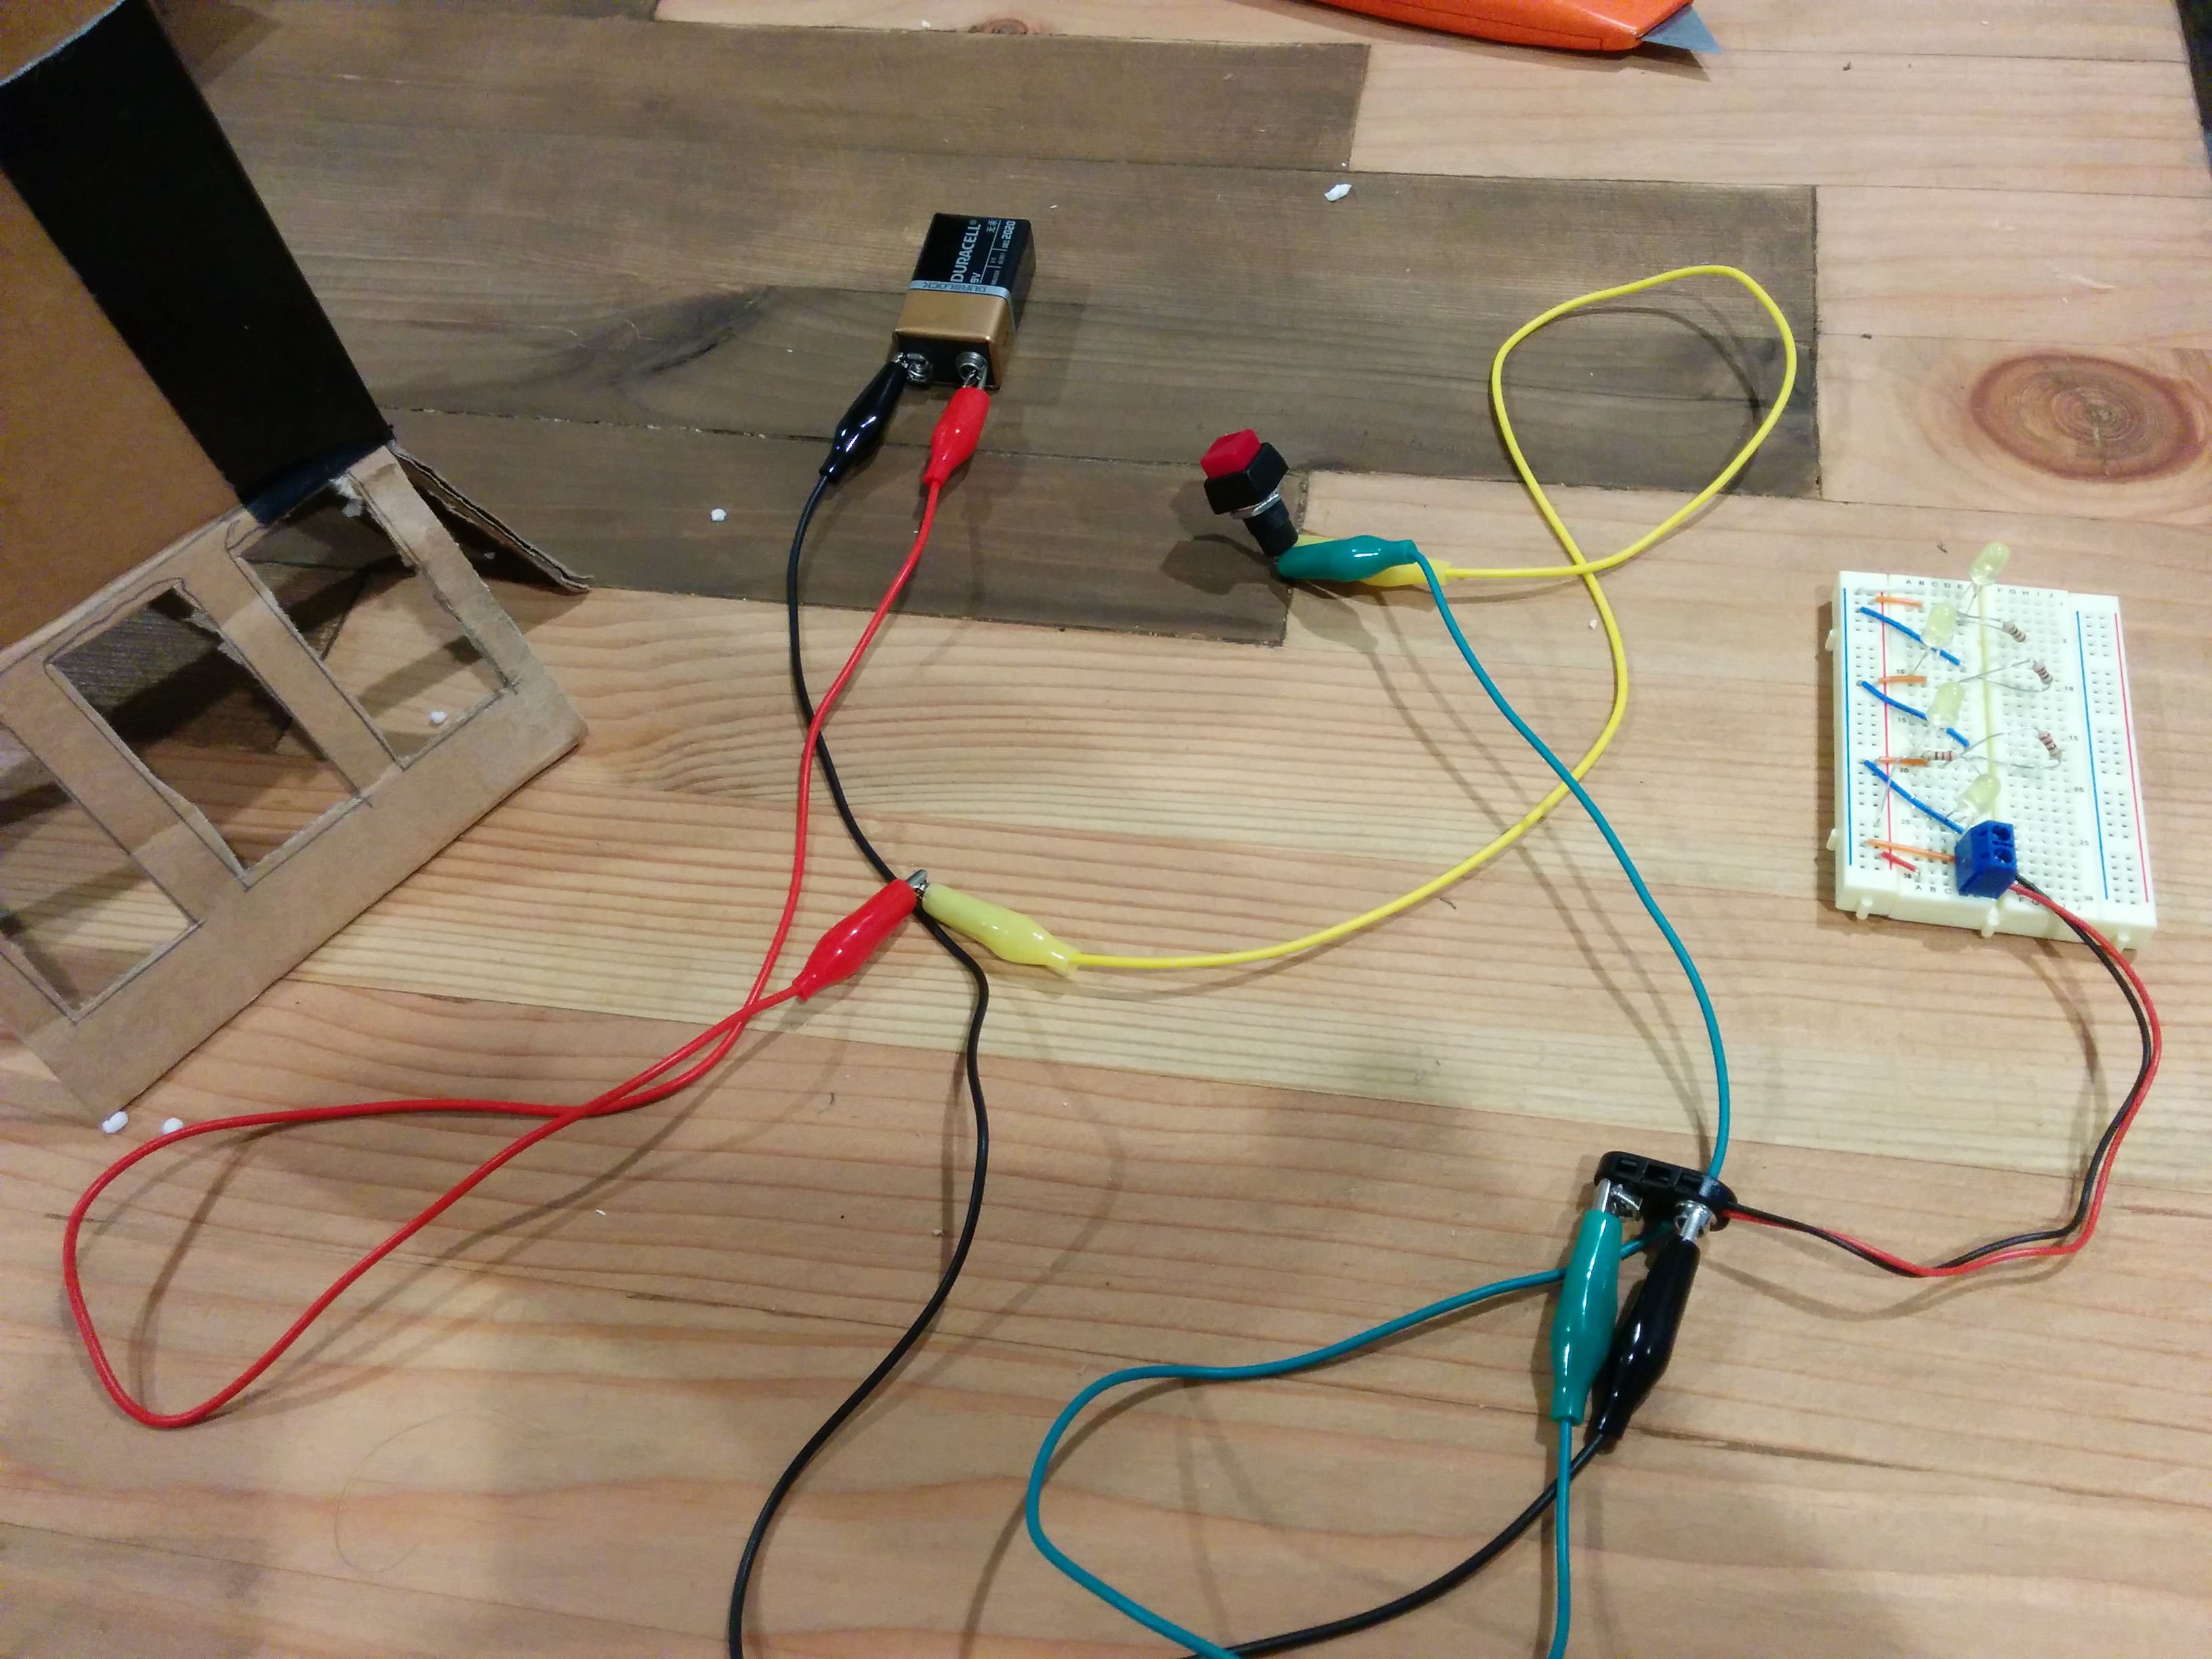
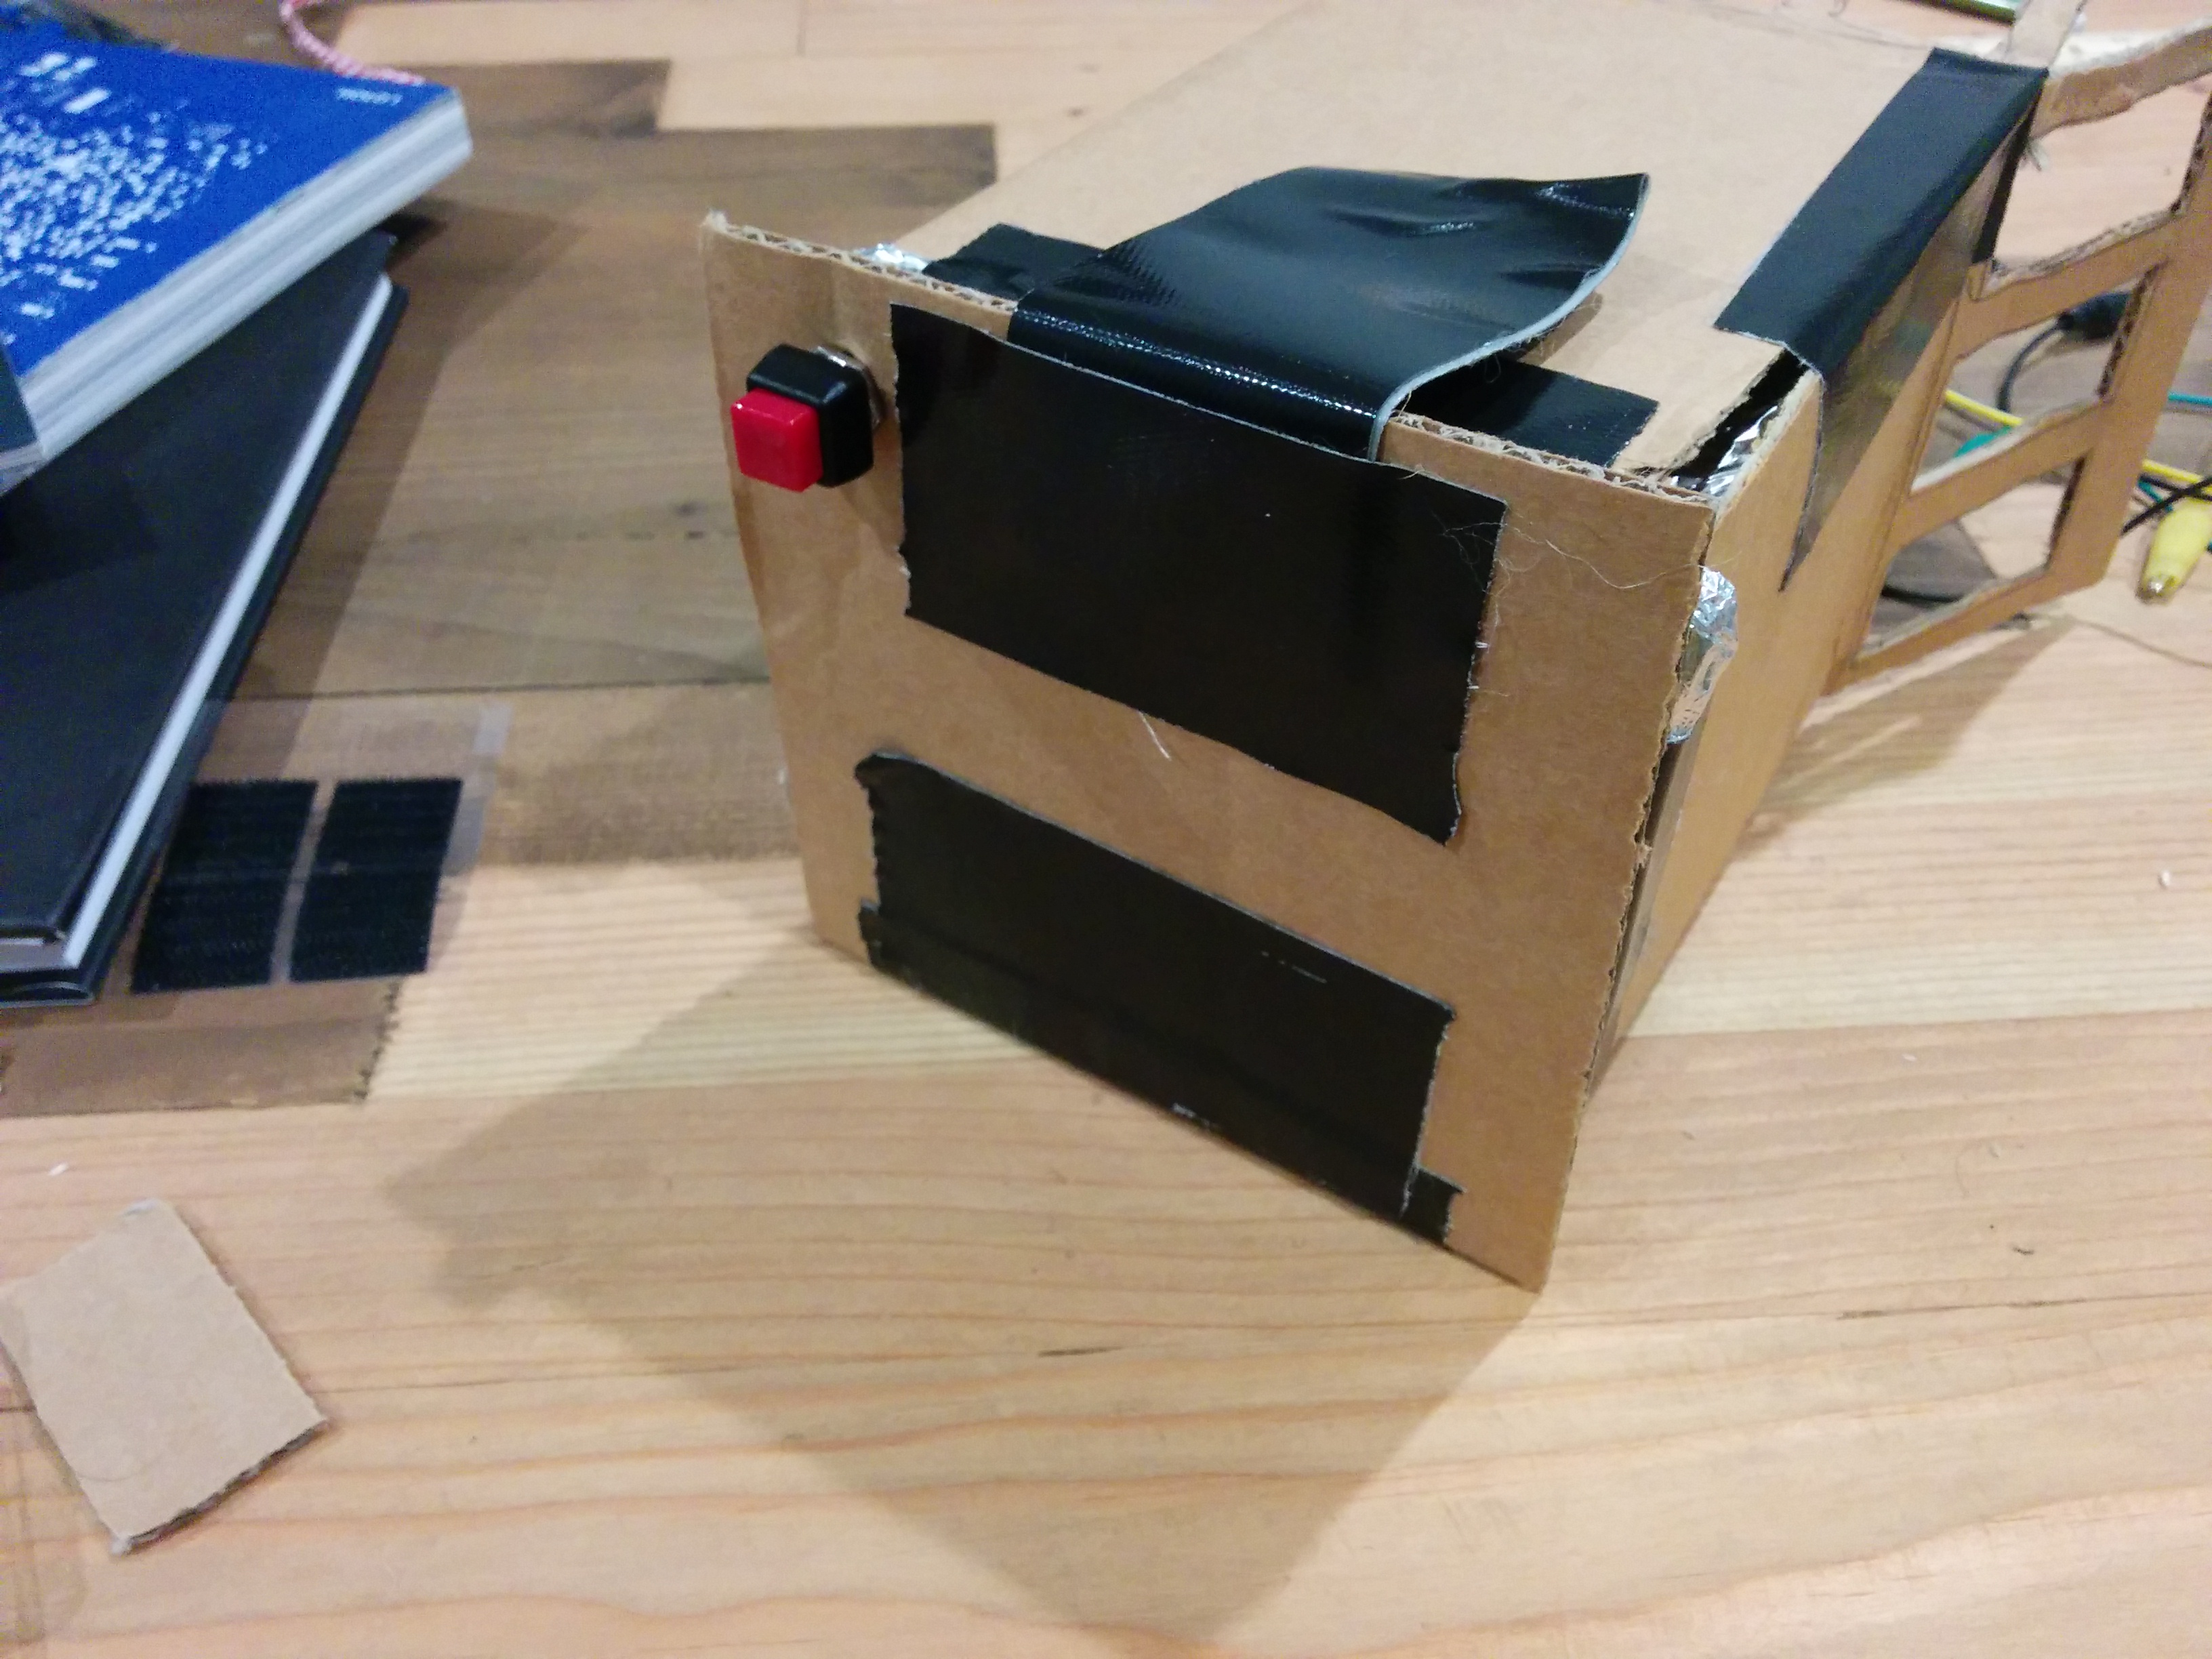
The switch was tested with alligator clips, then made more permanent with male to female jumper wire, a block terminal, and the soft touch switch. I cut another piece of cardboard to make a more permanent top, and attached the breadboard to it via a patch of velcro.

img_20161030_163250

img_20161030_165725

img_20161030_164733

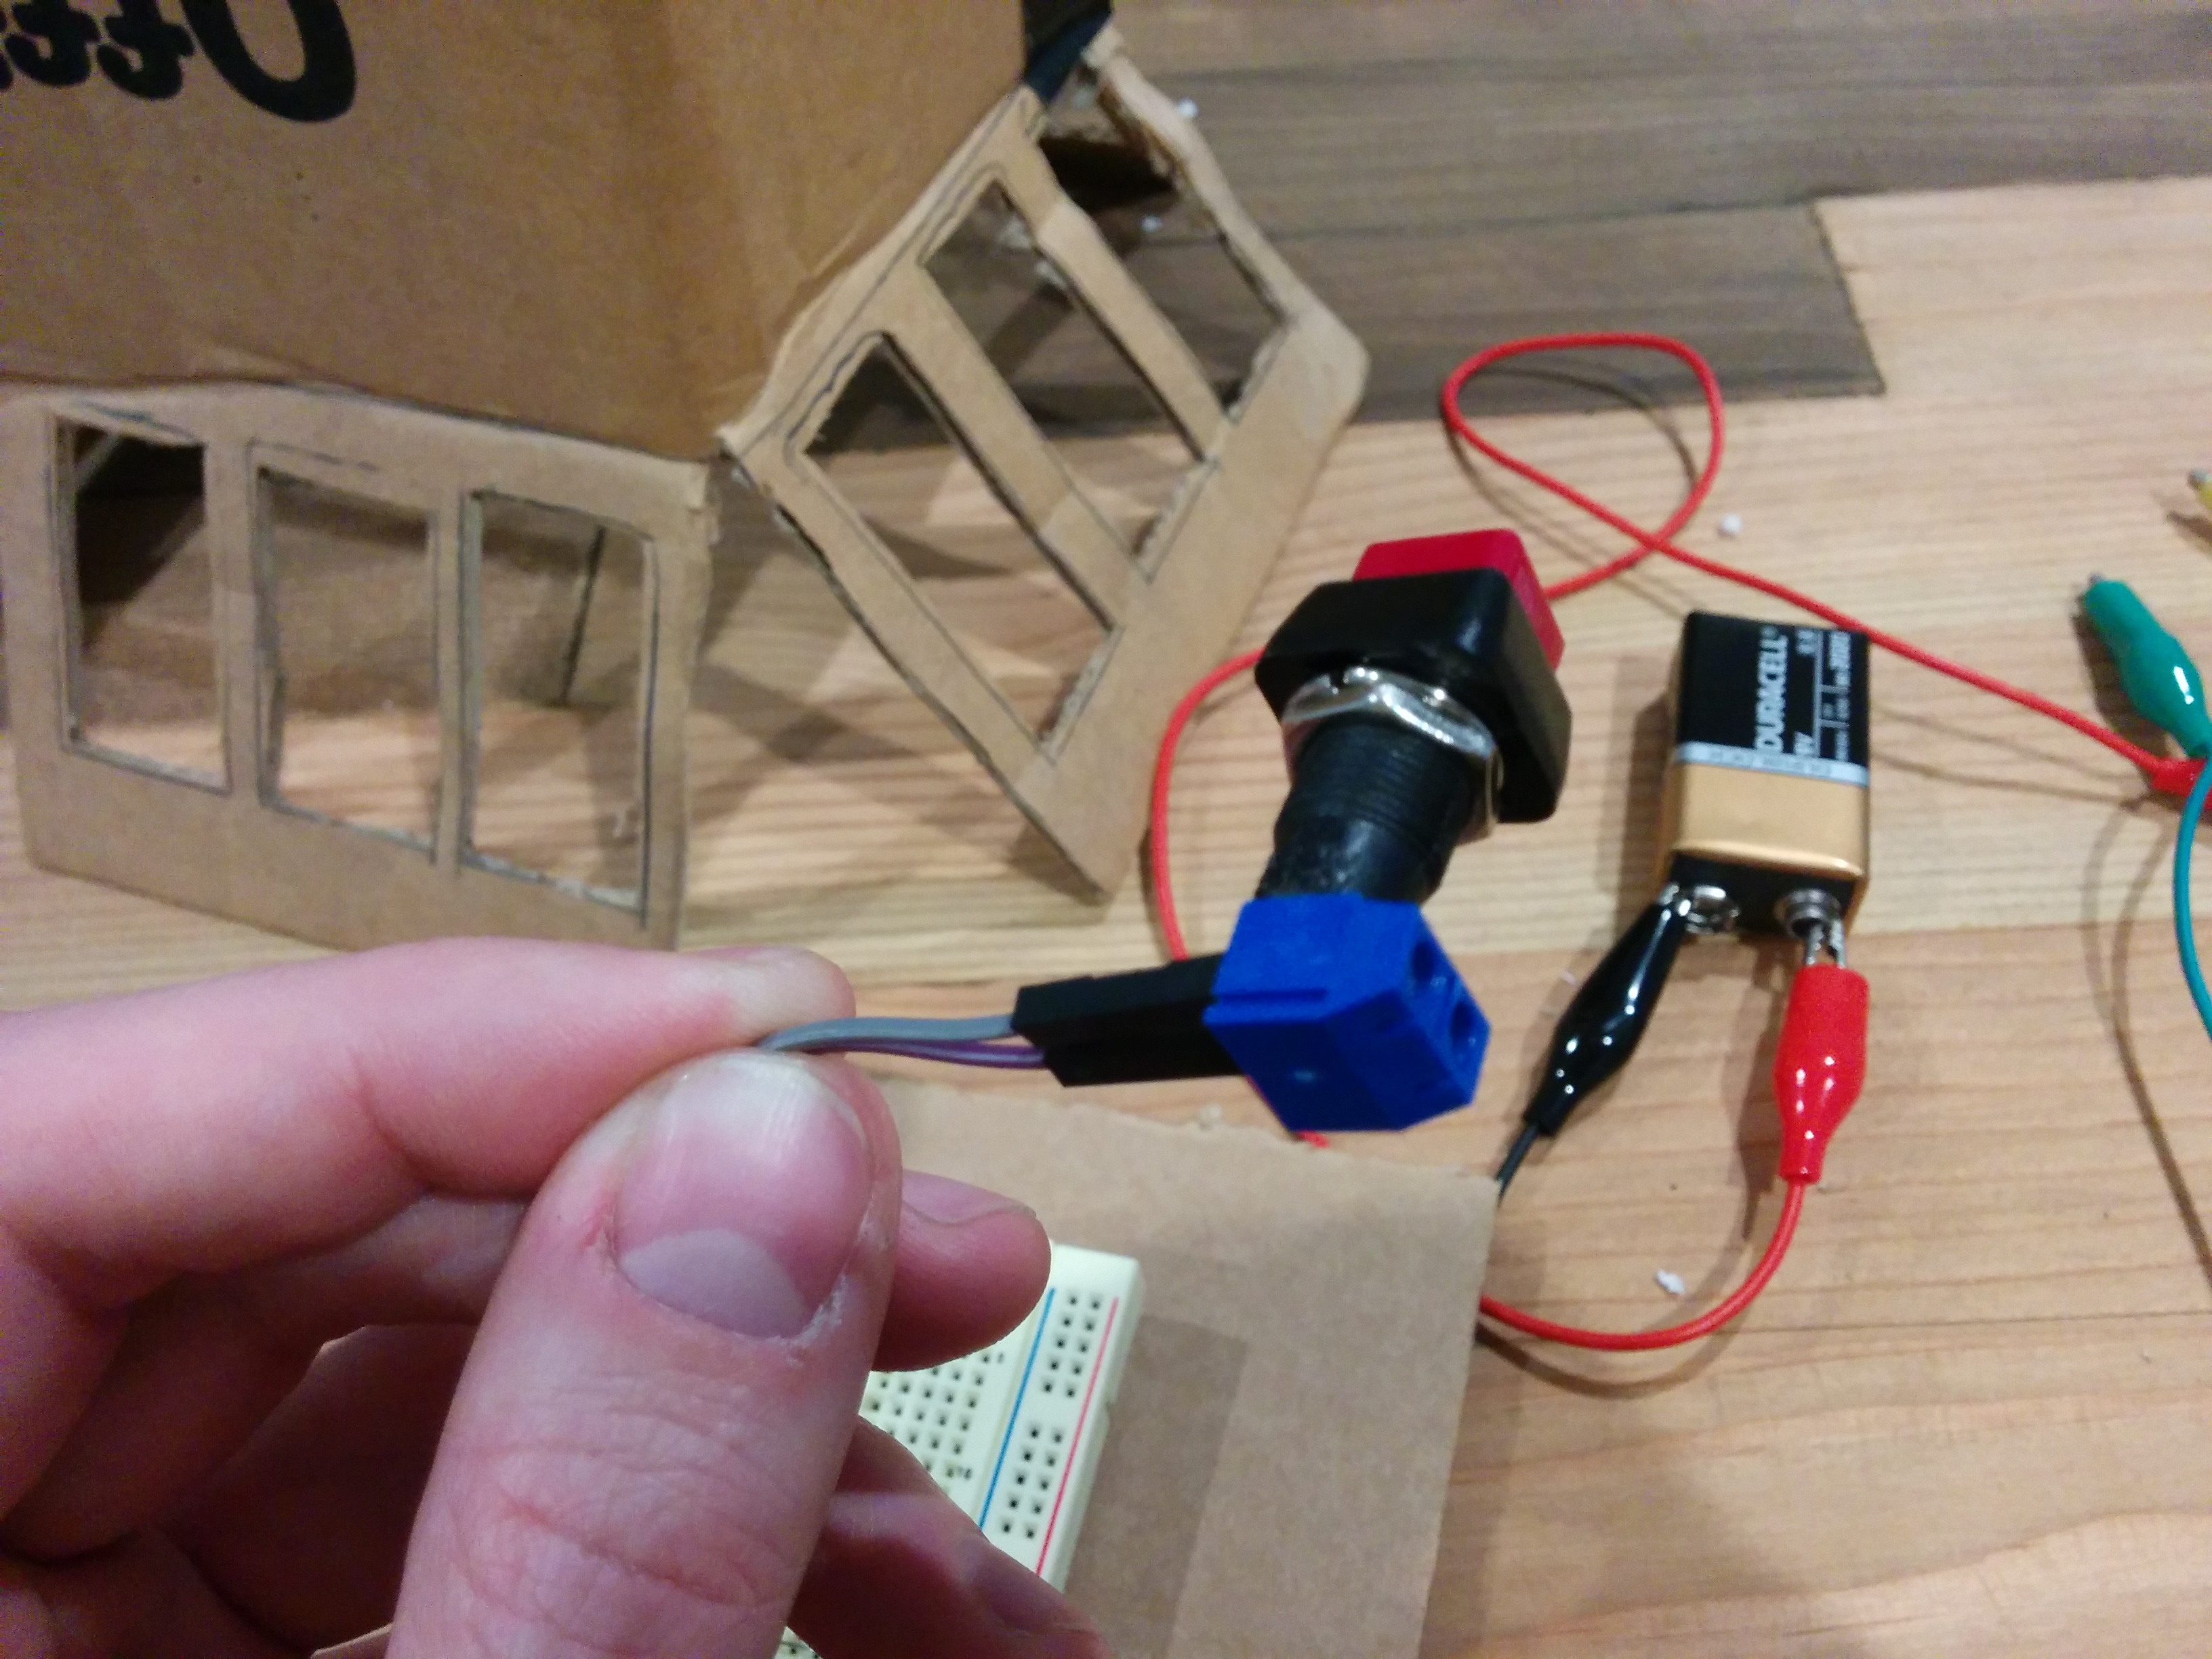
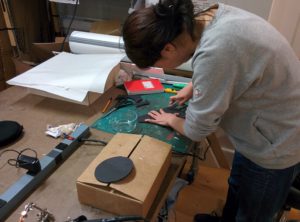
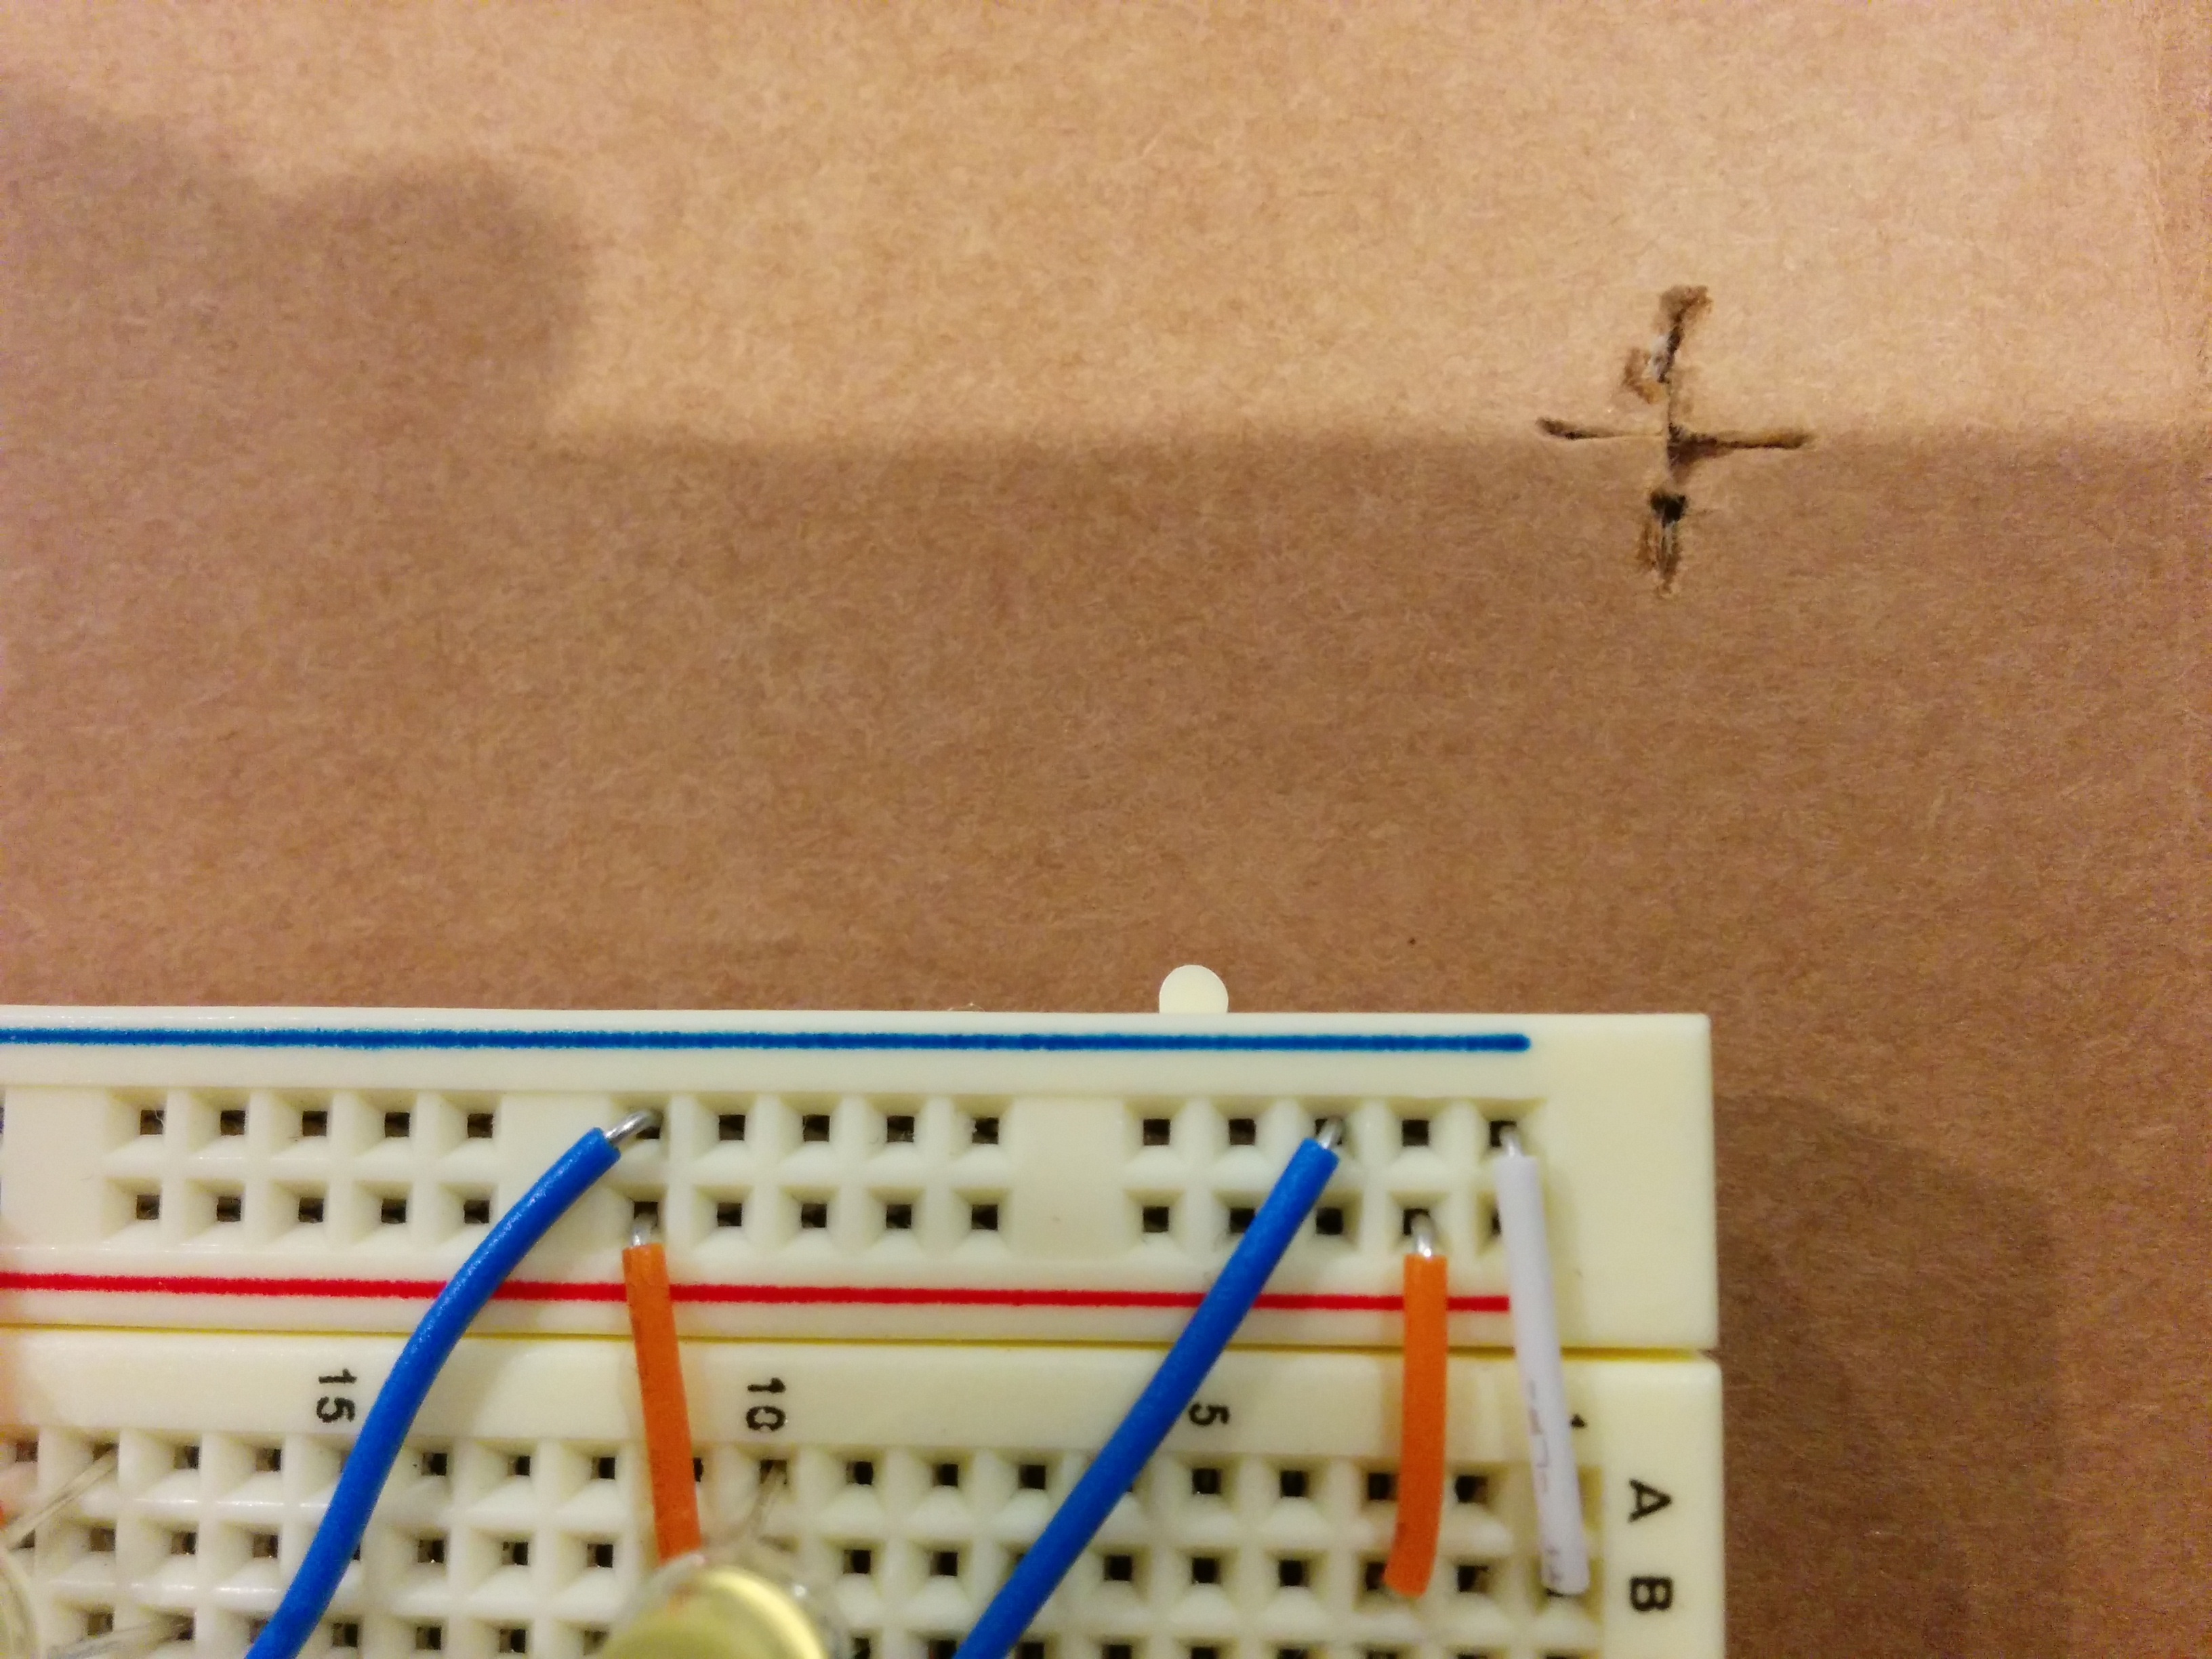
A cross pattern cut was made, which allowed me to push the push button base through while keeping as much tension as possible to hold the button in place.

img_20161030_171029 img_20161030_171312

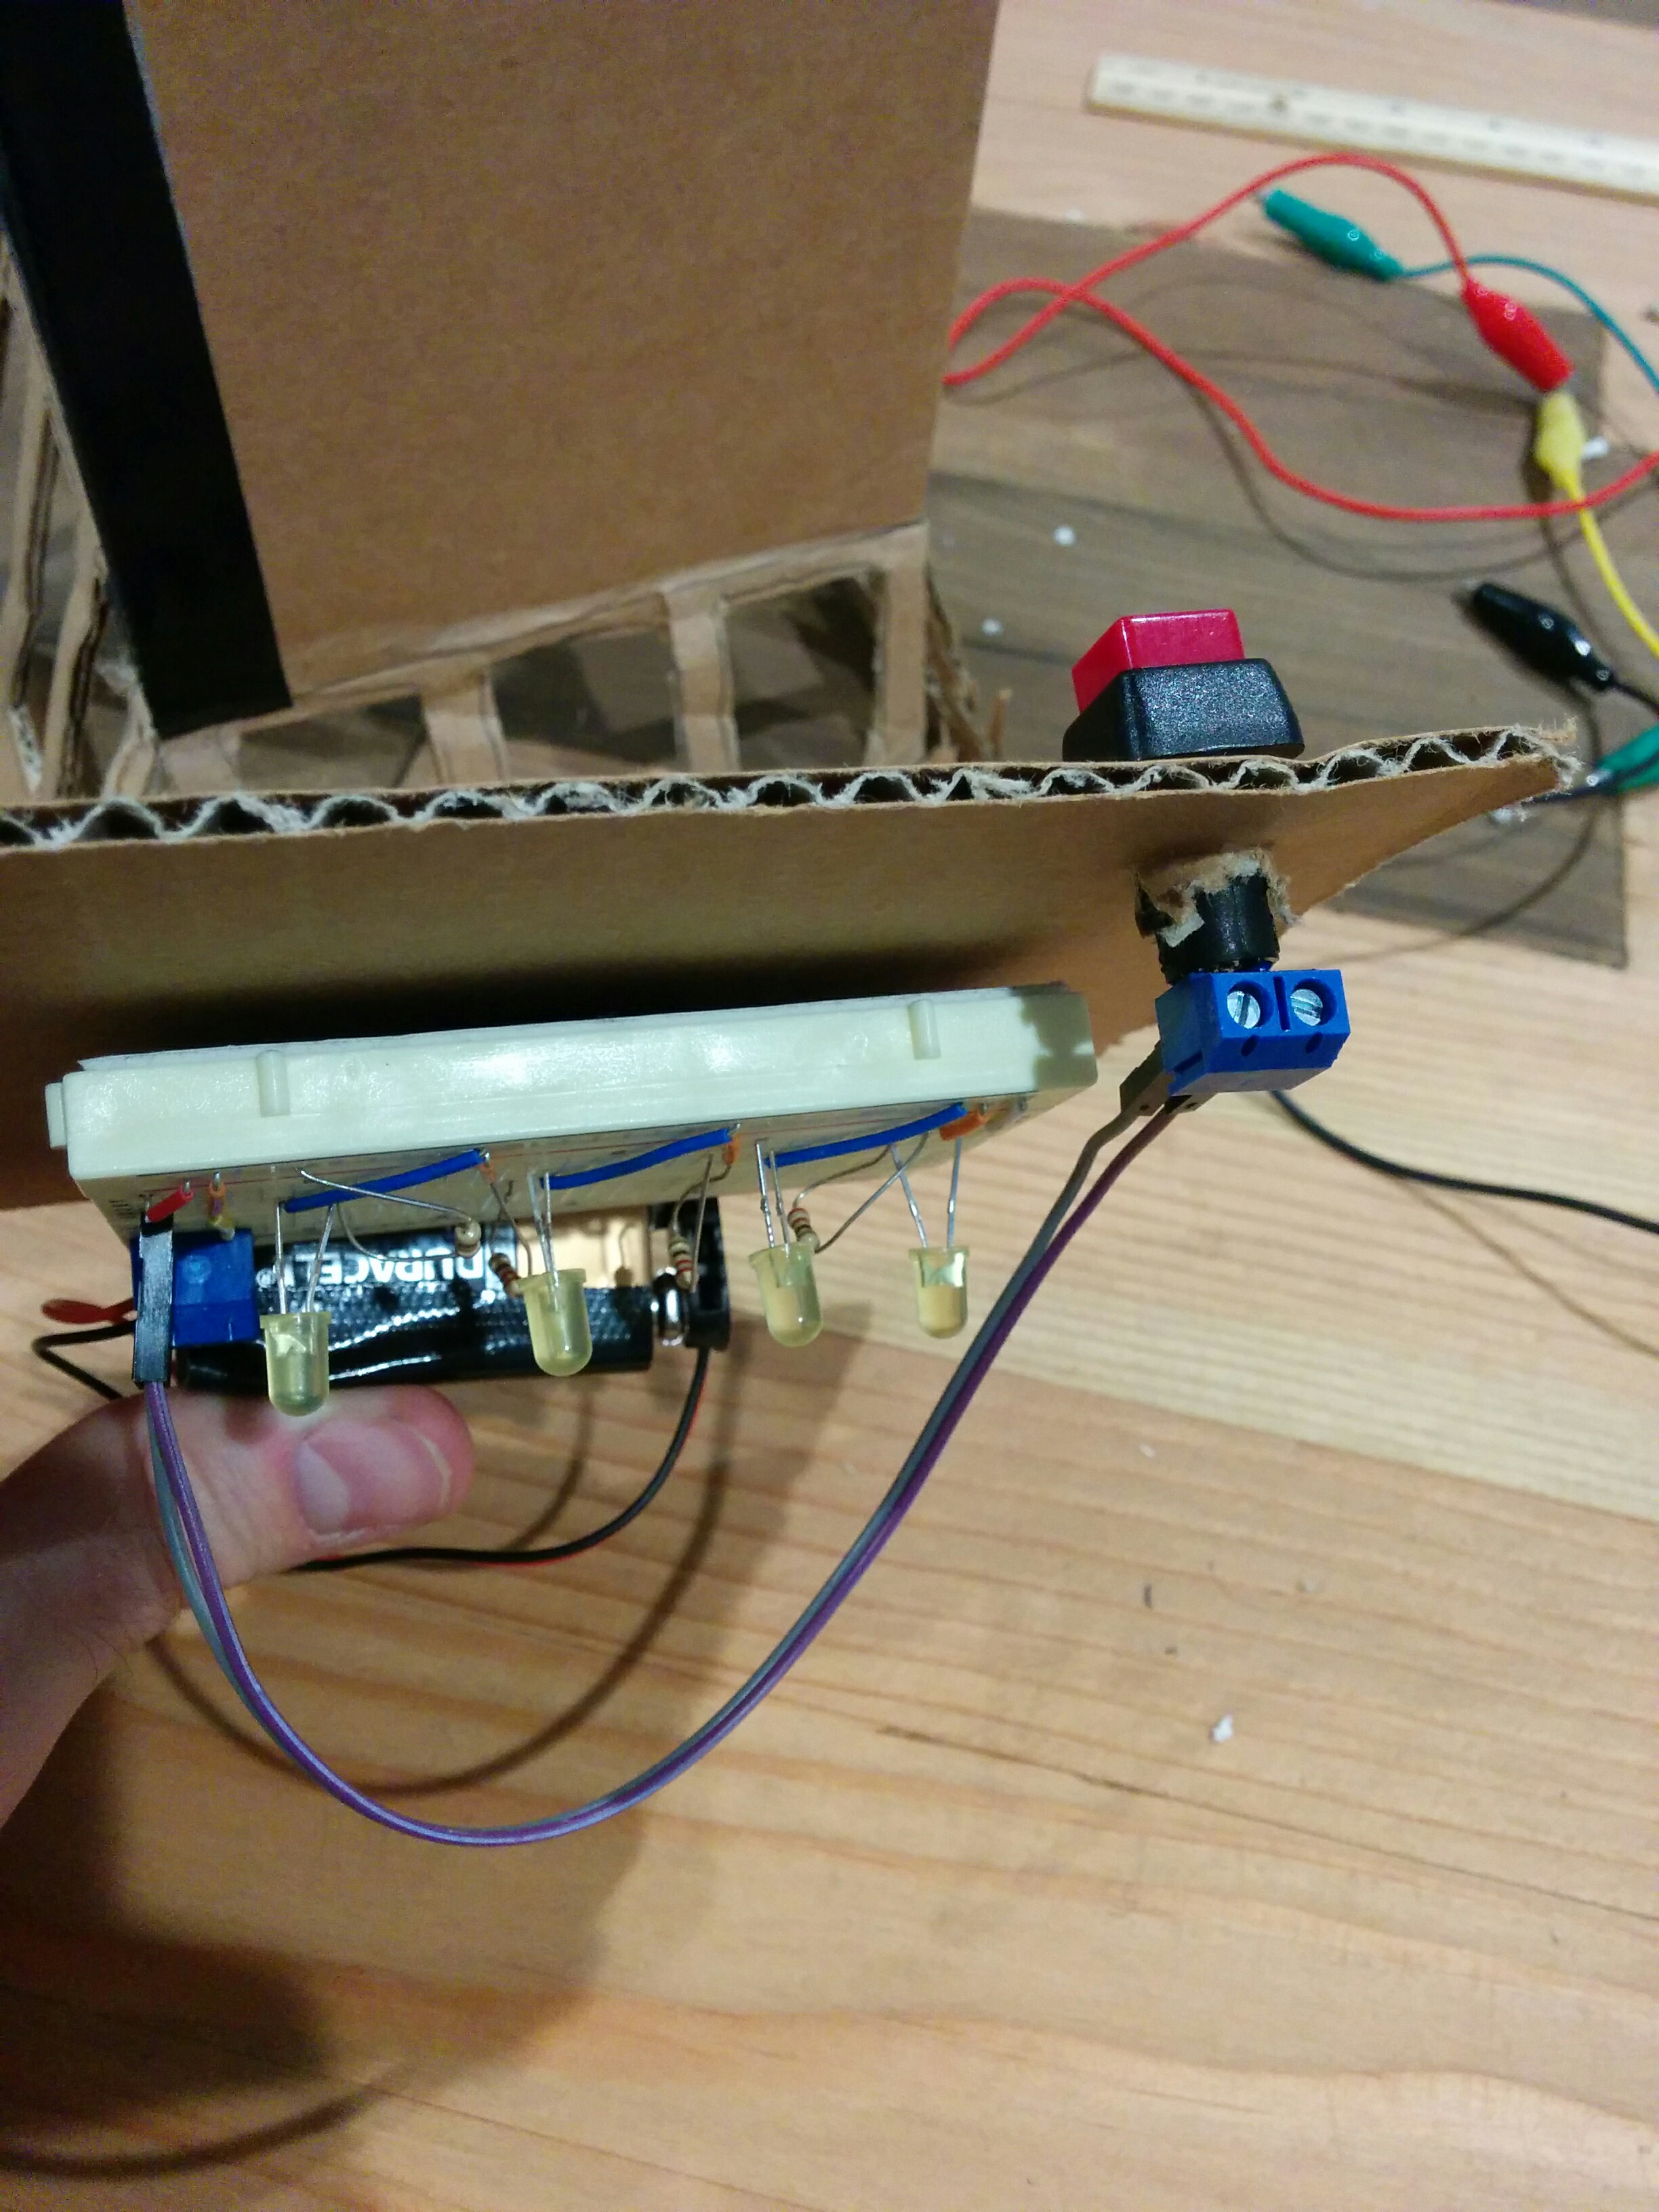
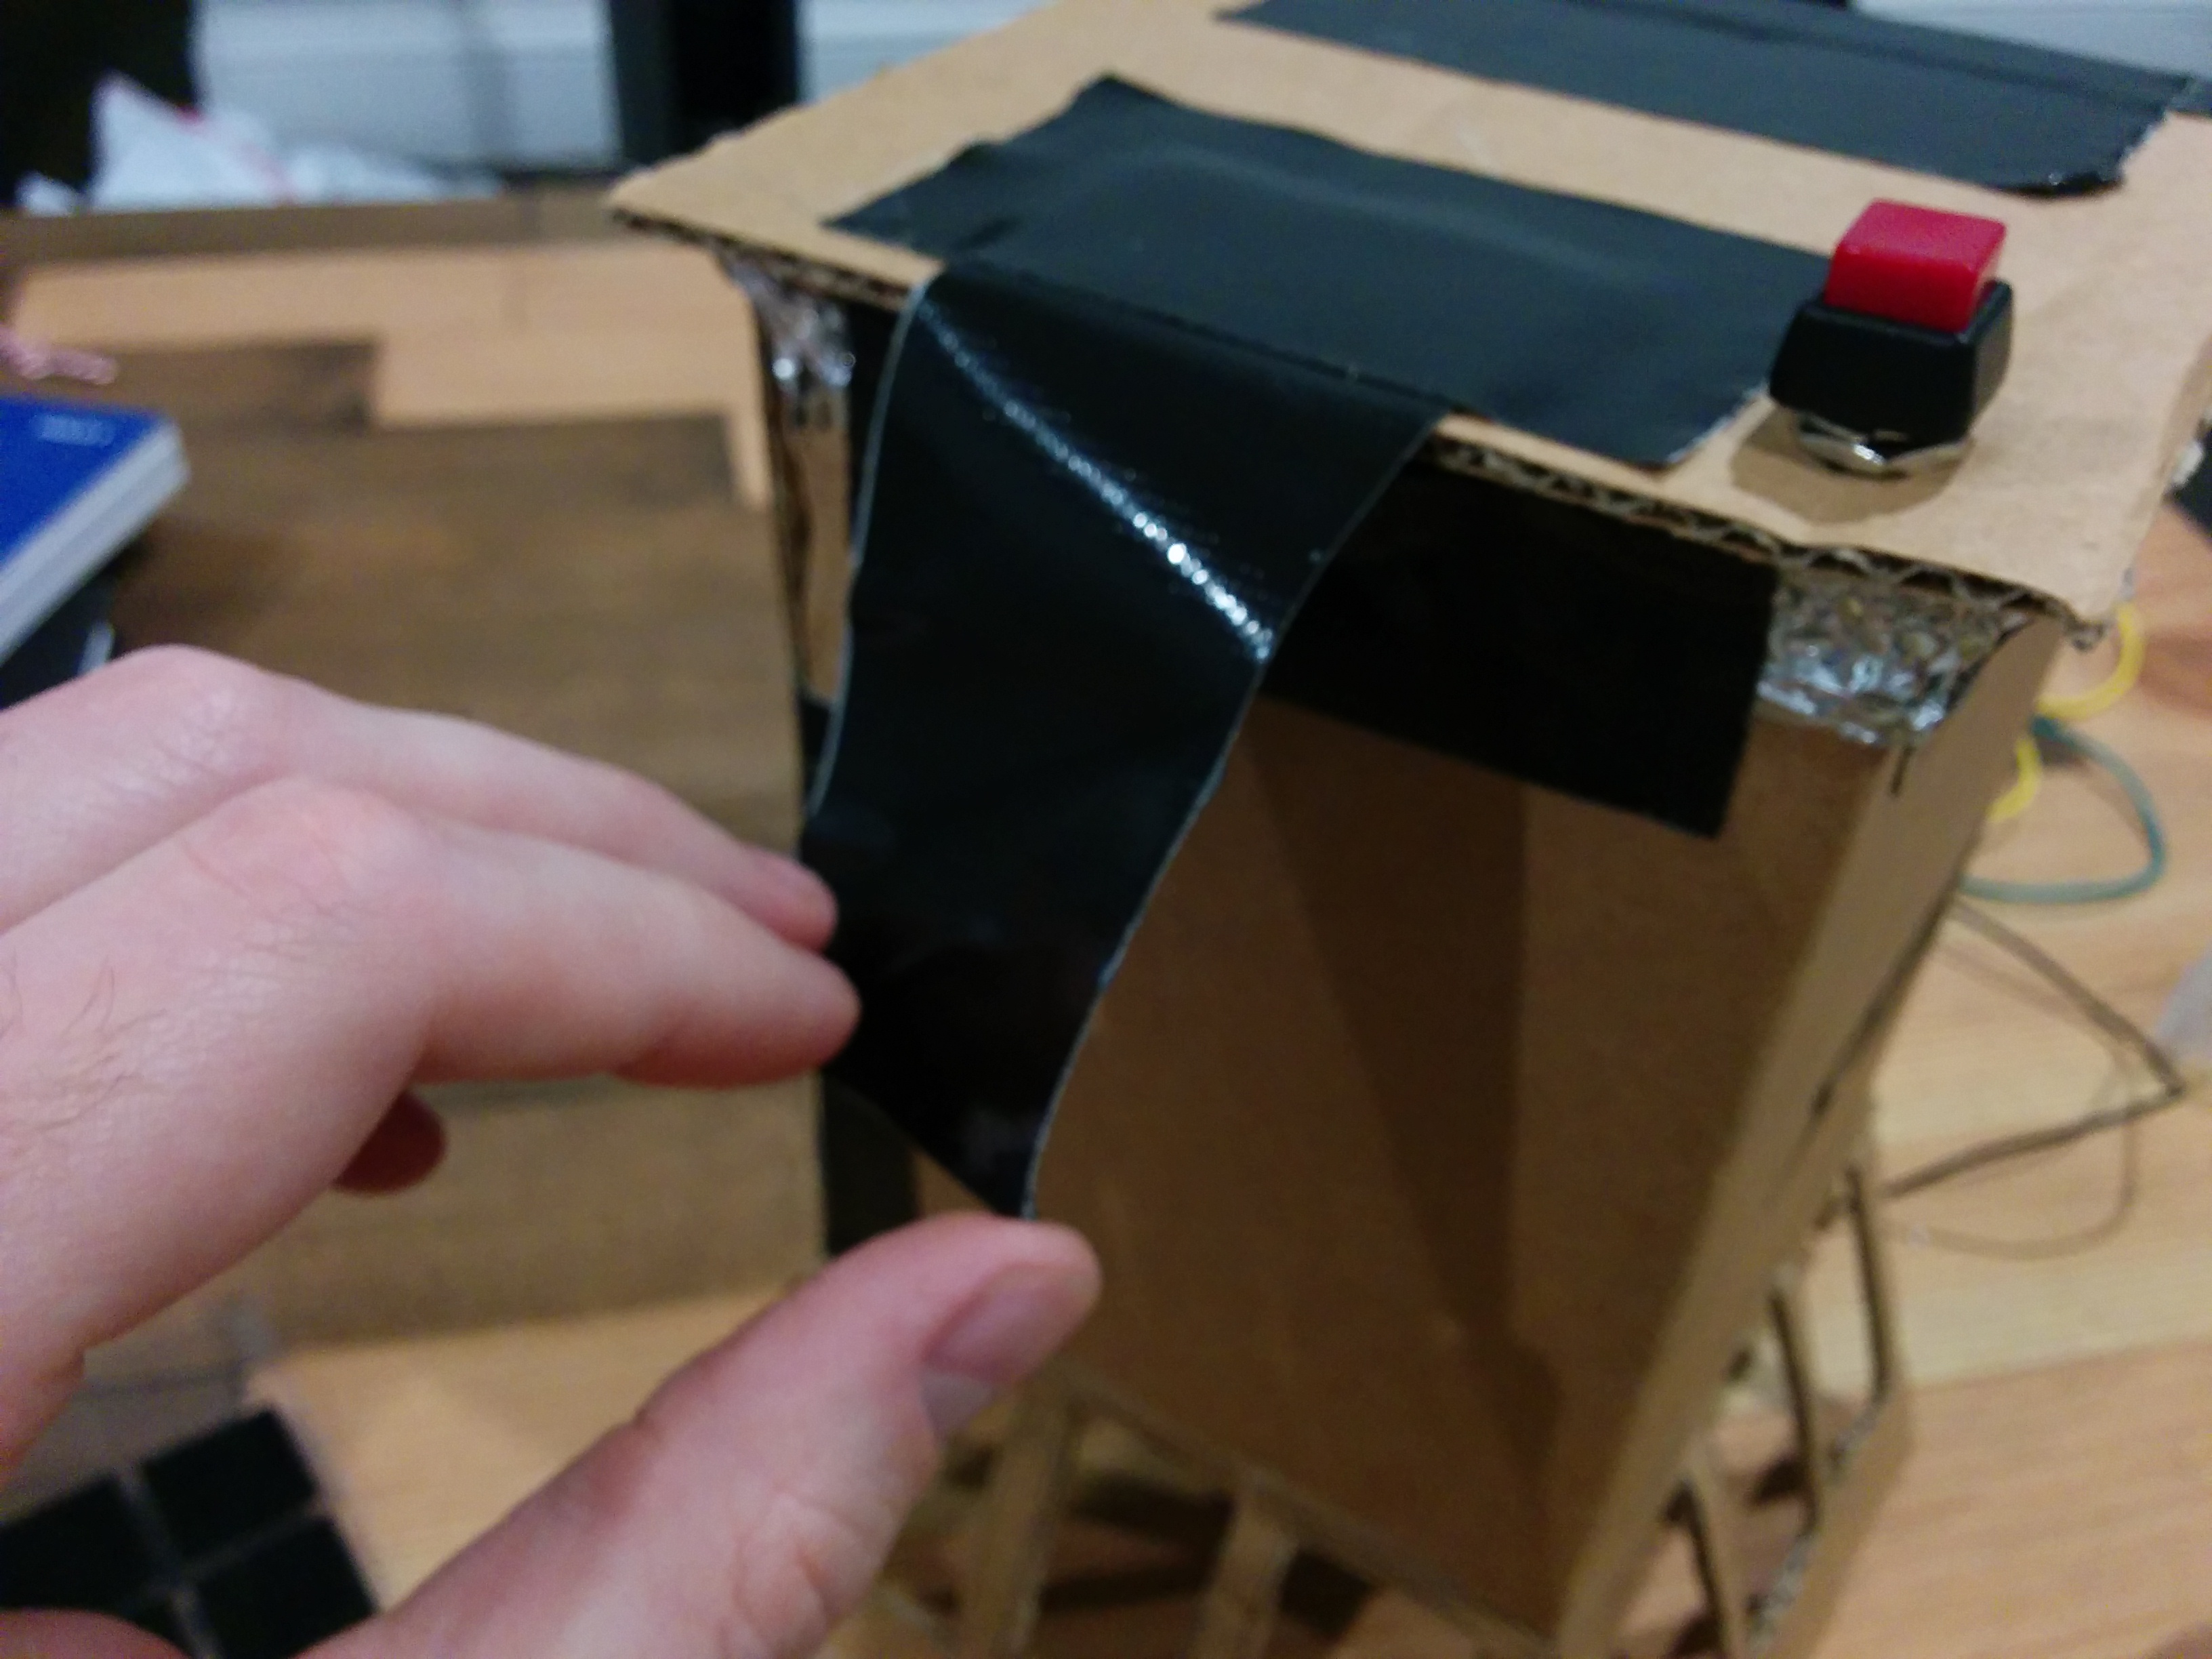
Then I taped one side of this ‘lid’ to the top of the structure. Instead of taping the entire piece down, I created a kind of flap out of duct tape on the other side. This attaches to the side of the light with velcro. This allows access to the inside, for electrical troubleshooting, replacing batteries, or adding/removing LEDs.

img_20161030_172033 img_20161030_172041 img_20161030_172219 img_20161030_172247

List of tools used

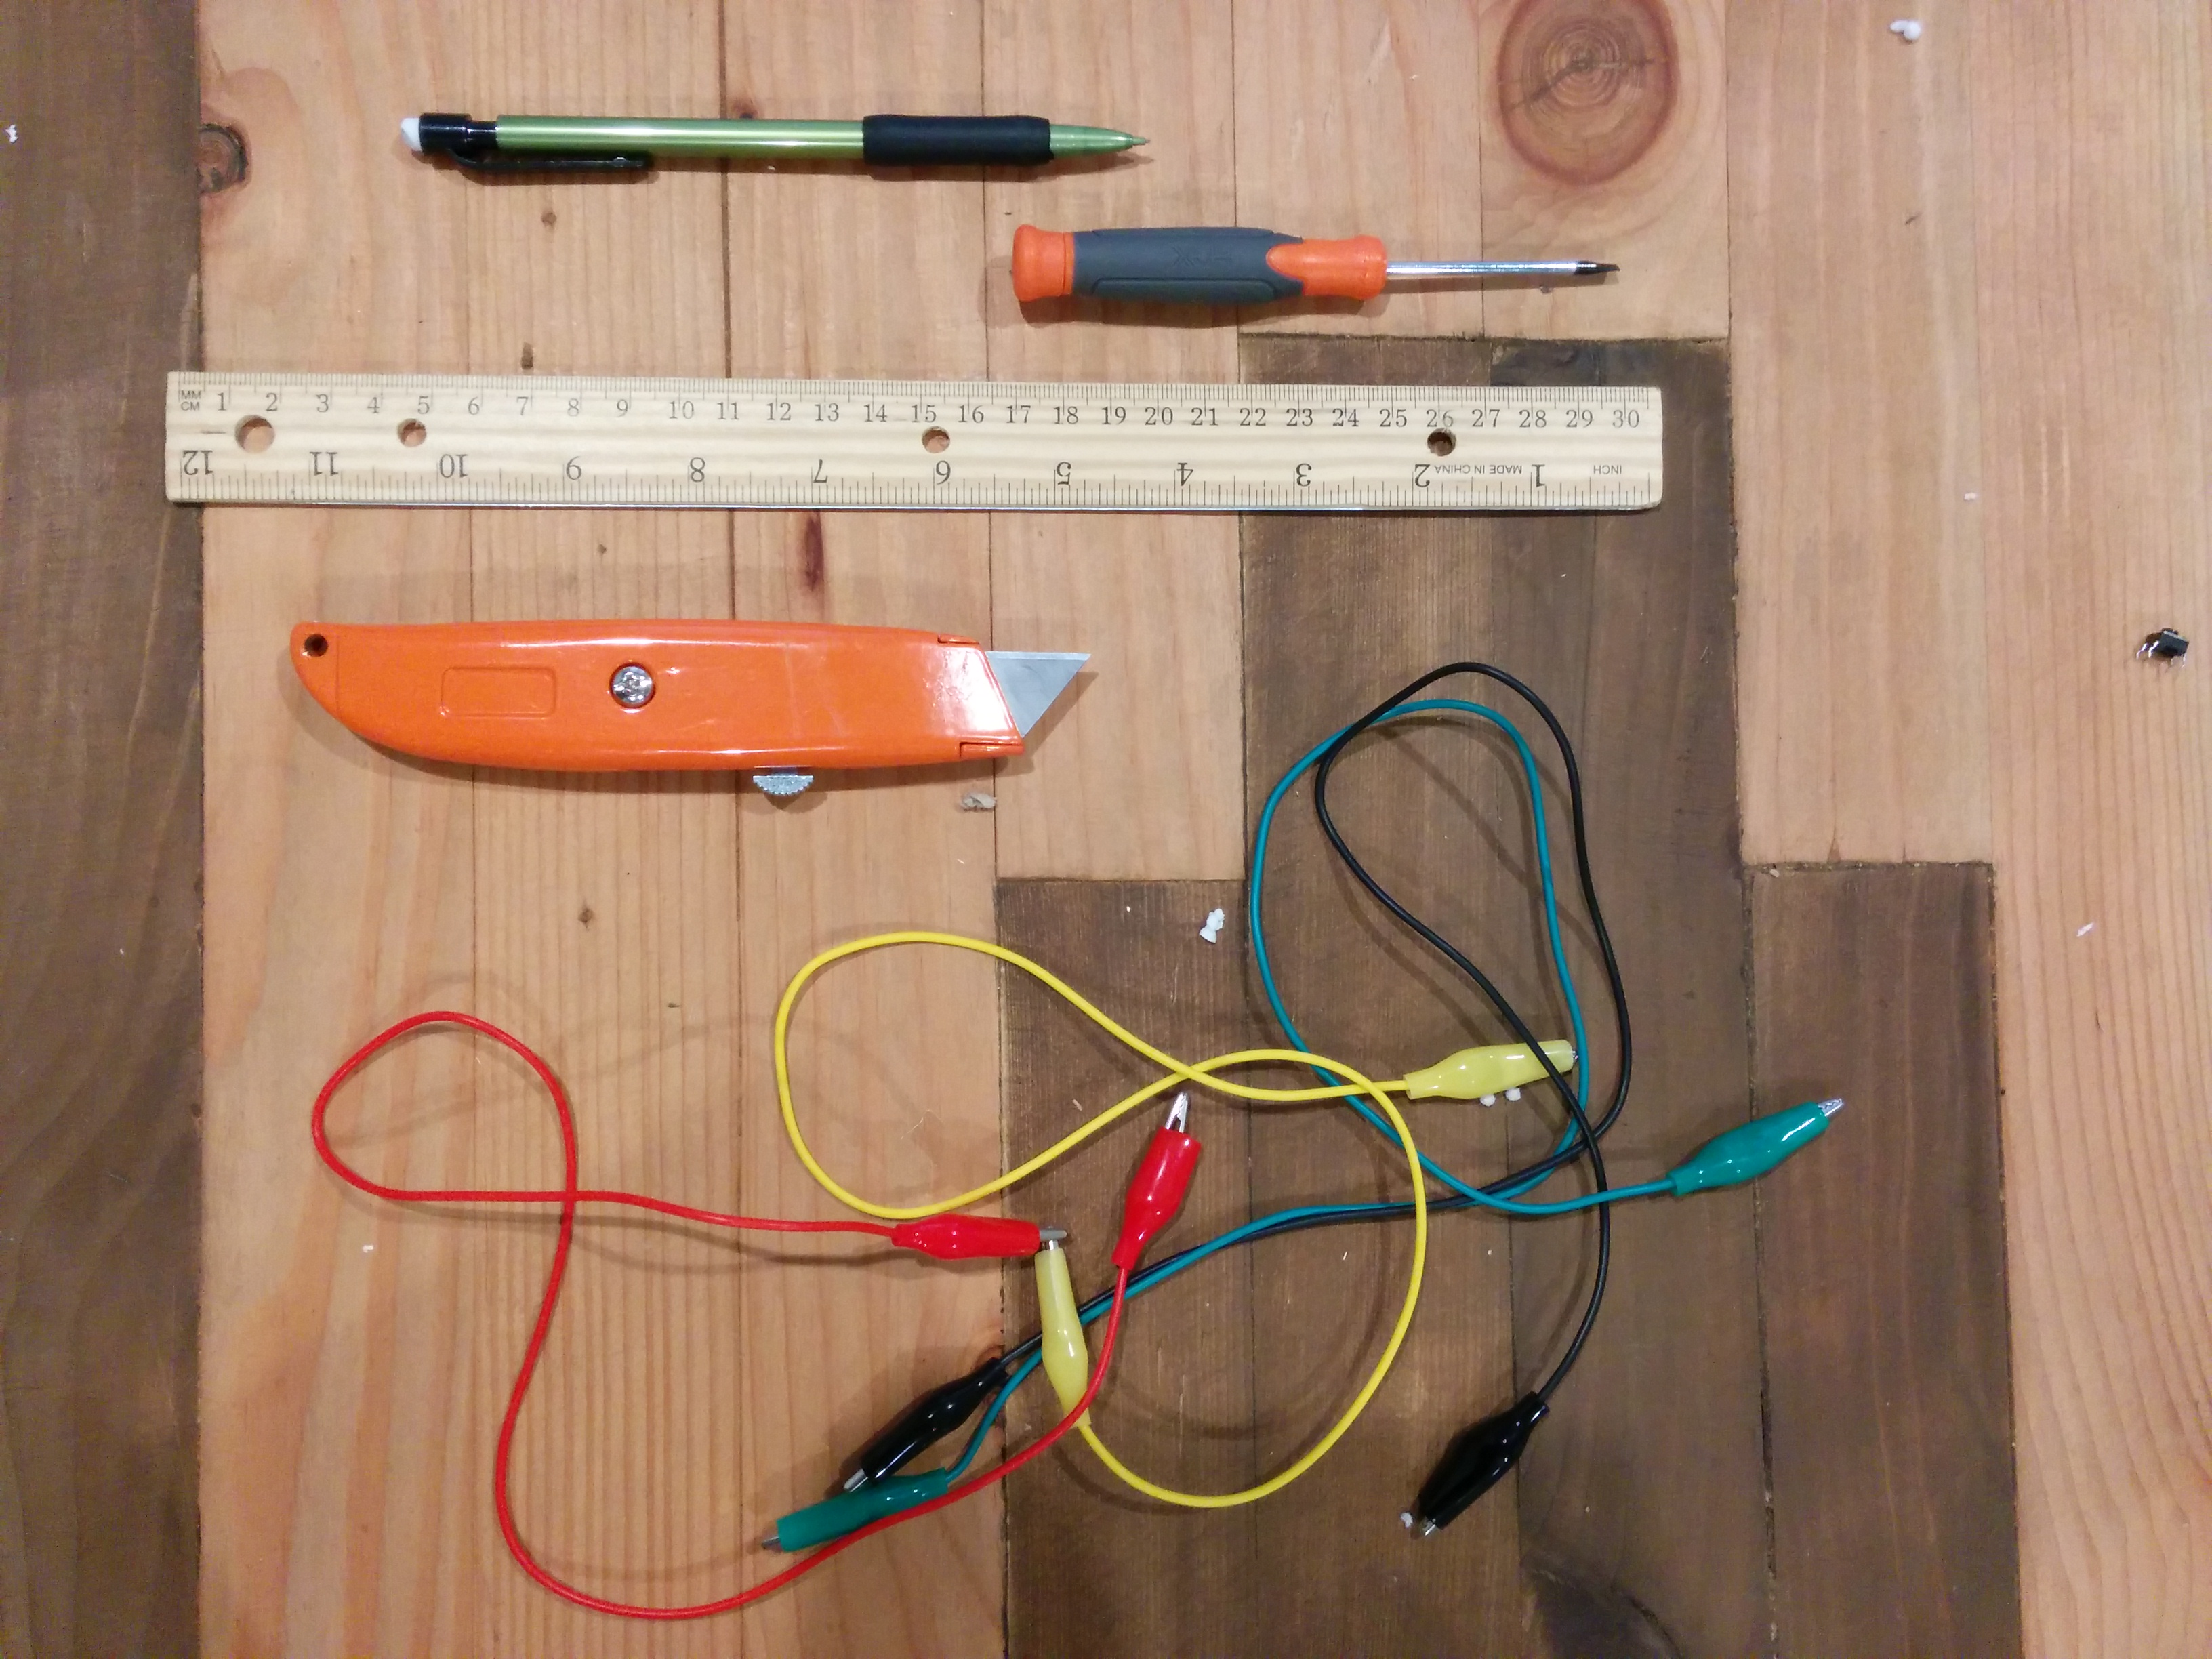
The star tool of the show was a box cutter for going through cardboard and styrofoam. Pencil and measuring tape for marking things out, along with a hard ruler for marking as well as being a hard object to bend cardboard around in straight lines. A very small flat head screwdriver was used to secure the block terminals that held the wiring. Alligator clips were used for the testing of the circuit.
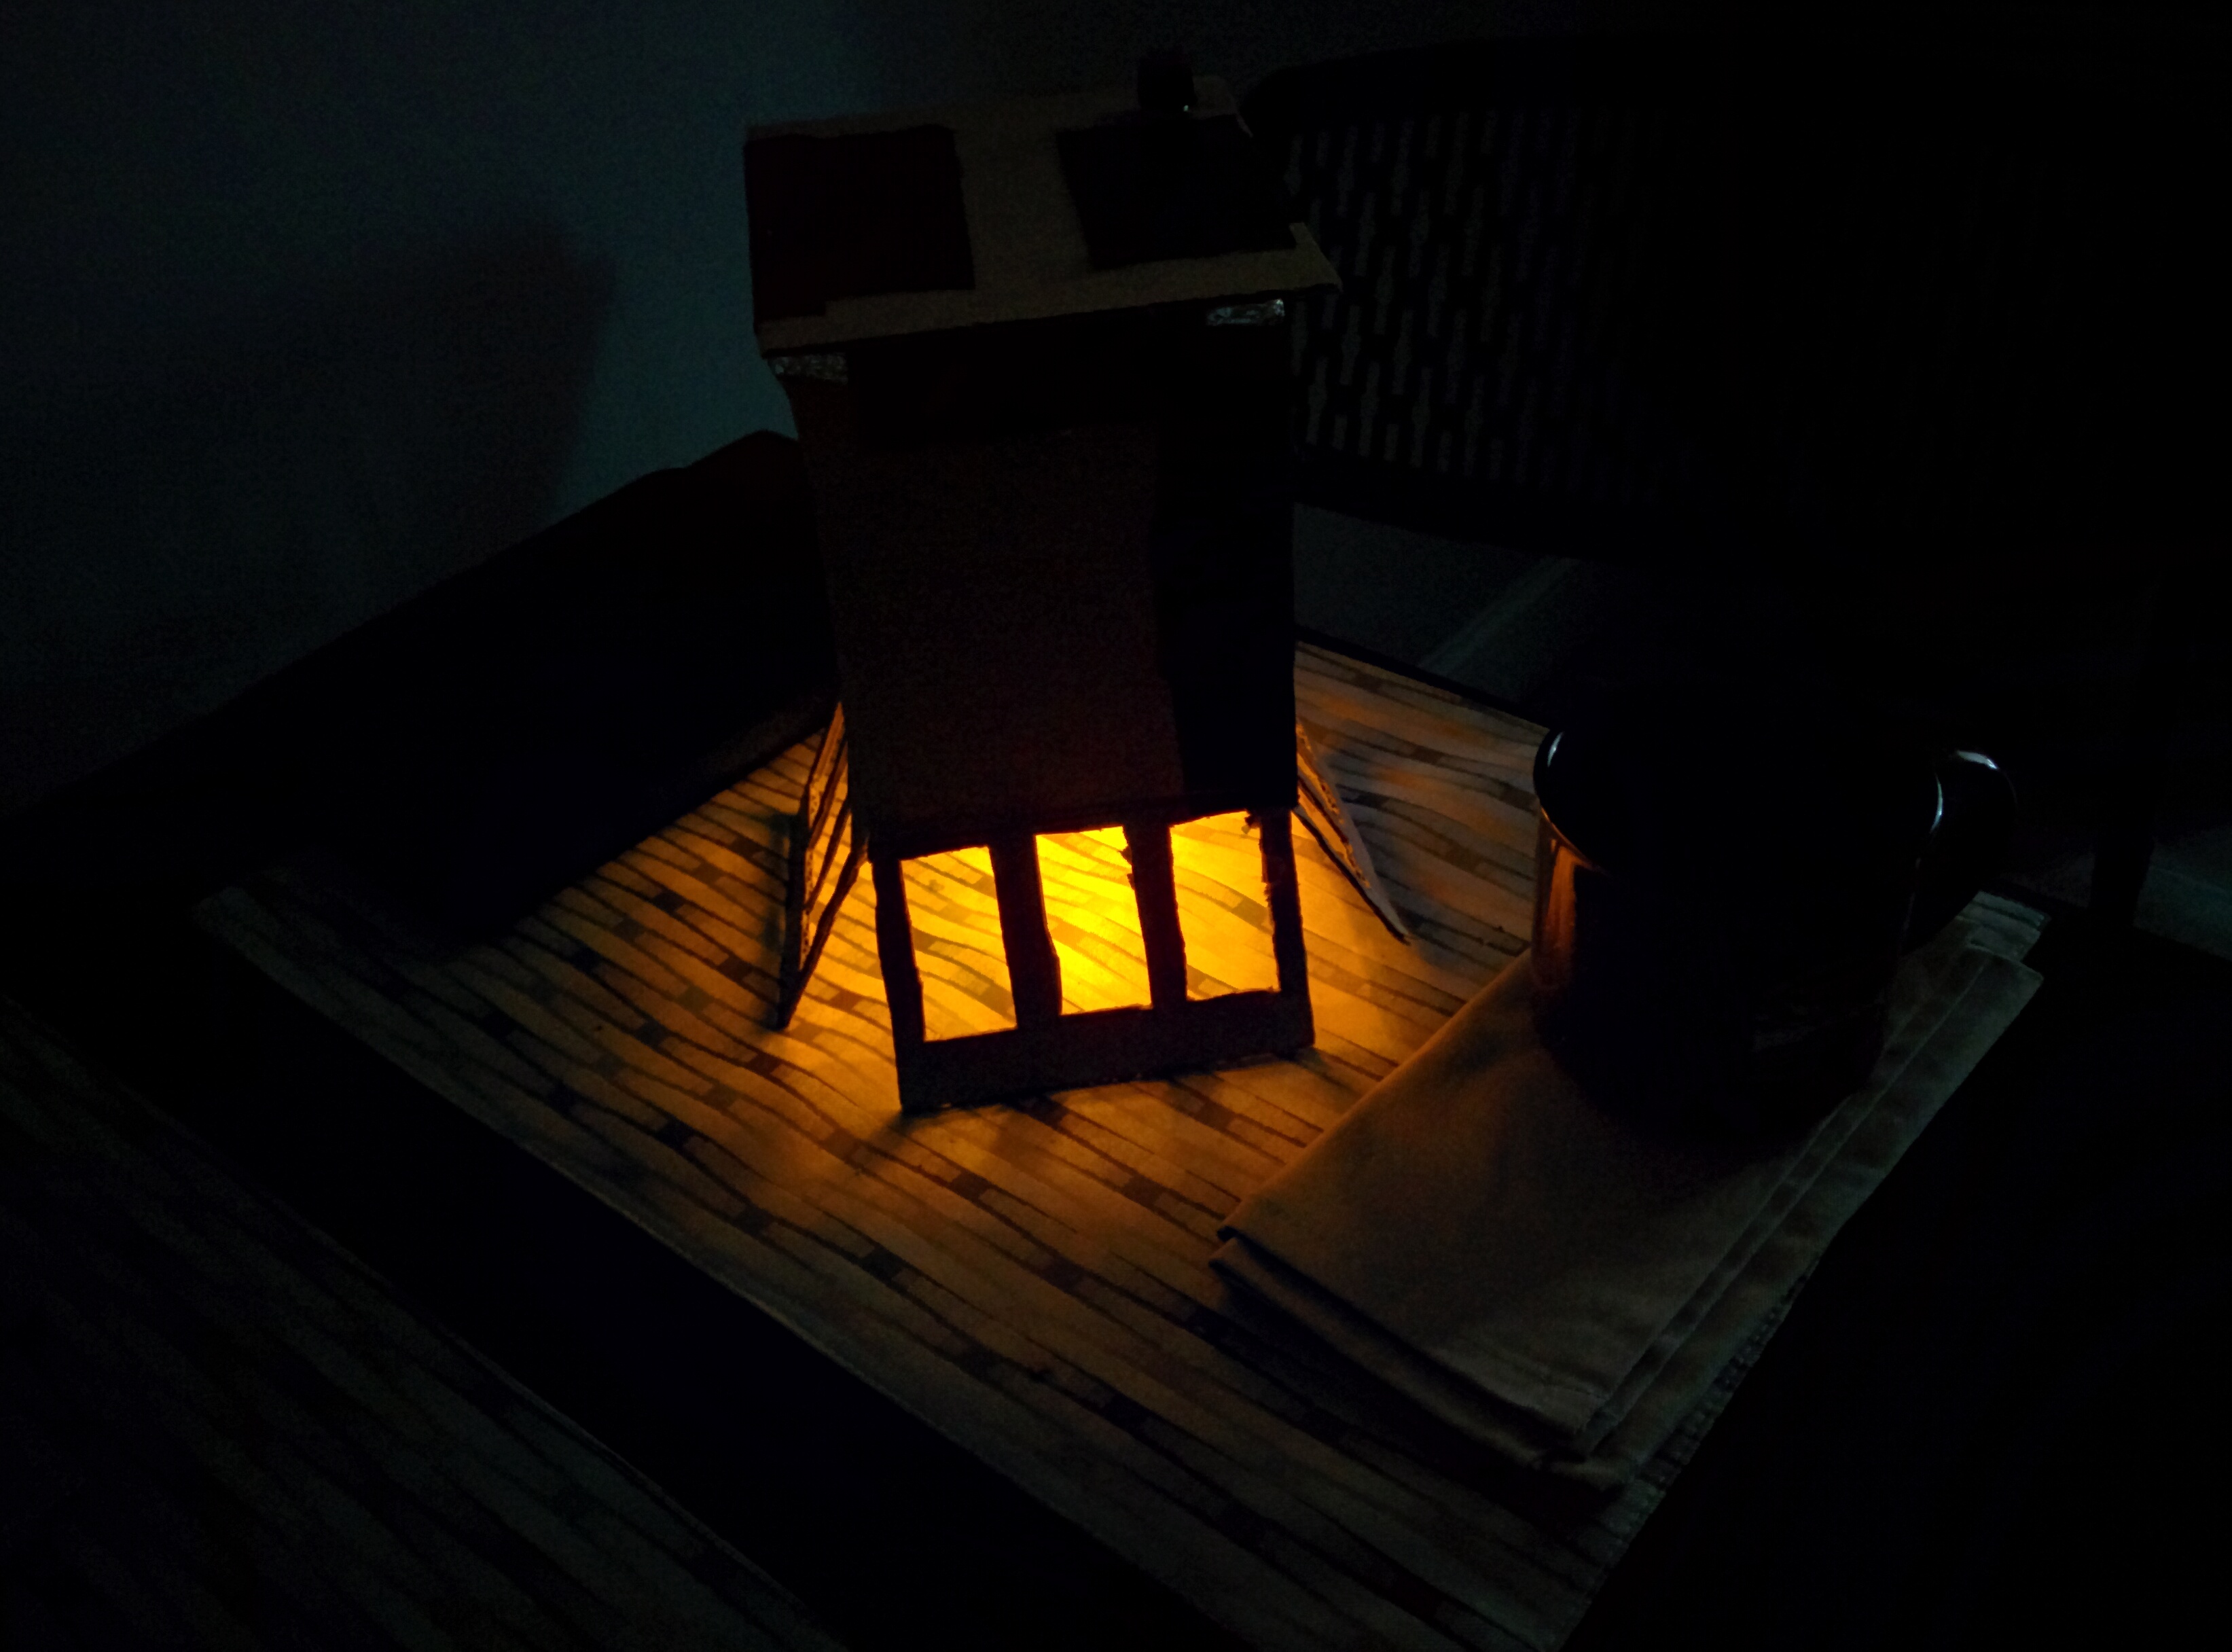
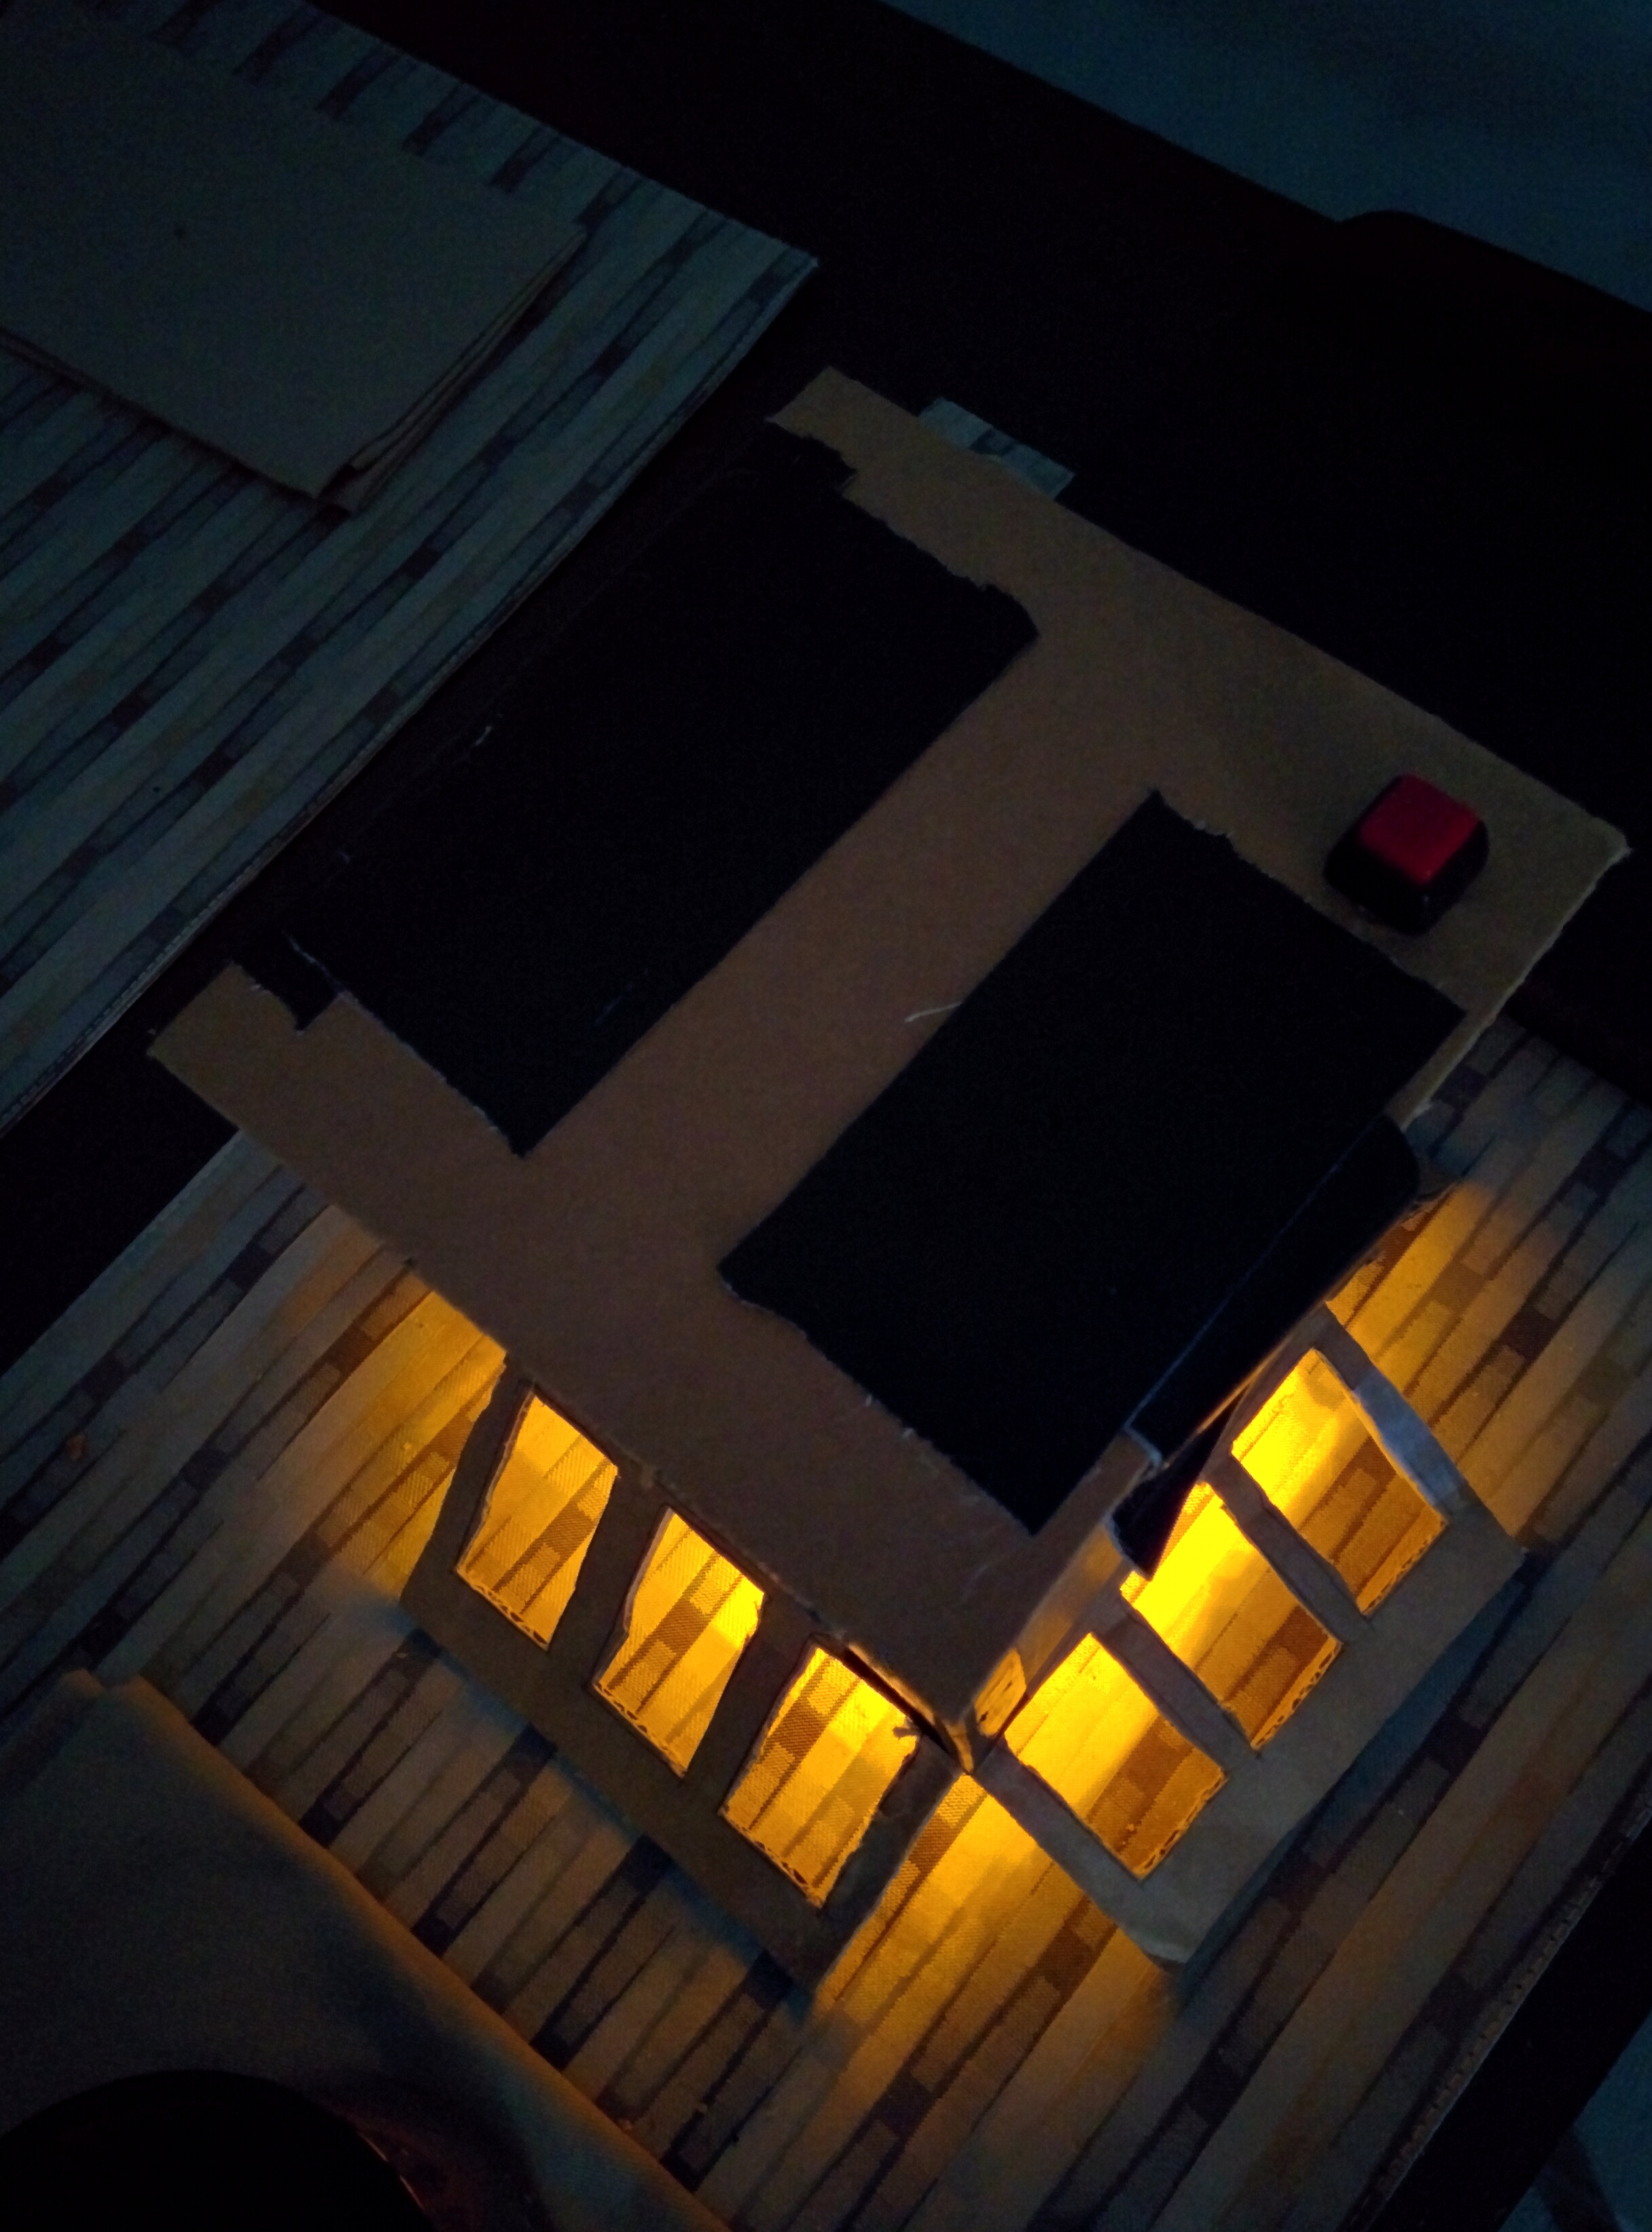
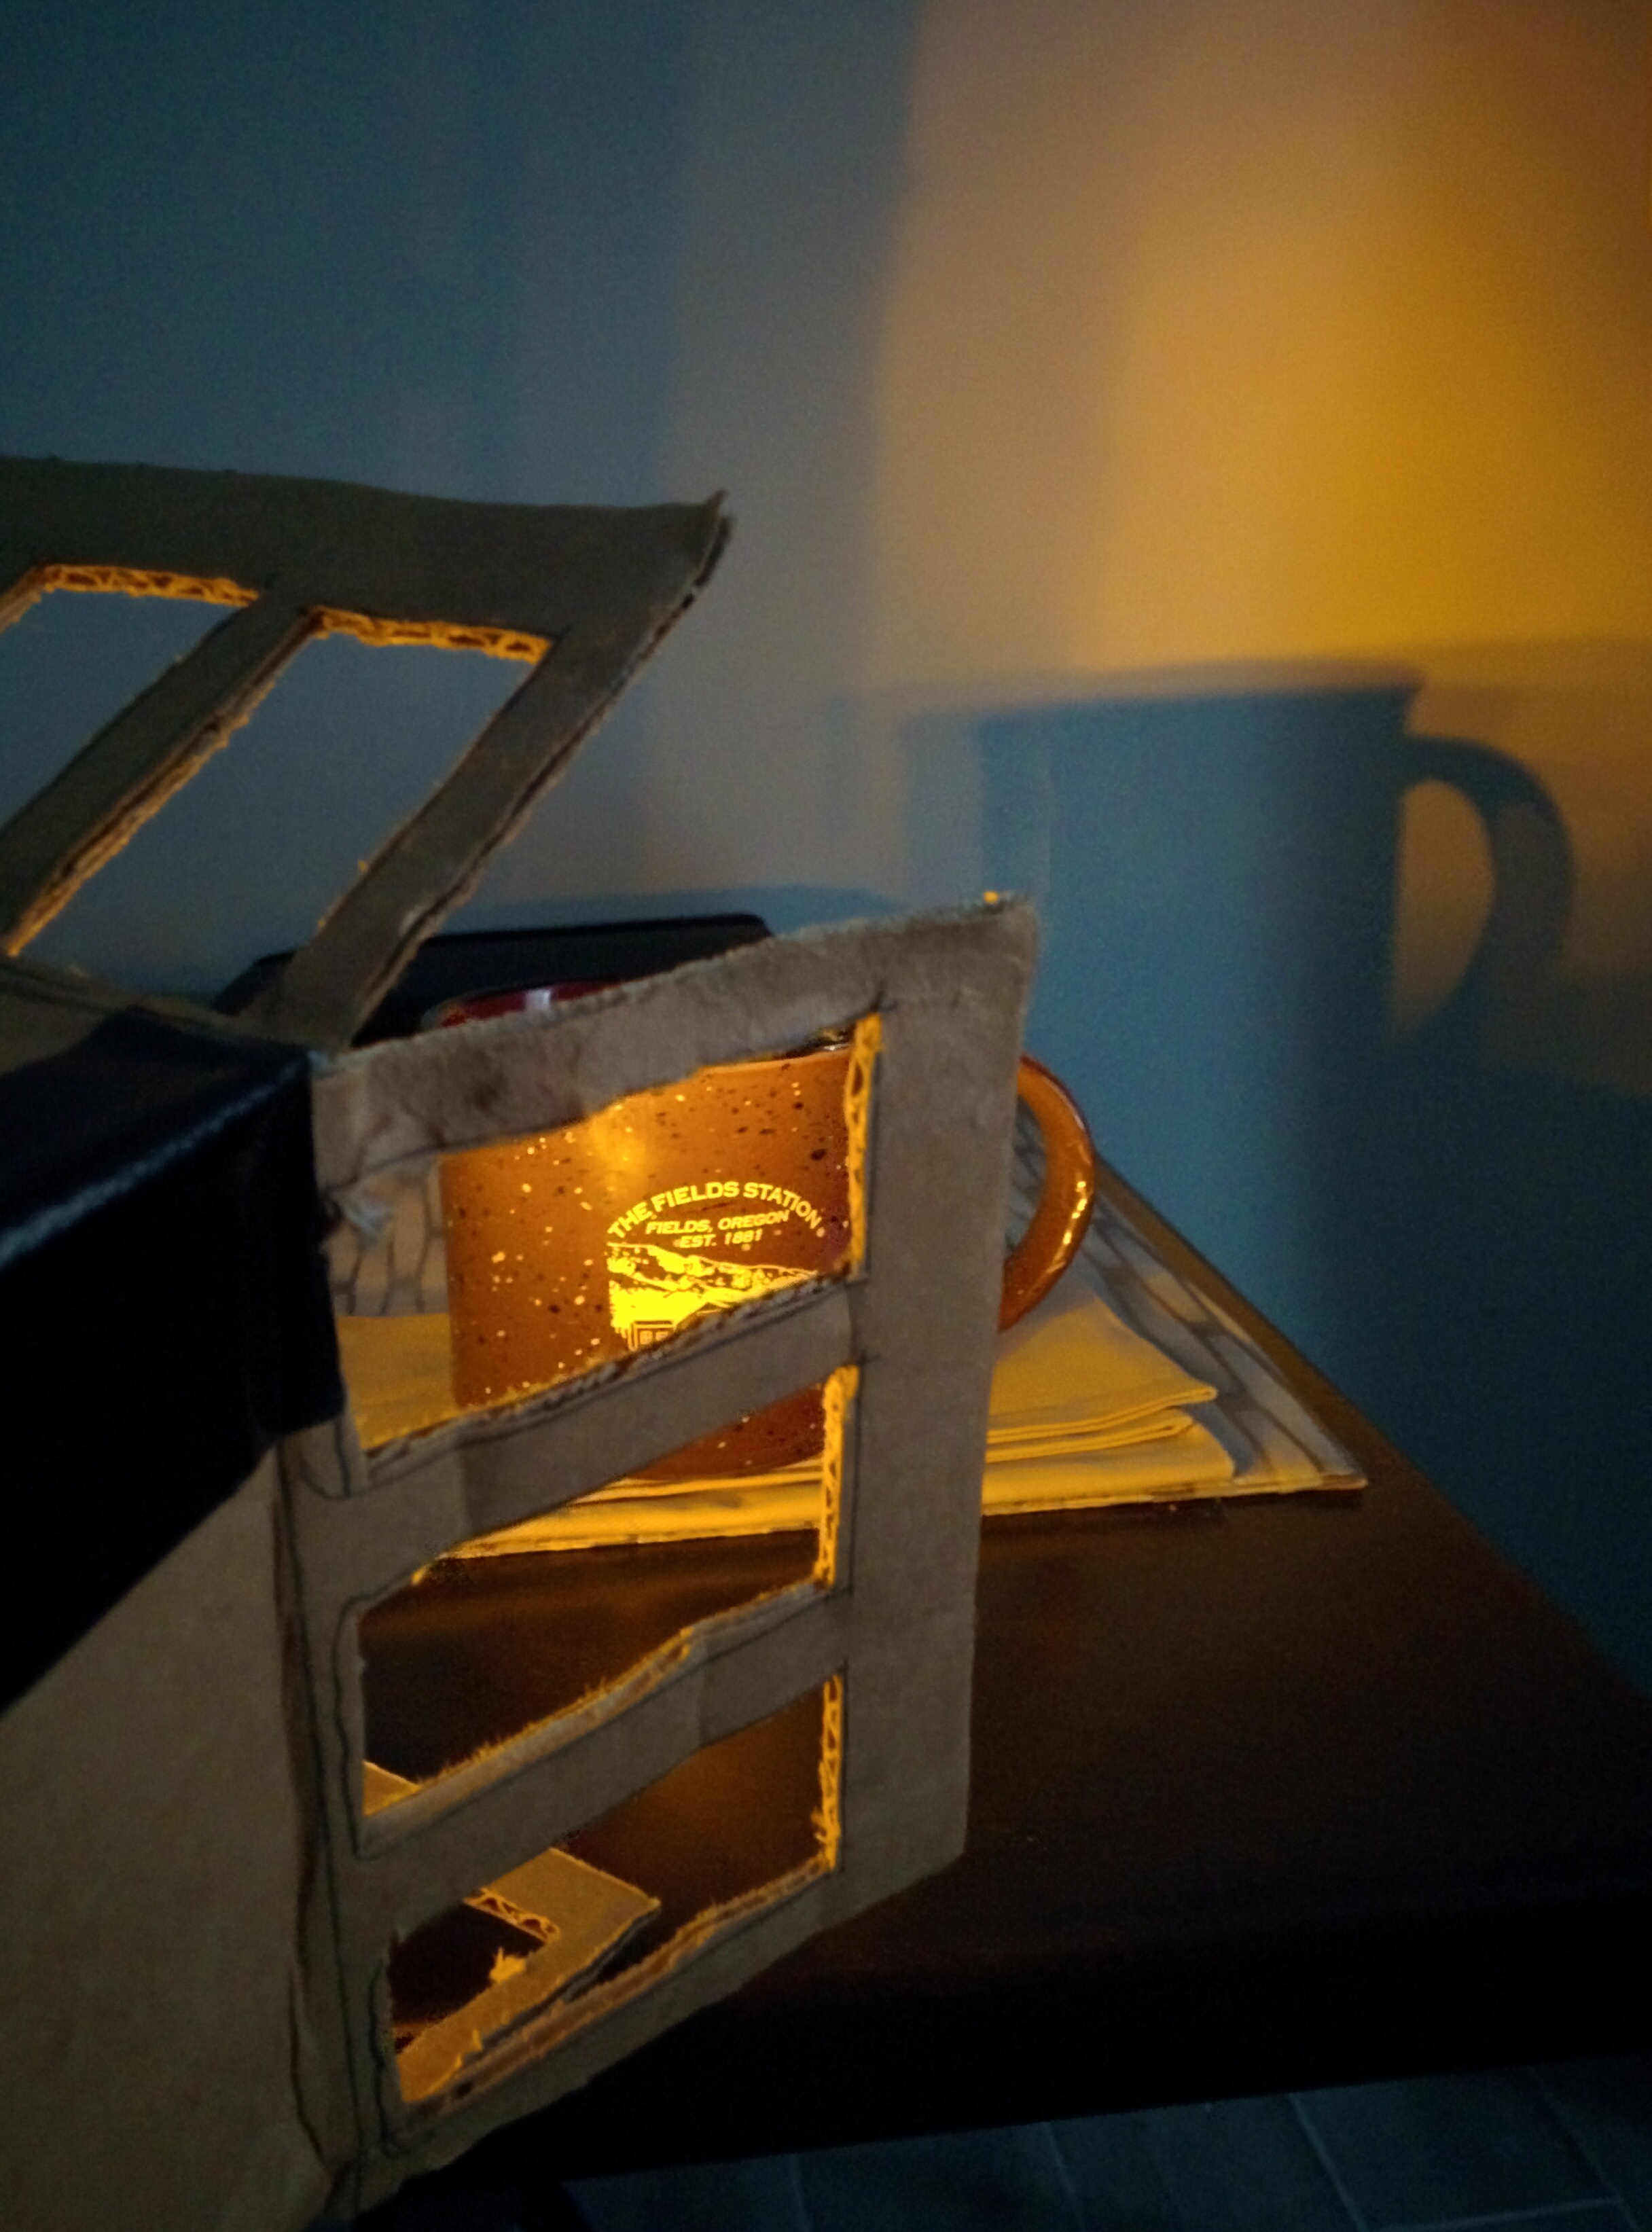
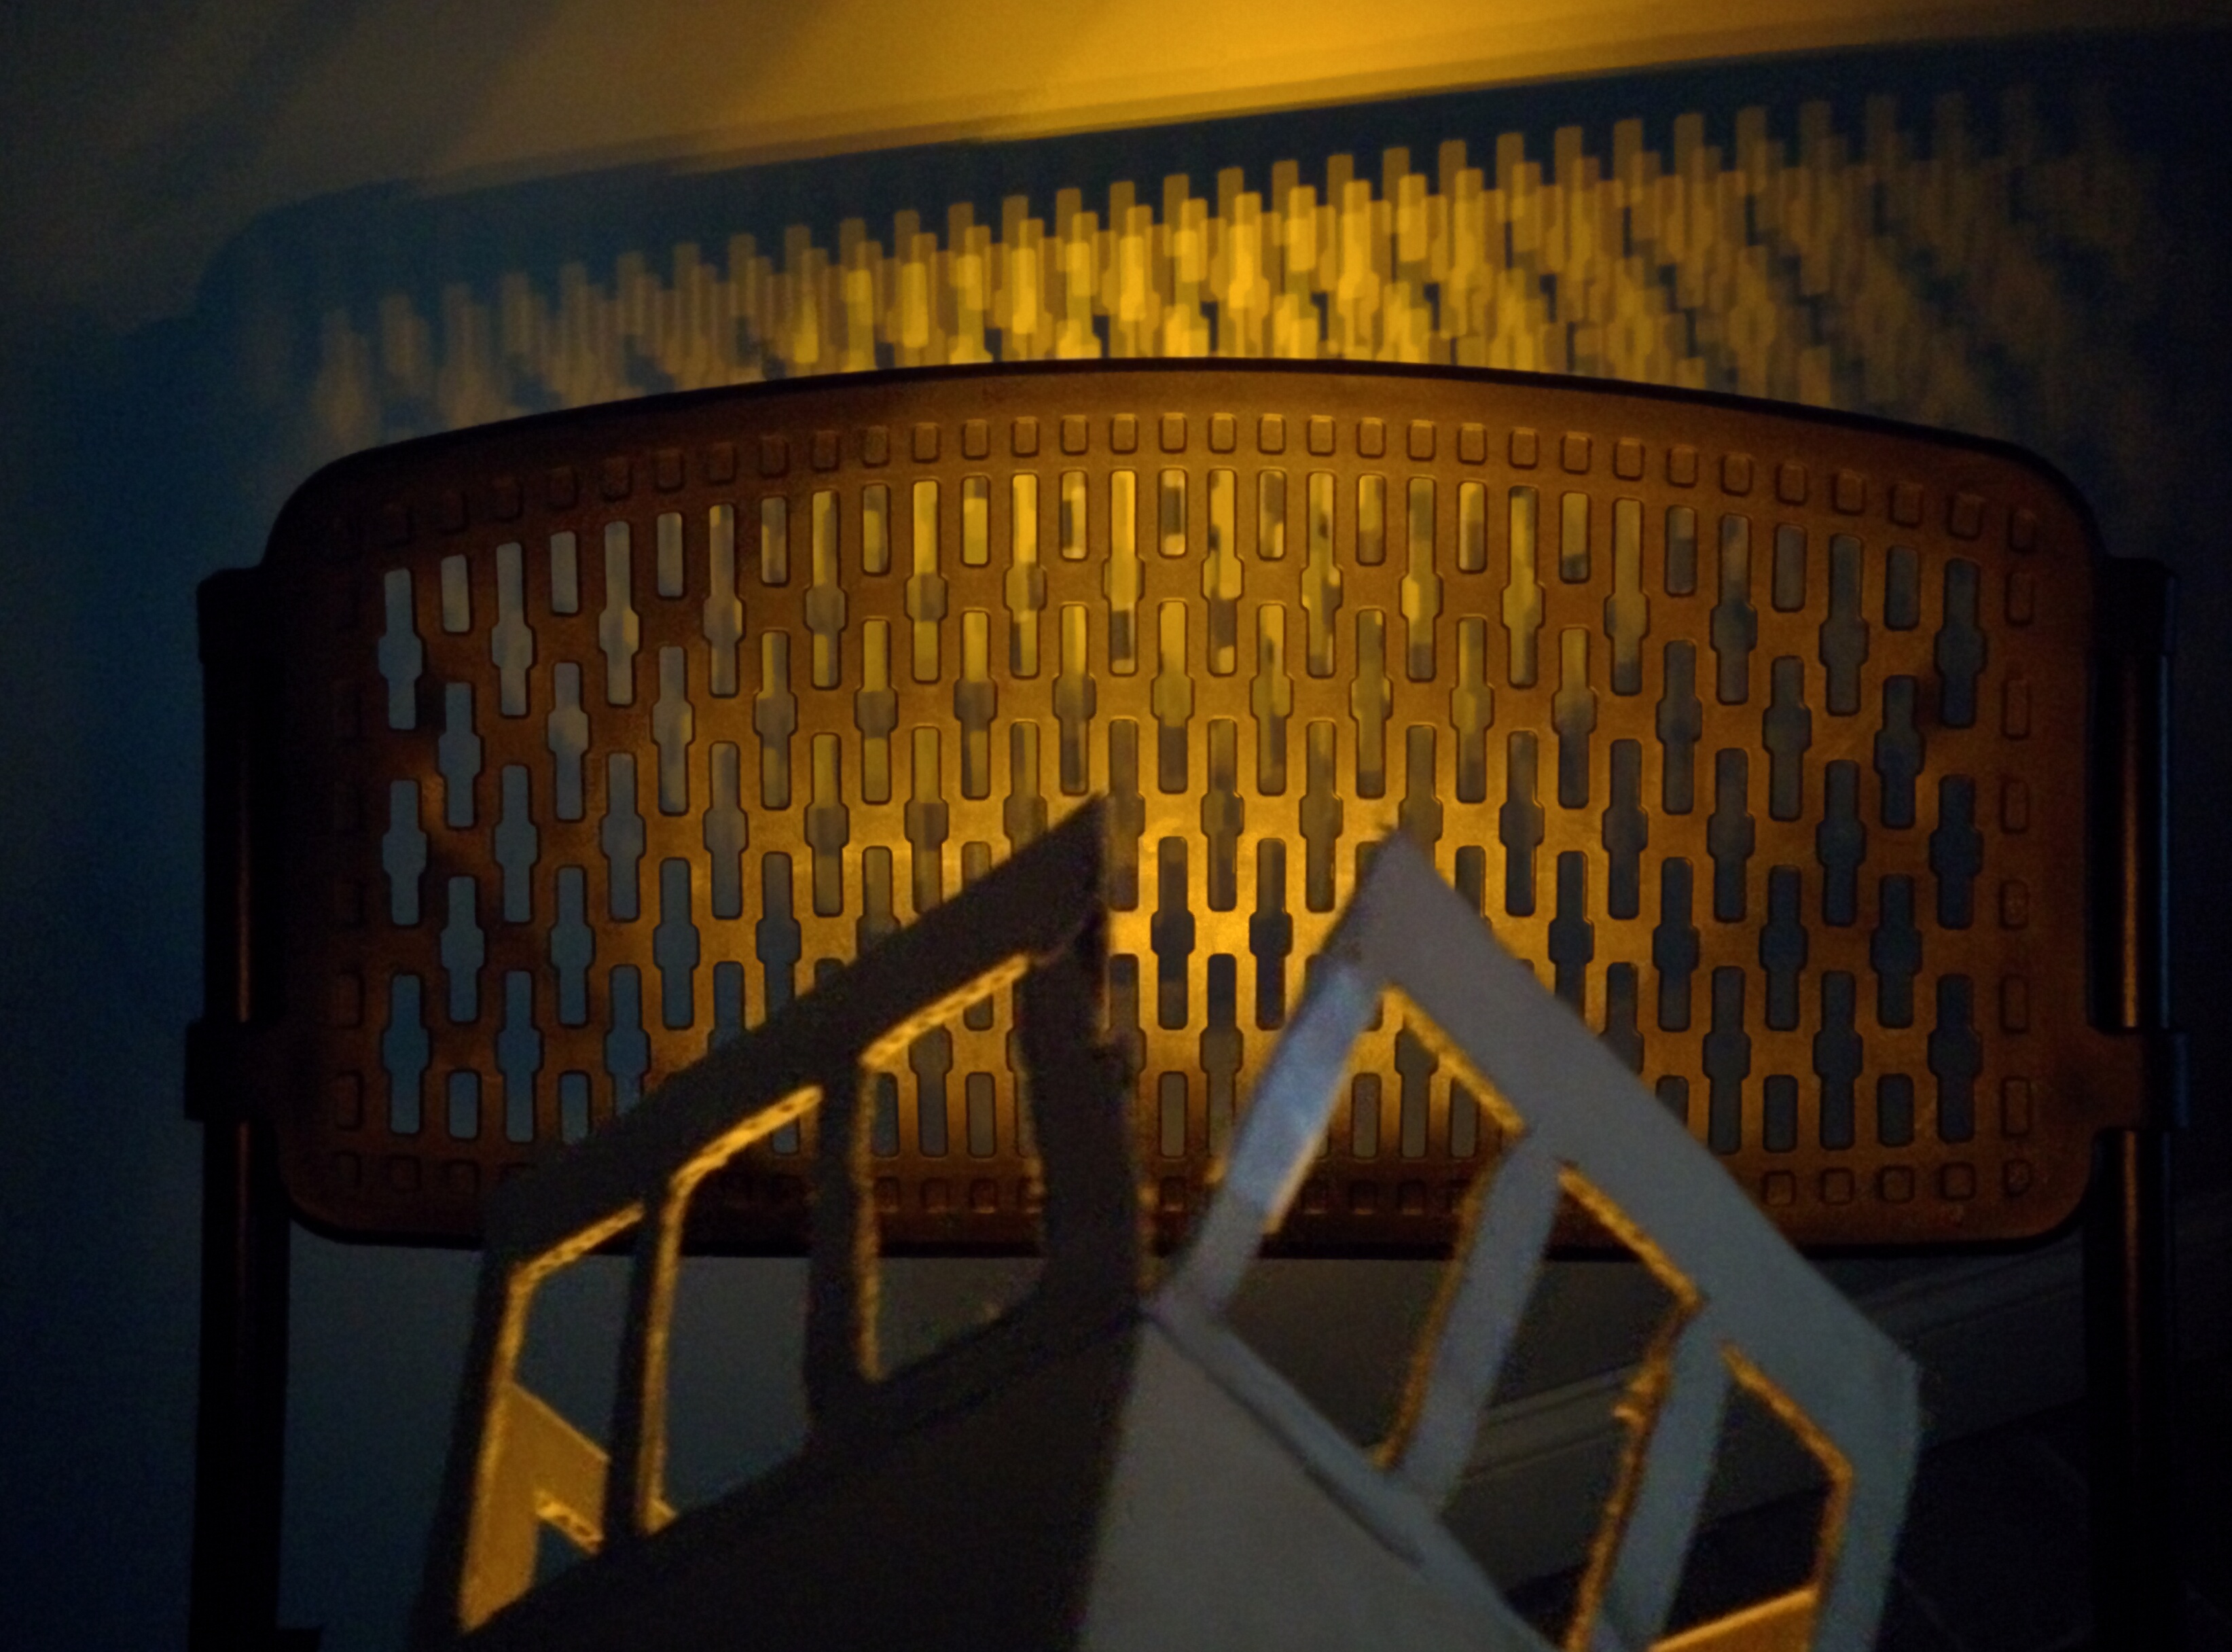
img_20161031_113639

Final Images

Despite its cardboard prototype appearance, I’m happy with the result. The variations on this concept are many; differing sizes, leg/body ratios, and patterns for letting light through. Getting something together, even if only in cardboard, gives a good opportunity to really feel what design choices can resonate the most.

img_20161031_120435 img_20161031_121044 img_20161031_121158 img_20161031_121219 img_20161031_121327

ICM Homework 7: Loading data, JSON, APIs

Our assignment for this week was to work with external data: loading JSON files with data sets and using them to visualize the information within. Getting familiar with using APIs lets you pull JSON files from popular websites and web services.

The example videos from Shiffman seemed to make sense, but it wasn’t necessarily smooth following along. It seems like the New York Times API documentation and services work in a slightly different way than when he had used it. This meant that certain code didn’t quite work.

Instead of providing a solid example URL, you are given the following code:
var url = “https://api.nytimes.com/svc/search/v2/articlesearch.json”;

url += ‘?’ + $.param({

‘api-key’: “a74472e8eca541b2b2577c690b887abe”,

‘begin_date’: “20161025”,

‘end_date’: “20161025”
});

$.ajax({
url: url,

method: ‘GET’,

}).done(function(result) {

console.log(result);

}).fail(function(err) {

throw err;

});

Using the $ didn’t seem to play well nice with p5, so I needed to piece the puzzle together and write the proper URL “by hand” to see if I could get a proper response JSON file. Fun fact, it seems like APIs that are mis-written in certain ways don’t just refuse to work. When I was looking for article headlines by date, my malformed query would respond with today’s headlines. Of course, I used today’s date as my initial test to see if I could get information from the API. So it wasn’t until later when I was playing around with different day requests that I noticed nothing I put in was working.

I was a little distracted by that because I had spent a good chunk of time trying to figure out the spacing of my project. And because of all the GIFs. What GIFs, you say?

https://alpha.editor.p5js.org/projects/rykND901x

My idea was to use not one, but two APIs. The user can enter a date to get a headline from the New York Times on that day, and then each word is run through the Giphy API. Each search returns an image that puts a GIF on the DOM, creating a chain of GIFs that are “translated” from English. Perhaps this technique can help revitalize the print media industry.

api_hmwk_screenshot

The main issue was the timing of the different API calls. There is still a bug where the GIFs aren’t necessarily placed in proper order. Clicking the button again can remedy this, and the bug doesn’t always show up. It seems that simply the time required to start a new API call for each word and load the GIF messes with the sequential nature of the loading. I spent lots and lots of time trying to figure out how to avoid this and make sure that the images would always be in the right order. Still haven’t managed to figure it out, but in general the proof of concept is functional enough and fun to play around with.

PComp Homework Lab 6

Our lab this week was continuing to work with serial communication, exploring a “call and response” system for both sides of the Arduino/Computer relationship. Admittedly, I was getting used to simply spamming the serial ports on all sides. Cleaning up things and creating better habits around this will help for more the more intensive applications I may be creating in the future.

After figuring out the lab examples and tutorials, I had come up with an idea for serial communication. My concept for working with this relationship was to think of the Arduino as it’s own kind of artifact. What if an Arduino didn’t have any other kind of input or output besides serial messages? I did some research and it seems that programs written to the Arduino’s memory can’t have their source code retrieved off of the Arduino itself. What if the Arduino could hold certain secret information, and you could only access it by speaking the correct words through the serial port? If you deleted the original source files on your computer, perhaps this could be a kind of information security.

serial_riddles_with_answers

This sprang from my idea of expanding into different kinds of “call and response” messages. Instead of the suggested “hello” and “x” send and receives,  you need to answer a riddle. I used The Hobbit’s famous Gollum/Bilbo exchange of riddles as my set.

serial_stuck

Honestly, this is where things seemed to fall apart. I can send to and from P5, I can use DOM elements to type serial messages to the arduino and create text on a webpage. An initializing “Start Game” gets things going and moves onto the next step. But after that inital volley of call and response it seems to get stuck on the first question. I tried re-structuring the conditional statements, playing with switch cases, but haven’t seemed to break through just yet. I’m going to keep working on the general idea though, because I think there could be some promise in it.

PComp Midterm: PPAP Machine

I was paired with Jinhee Ahn to work on our midterm for PComp. We had a brainstorming session about what fun ideas we could bring to life, and Jinhee had the idea to create tiny turntables to control music of some kind. But what songs? She thought of Pen Pineapple Apple Pen.

https://www.youtube.com/watch?v=d9TpRfDdyU0

At first we laughed, but thought that it might actually be fun to make a game out of it. Maybe this was more like a game, where you input pen, pineapple, and apple all in the correct sequence. Sort of like a game of Simon, or Rock Band. But you were allowed to control the pace, where you are guided to learn the sequence of inputs but can do so at your own pace.

img_20161024_142046

We decided on rotary encoders for the turntables, since we wanted to be able to fully spin them forever like you would a real turntable. This became tricky, because working with encoders is different than a normal potentiometer knob, even if they look similar. The example code that I found (much credit to the bildr website) and many others like it seemed to guide me towards learning about “interrupt” pins on the Arduino.

Interrupts are great! Interrupts are useful! According to the bildr website, they should be considered “magic”! I’m in. But not so fast! It seems that an Arduino Uno only has 2 interrupt pins, and I need two for each rotary encoder. Time for an upgrade. The Arduino Mega has 6 interrupt lines, solving my input issues.

img_20161022_180627

To split up the work load, I did most of the coding. My first task was to find a way to play PPAP on the Arduino. Fortunately for me the internet is deep and weird.

https://www.youtube.com/watch?v=3XXajtg0zKc

On YouTube someone was kind enough to load a chiptune cover of PPAP, played within an oldschool “tracker” audio program. This displays the notes being played. Then I could transcribe them into MIDI notation using an online audio program. If you feel like downloading my translation of an internet meme into a MIDI file, you can grab a copy/play/remix it here:

https://onlinesequencer.net/334305

And for the final step, I found a site online that takes MIDI files and then converts them into code that can be used by the Arduino tone() function.

https://extramaster.net/tools/midiToArduino/

*Phew!* Lots of translations in a row, but it worked.

The program itself knows all the notes, and plays them back when the appropriate instrument is activated. A light above each input indicates which one you should be using. This means I had to keep track of the notes, the position of each note in the song, and the “parts” for each song that would correlate with each instrument. So, “I have a pen” is four syllables, and hence four notes. You will need to hit the “pen pad” (a piezo sensor) four times to step through that part of the song. Then the next part is “I have an apple”. In this case, at the start of this phrase the current position is on the fifth note, which has been manually assigned to the second “part” of the song. When in this part, a different LED is activated, and the “apple” record is the only instrument that can move the music forward.


It is amazing how much you can take for granted when coming up for an idea for a program. “Oh, its the notes and then you’ll just say what parts of the song…” Then you have to actually code it, breaking down all the discrete little conditions you gloss over when thinking of how something should work.

Additionally, this was a good learning exercise for coding Arduinos specifically. Working a lot in p5, I was easy to take for granted something like the array.length() property. Arduino does not work that way, so the number of notes was manually counted out and hard coded as it’s own integer.

Link to my currently messy code can be found here.

img_20161025_202629

Jinhee’s graphic design experience really made a big difference once we were all done. Even as a prototype, going the extra mile to give something the right look can be worth it. Our device is now clearly a fun, whimsical toy.

There are some interesting UX revelations here, and certainly some general knowledge that will be kept when considering future projects with Arduino. But I think for a prototype, this is a good proof of concept to try out the ideas we were going for.

14804791_10154651372634313_1431565210_nimg_20161024_13234314813697_10154651373814313_560012887_n14804783_10154651373844313_2036594714_n

ICM Homework 6: DOM interfacing and manipulation

We’re breaking out of canvas land and into the DOM! Our homework this week involved using the HTML DOM with our p5 programs, getting and sending values on a webpage (outside of the usual canvas element we’ve been using so far).

I’m still having fun exploring the p5 sound library, and DOM control was a great way to logically add control and feedback to a music based program. I’m really impressed with p5’s stretching of sound, and decided to make a Vaporwave themed music player.

http://alpha.editor.p5js.org/projects/rkk0bvS1e

(Embedding this one was a bit fussy. Maybe because of all the DOM trickery? Worth asking about in class.)

Drag a sound file that is on your computer onto the indicated area and the file will load. When the file is successfully loaded, press the play button.

Certain aspects of layout are just so much easier in HTML, it was a great reminder to get back into it. Though there were some issues with centering some of my DOM elements, the advantages to really working the DOM are apparent for larger scale and multi-page p5 programs. I was able to implement drag and drop for file loading, change the color of elements based off of the amplitude of the music, and create sliders and buttons quickly and easily. Even funny stuff I hadn’t even thought of was available. Depending on the amplitude of the sound, the title of the sound file being displayed will switch from lowercase to uppercase. (CSS style ‘text-transform’,’uppercase’ for the curious)

Knowing that I can CSS style everything is even that much better, keeping in mind future edits and changes that might occur in a program. In this case, I used some Google Fonts to spruce up the Vaporwavey feel of the design. And all of this isn’t at the expense of the canvas sketch itself, which shows a waveform of the sounds currently playing. This gets embedded in the background thanks to a z-index property. In the requisite pink and blue, of course.

I started out with music more ambitious goals involving the p5 sound library, which were thwarted at nearly every turn. But my little Vapor-Player (…um…working title…) has captured my heart, and I will be revisiting it as I get more adept at sound manipulation in the browser.

The only question I have left is… what happened to shrug emoji’s right arm?!!?

shrug_emoji_hurt

Shrug emoji!! What did I do? Oh GOD I’m a monster!!!!

Editors note: When asked for comment about the incident shrug emoji offered no statement, but did shrug.

PComp Lab 6: Return of the Synthesis

This week we were asked to continue the work that started in synthesis, and use serial communication in order to control a program we have made for Intro to Computational Media. I got a little excited about what I’ve been trying to make for my current homework, so I decided I was going to try and co-develop them.

I’m having a lot of fun playing around with the p5.sound library, so I decided to try and make a physical interface for my program. Two sliders and a button. One slider controls volume, one controls the rate of playback, and the button triggers a sound to play.

Really, I wound up re-using most of my code from synthesis, on both the arduino side and the p5 side. Just toss that in there and…

…not so fast!

I have no idea why this was happening, but I was crashing the online p5 editor with my arduino-controlled program. Our original synthesis program was running just fine. But this new one I made seemed to create strange errors and make the browser hang. Though, for whatever reason, this did NOT affect the p5 application. As you can see, that one is running and receiving data just fine.

p5appworks_onlinedoesnt

Spent a little too much time trying to trouble shoot that before just sticking with the app as opposed to the web. I will definitely want to show this to some p5 people to see if they know what might have happened. But I had a working program, even if it was on a different platform.

Holding down the button re-triggers the playback as fast as p5 can handle, which is usually a glitch for certain kinds of button based inputs. But in this case, made for more of a tonal interaction as opposed to percussive. In the sense of performative capabilities, I thought this was the better choice for now.

IDS: Starting Prototypes with Max MSP

After a week off from class, we’ve returned with some prototypes. Luke started showing the class ways to get started with Max MSP, using webcam control of audio for  a first example. Then he emailed us the guts of a synthesizer, the Vom-o-Tron! It is a formant synthesizer for creating human-like vowel sounds. It sounds a little creepy, like a robot vomiting, but was fun for making crazy noises. Our task was to make an interface for it.

vomotron_interface

It is still a work in progress, but in general I had some fun using it. Since Vom-O-Tron is a whacky name, I decided to go with a fantastical, cartoonish skeuomorphism. The synth’s name vomit’s its content onto the screen in a multicolored rainbow mess. I’ll let you play with it. Download link here:

prototype-vom-o-tron

Just to note, the sequencer is a bit… broken. And just in time to perform it in front of class for everyone! Projects always behave best at home, right? Notes for getting it kick started again can be found in the comments next to the sequencer while in edit mode.


I still wanted to use some of the webcam work we had done in class. Matt Romein held some Max workshops at ITP, so I rolled in some of the things I learned there. This musical interface records from your microphone when you press the space bar. Then the web cam watches for the color red and blue. The sampled recording will playback at higher speeds when it sees red on the screen, lower speeds when it sees blue. The screen is split into a 3×3 grid, so moving colors around will playback at different rates as well.

musicalinterface_screenshot1

I made some printouts to play with the functionality. I’ll include them in the download zip as well:

musical-interface-prototype-1

ICM Homework 5: Objects, constructors…and Synthesis!

We are starting to get towards the middle of the semester, and have added more foundational building blocks to the programming repertoire. This time around, it is working with objects and constructors. Getting used to “the Javascript way” has been a bit of a challenge, and I’m glad I get to practice the implementation even if I’m already familiar with the concepts.

This was also an opportunity to use p5’s sound library, which I have been very curious about. Getting my objects and constructors all set allowed me a lot of flexibility in terms of creation and playing around with ideas. I wanted bouncing balls that played sounds when they hit the ground, and the object oriented approach let me easily play around with their properties and behaviors, including the sonic ones.

In this sketch, you click to create a ball. The ball will fall and bounce, making a noise. Press keyboard buttons 1 through 4 to change the kind of ball you want to create.

http://alpha.editor.p5js.org/projects/SkcYoLKR


Lots of fun! I love sound interaction that is playful and a little unorthodox. I’m really impressed with p5’s implementation of it, and can’t wait to dig in more.

There were some conceptual questions I had to ask myself. Right now, the balls all more or less behave the same. They could easily be one soundBall class and then have their “type” passed to them to determine behavior. But I had the feeling that I might want to make their behavior drastically different from one another in the future, so I decided for now to make them all separate kinds of objects.

This made my displaying and updating routines in the main sketch a little repetitious. I was wondering if an elegant solution might be having an array of arrays, with each “second level” array hold all of each kind of ball. But then I was wondering if it is bad form to have arrays with mixed types of variables inside.

There were also some quirks in regards to getting the sound going, which might be out of the scope of the class for now but I will definitely want to pursue later. All in all, though, a fun time and whet my appetite for making more advanced objects and really working the sound library.

Synthesis

And then there was Synthesis! I’ve gone over this in my PComp blog as well, but will repost here as well.

This past week we had our “Synthesis” session: the combining of the things we have learned in Physical Computing and Computational Media. In short: getting our P5 sketches to talk to our Arduino. Fun stuff!


I was partnered with Chris Hall, who had an awesomely trippy sketch that we thought would be fun to control physically. Her original program triggered animation on clicking, and we managed to translate that to an Arduino button press.

img_20161007_123117

We were pretty happy with ourselves, pressing away and showing off our work:

We are blowing minds on the floor!

Tom Igoe saw our work, complimented us… and promptly told us to add more. His advice to use p5’s split() function was key information, and saved us a lot of time in figuring out how to implement two inputs. Though even then there were some issues in formatting the serial communication coming out of the Arduino. At first I had done some string concatenation on the Arduino side in order to send out comma separated values, but it was getting turned into jibberish. Using individual Serial.print() commands, then ending everything with a Serial.println() seemed to do the trick. We were now able to press the button to start the animation, and then use a potentiometer to change the hue of the colors in the sketch.

img_20161007_142857


PComp Lab Re-Work & Synthesis

This past week we had our “Synthesis” session: the combining of the things we have learned in Physical Computing and Computational Media. In short: getting our P5 sketches to talk to our Arduino. Fun stuff!


I was partnered with Chris Hall, who had an awesomely trippy sketch that we thought would be fun to control physically. Her original program triggered animation on clicking, and we managed to translate that to an Arduino button press.

img_20161007_123117

We were pretty happy with ourselves, pressing away and showing off our work:

We are blowing minds on the floor!

Tom Igoe saw our work, complimented us… and promptly told us to add more. His advice to use p5’s split() function was key information, and saved us a lot of time in figuring out how to implement two inputs. Though even then there were some issues in formatting the serial communication coming out of the Arduino. At first I had done some string concatenation on the Arduino side in order to send out comma separated values, but it was getting turned into jibberish. Using individual Serial.print() commands, then ending everything with a Serial.println() seemed to do the trick. We were now able to press the button to start the animation, and then use a potentiometer to change the hue of the colors in the sketch.

img_20161007_142857


We were also encouraged in PComp to work on some older labs to fix issues or try to make them better. I decided I wanted to take another crack at my automated music box. First things first, I played around with the paper score, specifically cutting and taping it so that it would turn into a loop. Then, I went to buy some new gear.

http://tinkersphere.com/motors-wheels/241-high-torque-continuous-rotation-servo-4kg.html

A new motor! A servo, actually. I went to Tinkersphere and found a full rotation, high torque servo motor. I won’t fill up with blog with documentation all of my failures, which included much cutting of cardboard, haphazard usage of a box cutter, and way, way too much Scotch tape. But just trust I was still having issues making this little moving machine translate it’s energy to the music box. That is when I had an epiphany…

img_20161010_165145

The blank nub of the servo was the perfect fit for a plastic straw (almost). With even more questionable box cutter usage and now only modest amounts of Scotch tape usage, I crafted something effective:

Almost. Not all the way there, but much closer to where I have been. It seems like the motor gear would eventually strip the inside of the straw, lose it’s grip and prevent the moving action. But in general, the more direct, straight line seemed to perform better than my previous plastic blob. I’m going to be starting Introduction to Fabrication in the second half of the semester, and think I’ll keep this project on the back burner until I can craft some proper machinery to make it truly groove along. But it was nice to see the fundamental proof of concept on display (if only briefly).